Yosemite National Park is one of the most spectacular natural destinations in the United States. Located in California’s Sierra Nevada, it is famous for towering granite cliffs, powerful waterfalls, giant sequoia trees, alpine meadows, clear rivers, deep valleys, high-country roads and some of the most recognisable landscapes in North America.
Yosemite National Park Travel Guide: Waterfalls, Granite Cliffs, Giant Sequoias and Scenic Drives
For first-time visitors, Yosemite Valley is the main highlight. This is where you will see El Capitan, Half Dome, Yosemite Falls, Bridalveil Fall, meadows, river views and some of the park’s most iconic photo spots. With more time, you can add Glacier Point, Mariposa Grove, Tuolumne Meadows, Tioga Road, Hetch Hetchy and quieter hiking areas.
Sponsored Popular Items
Quick take: Musement.com offers a worldwide selection of tours and attractions
Yosemite National Park Tours & Activities Guide United States Yosemite National Park: Tours & Activities (Summary + Direct Links) Yosemite is a classic big granite + waterfalls park:. Check current availability, inclusions and booking details before you go.
Why Visit Yosemite National Park?
Yosemite is worth visiting because it combines some of the most dramatic scenery in the American national park system. The park’s granite walls, waterfalls, forests and high-country landscapes create a powerful mix of easy viewpoints, scenic drives, challenging hikes and peaceful nature experiences.
It works for many types of travellers. Families can enjoy short walks, waterfalls and shuttle stops in Yosemite Valley. Photographers can chase sunrise, sunset and waterfall light. Hikers can choose anything from flat meadow loops to strenuous mountain trails. Road-trippers can link Yosemite with San Francisco, Lake Tahoe, Sequoia National Park, Kings Canyon, Mammoth Lakes or the wider Sierra Nevada.
Yosemite Valley
Yosemite Valley is the heart of the park and the best place for a first visit. This glacial valley is surrounded by towering granite cliffs and includes many of Yosemite’s most famous sights.
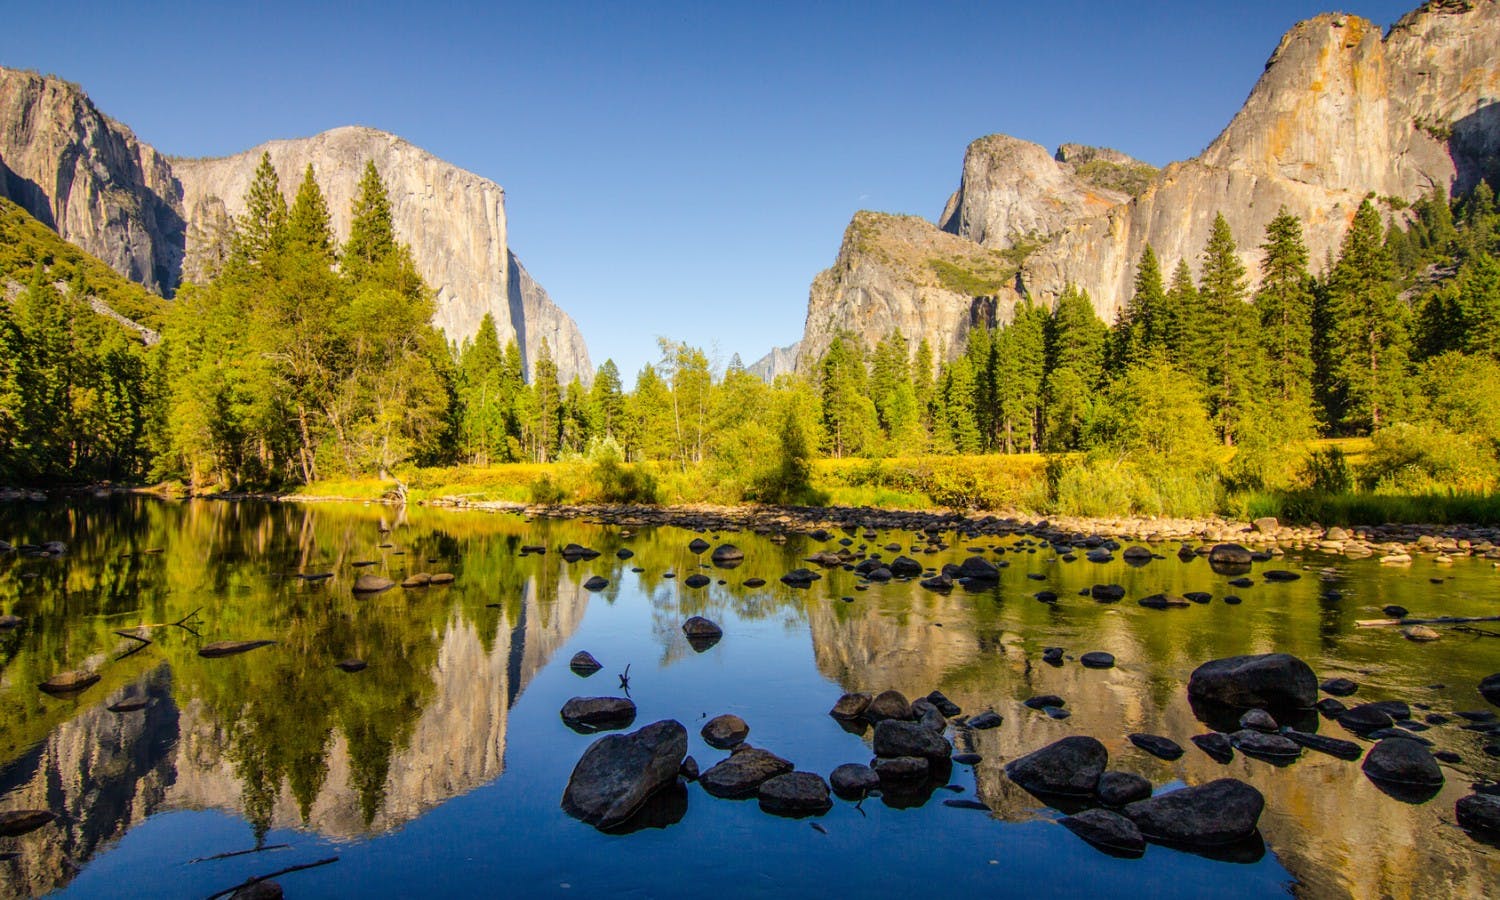
Key valley highlights include El Capitan, Half Dome, Yosemite Falls, Bridalveil Fall, Sentinel Meadow, Cook’s Meadow, Swinging Bridge, Mirror Lake, the Merced River and several classic viewpoints.
The valley is also the busiest part of Yosemite. Parking can fill early in peak season, and traffic can be slow. For the best experience, arrive early, park once, then use the free shuttle, walk or cycle around the valley rather than repeatedly moving your car.
Tunnel View
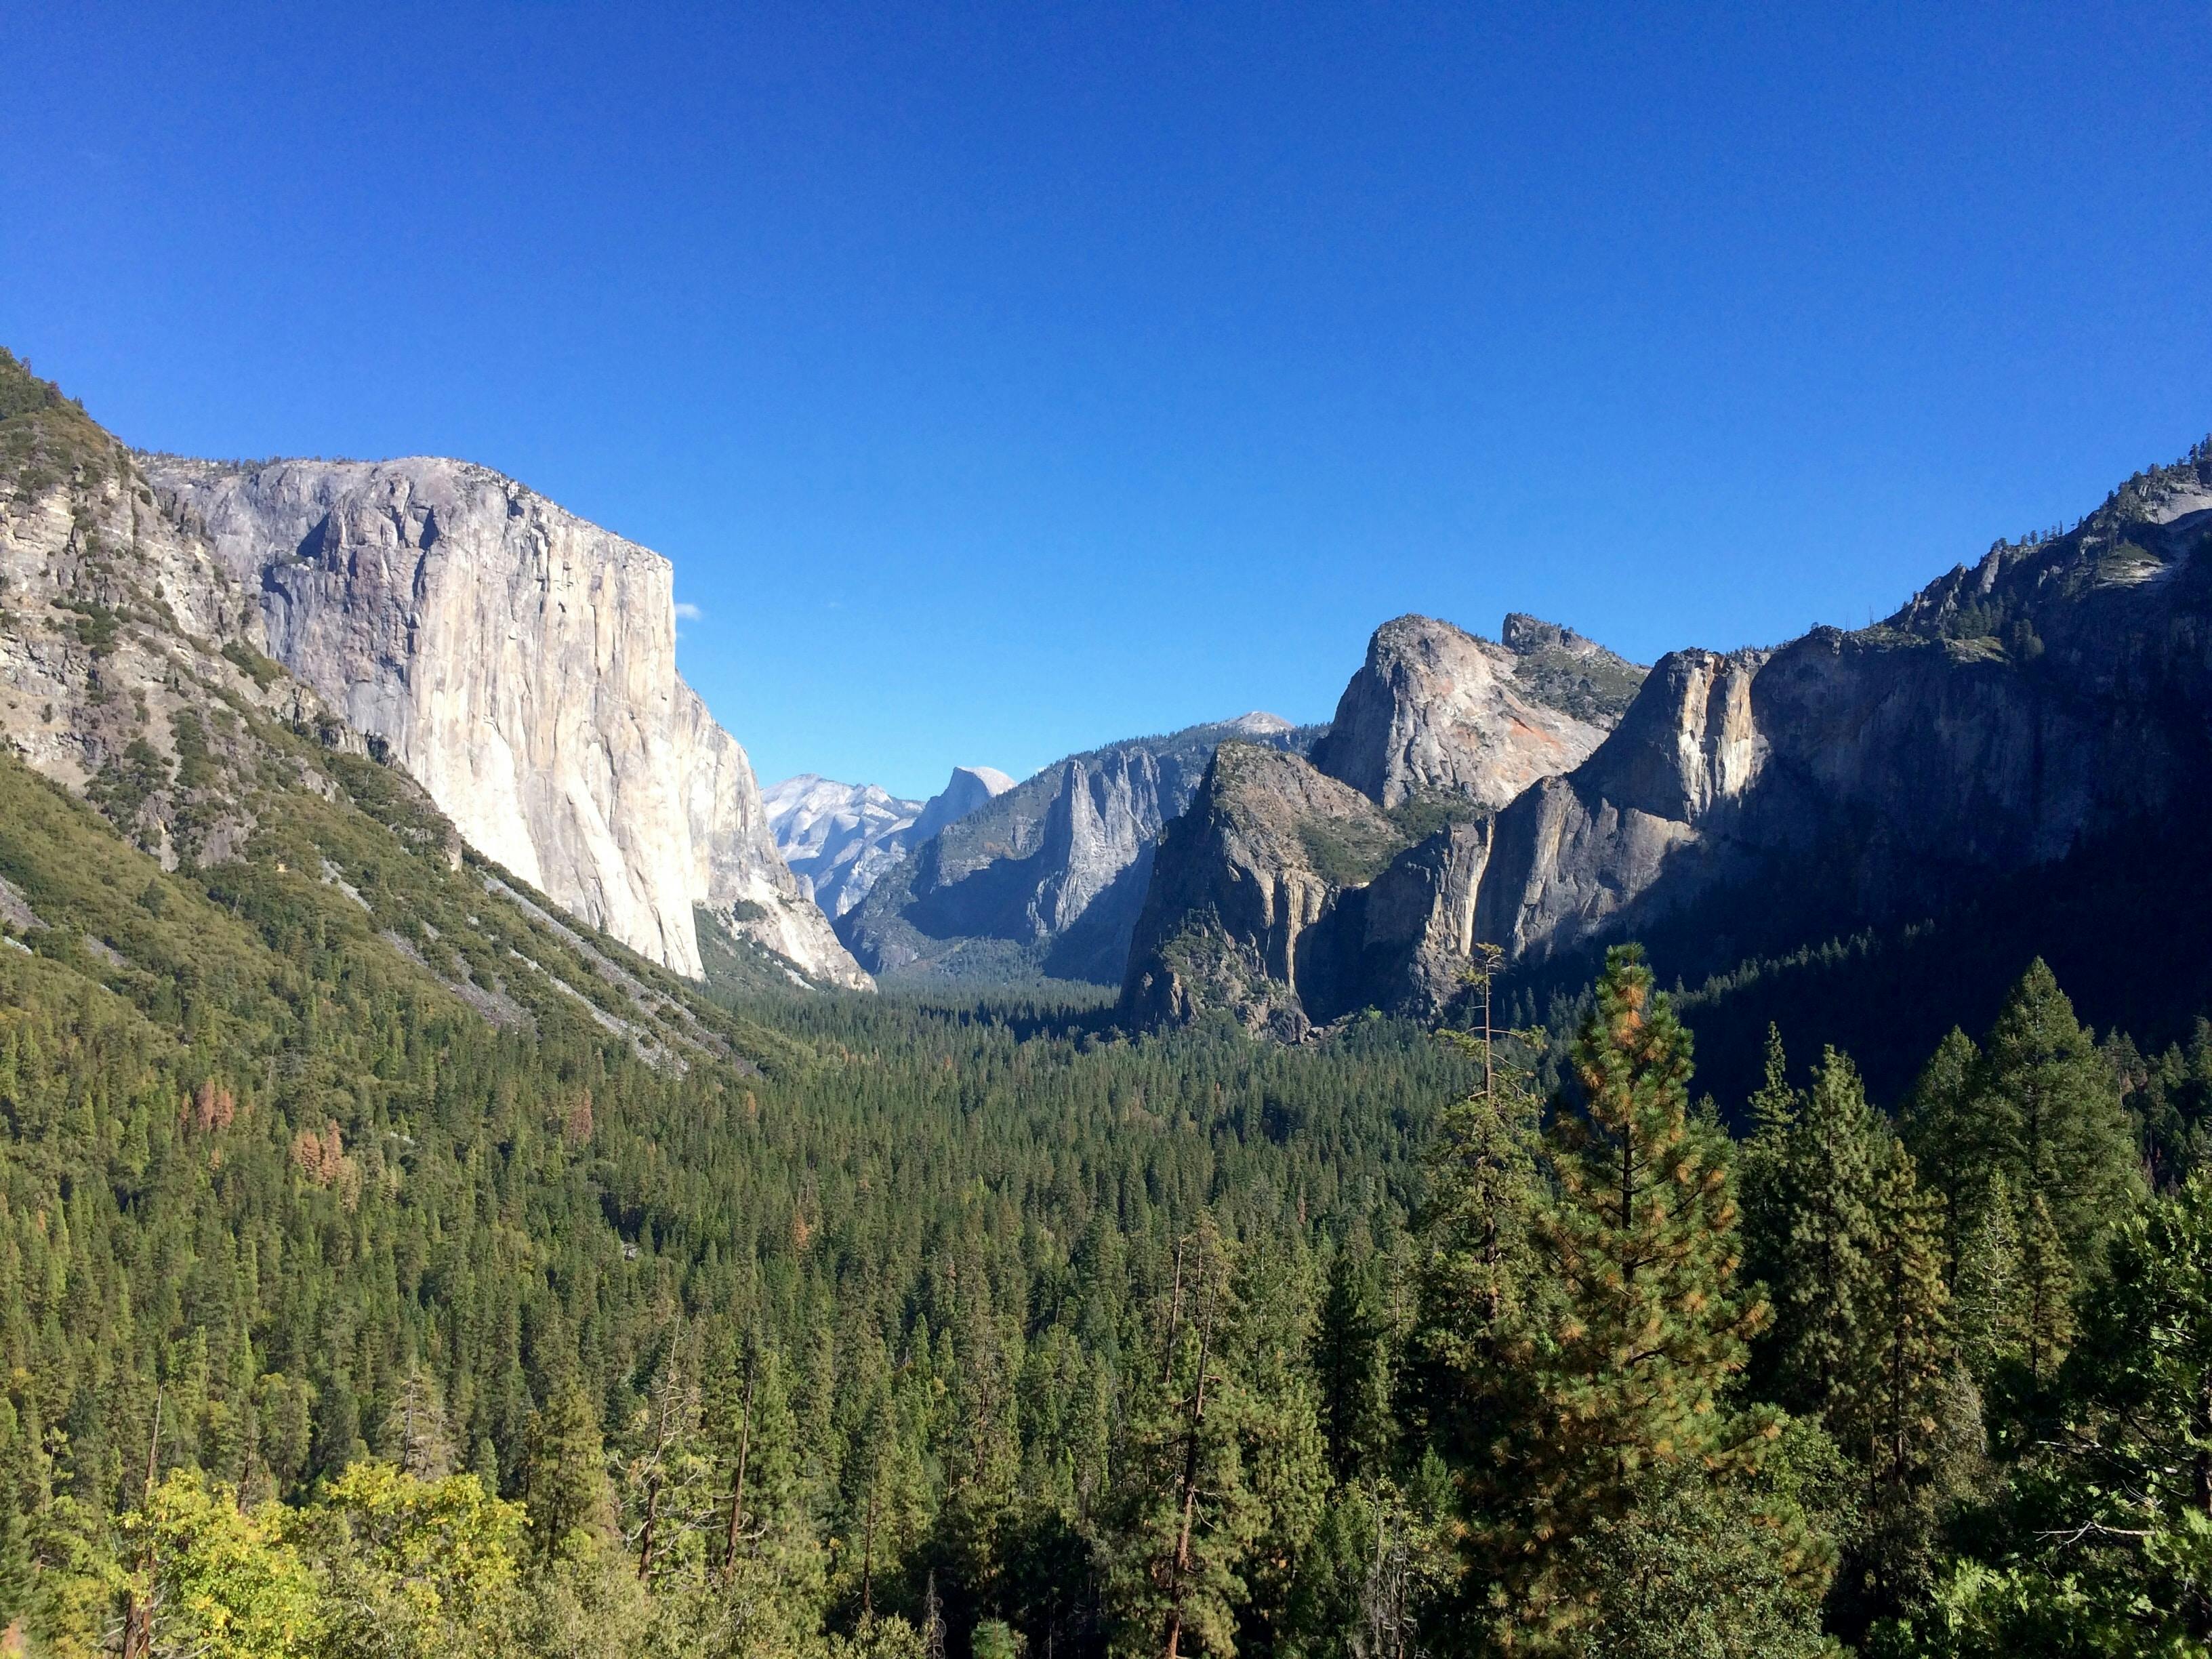
Tunnel View is one of the most famous viewpoints in Yosemite. From here, you can see a classic panorama of Yosemite Valley with El Capitan on the left, Bridalveil Fall on the right and Half Dome in the distance.
This is often the first major viewpoint for visitors entering from the Wawona Road. It is a must-stop for first-time visitors and is especially beautiful in the morning, late afternoon or after a storm when clouds move through the valley.
El Capitan
El Capitan is a massive granite cliff rising above Yosemite Valley. It is one of the most famous rock-climbing walls in the world and one of Yosemite’s defining landmarks.
You can see El Capitan from several locations in the valley, including El Capitan Meadow, Tunnel View and valley road pullouts. Even if you are not a climber, it is worth stopping nearby and looking carefully at the wall. With binoculars, you may be able to spot climbers on the granite face.
Half Dome
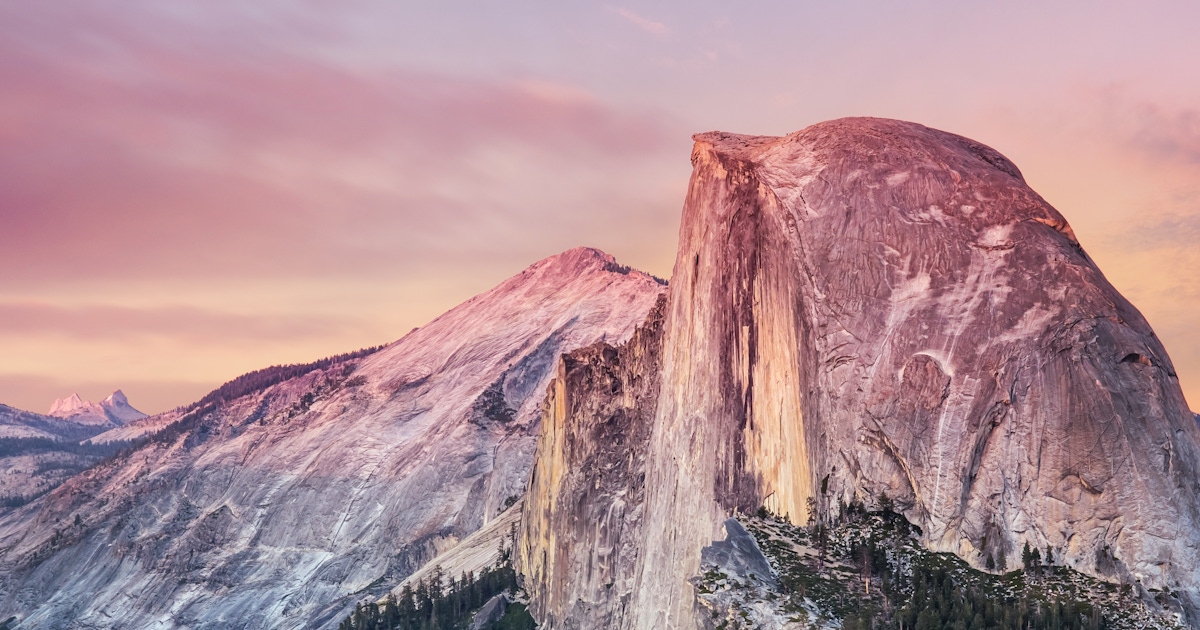
Half Dome is one of Yosemite’s most recognisable symbols. Its rounded granite face and sheer cut side dominate views from several parts of the park.
The famous Half Dome hike is a very strenuous route that requires a permit when the cables are in place. Most visitors do not need to hike it to enjoy the landmark. Excellent views are available from Yosemite Valley, Glacier Point, Sentinel Bridge and many other viewpoints.
Yosemite Falls
Yosemite Falls is one of the tallest waterfall systems in North America and one of the park’s most popular sights. It is made up of Upper Yosemite Fall, middle cascades and Lower Yosemite Fall.
The easy Lower Yosemite Fall Trail is one of the best short walks in the valley. It is suitable for many visitors and gives close views of the lower waterfall when water is flowing strongly.
Waterfall flow is usually strongest in spring and early summer, when snowmelt feeds the falls. By late summer or autumn, Yosemite Falls can be much reduced or even dry depending on the year.
Bridalveil Fall
Bridalveil Fall is one of the first waterfalls many visitors see when entering Yosemite Valley. It drops from a hanging valley near the western end of Yosemite Valley and is visible from Tunnel View and nearby pullouts.
The short walk to the Bridalveil Fall viewing area is worthwhile, especially in spring when the water is strong. The mist can be intense, so expect wet paths and slippery conditions near the base.
Glacier Point
Glacier Point is one of the best high viewpoints in Yosemite. It offers sweeping views over Yosemite Valley, Half Dome, the High Sierra and surrounding granite landscapes.
The drive to Glacier Point is seasonal, usually open from sometime in May until sometime in November depending on snow and road conditions. When the road is closed, access is much more limited and may require long-distance hiking or skiing depending on season and conditions.
If Glacier Point Road is open during your visit, it is one of the best additions to a Yosemite itinerary. Sunset can be beautiful, but expect crowds and allow enough time for the drive back in the dark.
Mariposa Grove of Giant Sequoias
Mariposa Grove is the largest grove of giant sequoias in Yosemite and one of the best places in the park to experience these enormous ancient trees. It is located near the park’s South Entrance.
The grove includes famous trees such as the Grizzly Giant and California Tunnel Tree. Visitors usually park at the Mariposa Grove Welcome Plaza and use the seasonal shuttle when it is operating, unless they have disability access permission or special conditions apply.
Mariposa Grove is a strong choice if you are entering from the south or combining Yosemite with Wawona. It deserves several hours if you want to walk beyond the shortest viewpoints.
Tioga Road and Tuolumne Meadows
Tioga Road is Yosemite’s high-country road, crossing the park from Crane Flat toward Tioga Pass and the eastern Sierra. When open, it gives access to Tuolumne Meadows, Tenaya Lake, Olmsted Point, high-altitude trailheads and a very different side of Yosemite.
This area is quieter and more alpine than Yosemite Valley. It is excellent for scenic driving, photography, hiking, lake views and escaping some of the valley crowds.
Tioga Road is seasonal and typically opens late May or June, then closes sometime in November. Always check current road status before planning an east-west Yosemite route.
Best Yosemite Walks and Hikes
Yosemite has walks and hikes for many fitness levels. Choose carefully based on weather, daylight, elevation, water availability and your experience.
Easy Walks
Lower Yosemite Fall Trail: Short, popular walk to waterfall views.
Cook’s Meadow Loop: Easy valley walk with views of Half Dome, Yosemite Falls and meadows.
Mirror Lake Trail: Relatively easy walk with views of Half Dome and seasonal reflections.
Bridalveil Fall Trail: Short walk to a classic waterfall viewpoint.
Mariposa Grove lower trails: Good for seeing giant sequoias, depending on shuttle and route conditions.
Moderate Hikes
Vernal Fall Footbridge: A popular route on the Mist Trail corridor.
Taft Point: Seasonal Glacier Point Road hike with cliff views.
Sentinel Dome: Seasonal hike with panoramic views.
May Lake: High-country lake hike when Tioga Road is open.
Strenuous Hikes
Mist Trail to Vernal and Nevada Falls: Steep, wet and demanding in places.
Upper Yosemite Falls Trail: Long climb with major elevation gain.
Four Mile Trail: Strenuous route between Yosemite Valley and Glacier Point when open.
Half Dome: Very strenuous permit hike with exposed cable section.
Wildlife in Yosemite
Yosemite is home to black bears, mule deer, coyotes, bobcats, squirrels, birds and many smaller animals. Seeing wildlife can be a highlight, but feeding or approaching animals is dangerous and harmful.
Food storage is especially important because bears are active in Yosemite. Never leave food, scented items, rubbish or coolers visible in your vehicle. Use bear-proof lockers where required and follow all park food-storage rules.
Where to Stay
Where you stay has a major effect on your Yosemite experience. The park is large, and driving into Yosemite Valley can take time.
Inside Yosemite Valley
Staying inside Yosemite Valley is the most convenient option for first-time visitors, but lodging books far ahead and is expensive. It gives you the best access to sunrise, sunset, shuttles and major valley sights.
Wawona
Wawona is useful for Mariposa Grove and the South Entrance. It is quieter than Yosemite Valley but farther from many valley highlights.
El Portal
El Portal is one of the most convenient gateway communities outside the park, especially for access through the Arch Rock Entrance.
Mariposa
Mariposa offers more hotel and dining choices but adds driving time. It can be a practical base when in-park lodging is unavailable.
Oakhurst
Oakhurst is near the South Entrance and works well for visitors combining Mariposa Grove with Yosemite Valley.
Lee Vining and Mammoth Lakes
These east-side bases are useful when Tioga Road is open. They work well for high-country Yosemite, Mono Lake and the eastern Sierra.
How Long to Spend in Yosemite
One day: Enough for Yosemite Valley highlights only. Focus on Tunnel View, Yosemite Falls, El Capitan, Bridalveil Fall and valley viewpoints.
Two days: Better for Yosemite Valley plus either Glacier Point or Mariposa Grove, depending on road access.
Three days: A good minimum for first-time visitors. You can explore the valley, add Glacier Point and see Mariposa Grove or Tioga Road if open.
Four to five days: Ideal for a less rushed visit with hiking, high country, giant sequoias and more time for sunrise or sunset.
One week: Best for serious hikers, photographers and travellers who want to explore beyond the busiest sights.
Simple Yosemite Itinerary
Day 1: Yosemite Valley Highlights
Arrive early and stop at Tunnel View.
Continue into Yosemite Valley and park once if possible.
Walk to Lower Yosemite Fall.
Explore Cook’s Meadow and Sentinel Bridge views.
Stop at El Capitan Meadow.
Visit Bridalveil Fall if parking and access are manageable.
Stay for late-afternoon light in the valley.
Day 2: Glacier Point or Valley Hiking
If Glacier Point Road is open, drive to Glacier Point for high views of Half Dome and Yosemite Valley.
Add Taft Point or Sentinel Dome if you are comfortable with moderate hiking.
If Glacier Point Road is closed, spend the day on valley walks or a hike such as Vernal Fall Footbridge.
Return to the valley for sunset or a relaxed evening.
Day 3: Mariposa Grove or Tioga Road
Choose Mariposa Grove if you want giant sequoias.
Choose Tioga Road if it is open and you want high-country scenery.
For Tioga Road, stop at Olmsted Point, Tenaya Lake and Tuolumne Meadows.
Return to your accommodation or continue toward the eastern Sierra if your route allows.
Best Time to Visit Yosemite
Spring
Spring is one of the best times to visit Yosemite Valley because waterfalls are usually at their strongest. Snow may still affect higher roads, but the valley can be spectacular.
Summer
Summer offers the most access, with Tioga Road and Glacier Point Road usually open. It is also the busiest season, with traffic, full parking lots and crowded trails.
Autumn
Autumn brings cooler weather and fewer crowds. Waterfalls may be much lower, but hiking conditions can be excellent, and the high country may remain open until snow closes roads.
Winter
Winter is quieter and beautiful, with snow on cliffs and trees. Some roads close, tire chains may be required, and access is more limited, but Yosemite Valley can be peaceful and dramatic.
Getting Around Yosemite
Driving is the most common way to reach Yosemite, but once you are in Yosemite Valley, it is usually better to park once and use shuttles, bikes or walking routes where available.
In peak season, parking in Yosemite Valley can fill early. Traffic congestion is common, especially late morning through afternoon. Arriving early is one of the most important Yosemite planning tips.
Public and regional transit options may be available from some gateway communities through YARTS, which can reduce parking stress. Check current schedules before relying on it.
Entrance Fees and Reservations
Yosemite requires an entrance pass. In 2026, Yosemite is not using a timed vehicle reservation system, but entrance fees still apply.
Visitors should check current official fee rules before travelling. Yosemite is cashless at entrance stations, so bring a card or buy a pass online before arrival.
Accommodation, campgrounds, wilderness permits and Half Dome permits are separate from the general park entrance pass and should be planned well ahead.
What to Wear and Pack
Comfortable walking shoes or hiking shoes
Layered clothing
Rain jacket or wind shell
Warm layer for mornings and evenings
Hat, sunglasses and sunscreen
Reusable water bottle
Snacks or picnic food
Offline maps or paper map
Power bank
Binoculars for wildlife and climbers
Small first-aid kit
Bear-safe food storage plan
Tire chains in winter or when required
Safety Tips
Stay Away from Water Edges
Yosemite’s rivers and waterfalls can be powerful, cold and dangerous, especially during snowmelt. Stay behind barriers and away from slippery rocks near water.
Store Food Properly
Bears are active in Yosemite. Store food, toiletries and scented items correctly in bear lockers or approved containers. Never leave food visible in a vehicle.
Do Not Approach Wildlife
Keep a respectful distance from deer, coyotes, bears and all other animals. Feeding wildlife is dangerous and illegal.
Respect Trail Closures
Closures happen because of rockfall, snow, ice, fire, restoration or safety risks. Do not enter closed areas.
Carry Enough Water
Even short hikes can feel hot and exposed in summer. Carry water and refill where permitted.
Watch for Rockfall
Yosemite’s cliffs are active natural landscapes. Stay on marked trails and avoid lingering near unstable areas.
Check Road Conditions
Roads can close because of snow, storms, fire, construction or rockfall. Check official conditions before and during your trip.
Start Early
Early starts help with parking, heat, crowds and photography. This is one of the simplest ways to improve a Yosemite visit.
FAQs About Yosemite National Park
Is Yosemite National Park worth visiting?
Yes. Yosemite is one of the most beautiful national parks in the United States, with granite cliffs, waterfalls, giant sequoias, meadows, rivers and high-country scenery.
What is Yosemite famous for?
Yosemite is famous for Yosemite Valley, El Capitan, Half Dome, Yosemite Falls, Bridalveil Fall, Tunnel View, Glacier Point, Mariposa Grove and Tioga Road.
Do you need a reservation to enter Yosemite?
In 2026, Yosemite is not requiring timed vehicle reservations for park entry. You still need an entrance pass, and separate reservations or permits may be needed for lodging, camping, wilderness travel or Half Dome.
How many days do you need in Yosemite?
Three days is a good minimum for a first visit. One day is possible but rushed. Four or five days is better if you want hiking, Glacier Point, Mariposa Grove and Tioga Road.
What is the best month to visit Yosemite?
May and June are often excellent for waterfalls, while July and August give broader road access but heavier crowds. September and October can be quieter with good hiking weather, but waterfalls may be lower.
Can you visit Yosemite in one day?
Yes, but focus on Yosemite Valley only. Visit Tunnel View, Lower Yosemite Fall, El Capitan Meadow, Bridalveil Fall and valley viewpoints rather than trying to cover the whole park.
Where should first-time visitors stay?
Inside Yosemite Valley is most convenient, but it books early. El Portal, Mariposa and Oakhurst are common gateway bases if in-park lodging is unavailable.
Is Yosemite good for families?
Yes. Families can enjoy short walks, waterfalls, meadows, scenic viewpoints, shuttle rides and giant sequoias. Children should be closely supervised near water, cliffs and roads.
Can you see giant sequoias in Yosemite?
Yes. Mariposa Grove near the South Entrance is the largest and most famous giant sequoia grove in Yosemite.
Is Yosemite difficult to drive around?
The main roads are paved, but traffic, limited parking, seasonal closures and mountain driving can make travel slow. Arrive early and check road conditions before setting out.
Final Thoughts
Yosemite National Park is a destination that lives up to its reputation. The first view from Tunnel View, the scale of El Capitan, the sound of Yosemite Falls, the curve of Half Dome and the quiet presence of giant sequoias make it one of America’s great natural experiences.
For the best first visit, allow at least three days, stay as close to the park as your budget allows, start early each morning and build your plans around current road conditions. Focus first on Yosemite Valley, then add Glacier Point, Mariposa Grove or Tioga Road depending on the season. Yosemite rewards both grand sightseeing and slow moments, so give yourself time to stop, look and listen.
Sponsored Popular Items
Quick take: Musement.com offers a worldwide selection of tours and attractions
Yosemite National Park Tours & Activities Guide United States Yosemite National Park: Tours & Activities (Summary + Direct Links) Yosemite is a classic big granite + waterfalls park:. Check current availability, inclusions and booking details before you go.
Yosemite National Park Day Tour from San Francisco United States Yosemite National Park full-day tour from San Francisco places landscapes, habitats or wildlife at the centre of the experience. Check current availability, inclusions and booking details before you go.
Yosemite National Park Day Tour – Nature & Wildlife Experience United States Yosemite National Park Day Tour places landscapes, habitats or wildlife at the centre of the experience. Check current availability, inclusions and booking details before you go.
Yellowstone National Park is one of the most spectacular natural destinations in the United States. Spread across Wyoming, Montana and Idaho, it is famous for geysers, hot springs, bubbling mud pots, colourful thermal pools, waterfalls, canyons, forests, alpine lakes, bison herds, elk, bears, wolves and wide-open mountain scenery.
Yellowstone National Park Travel Guide: Geysers, Wildlife, Hot Springs, Canyons and Road Trip Tips
As the world’s first national park, Yellowstone is both iconic and complex. It is huge, seasonal, weather-dependent and busy in peak months. The best visit comes from planning carefully: choose the right entrance, allow enough driving time, book accommodation early, respect wildlife distances and build your route around Yellowstone’s major regions.
Sponsored Popular Items
Quick take: Musement.com offers a worldwide selection of tours and attractions
Yellowstone is worth visiting because it combines scenery, wildlife and geology in a way few places can match. In one trip, you can watch Old Faithful erupt, walk beside steaming geyser basins, see rainbow-coloured hot springs, photograph waterfalls, drive through bison-filled valleys and stand beside one of America’s most dramatic river canyons.
The park is especially good for road trippers, photographers, families, hikers, wildlife watchers and travellers who want a classic American national park experience. It is also a strong addition to a wider route through Grand Teton National Park, Jackson Hole, Montana, Wyoming, Idaho or the Rocky Mountain West.
Old Faithful and Upper Geyser Basin
Old Faithful is Yellowstone’s most famous geyser and one of the park’s must-see attractions. It erupts regularly enough that visitors can usually plan around predicted eruption windows posted by the park and visitor centre.
The geyser sits in the Upper Geyser Basin, one of the most concentrated hydrothermal areas in the world. Many visitors make the mistake of watching Old Faithful and leaving immediately. A better plan is to walk the boardwalks around the basin and explore nearby geysers, pools and thermal features.
Old Faithful Village also has visitor services, lodging, dining, restrooms, parking and the historic Old Faithful Inn. It is one of the busiest parts of Yellowstone, so arrive early or expect crowds in peak season.
Grand Prismatic Spring
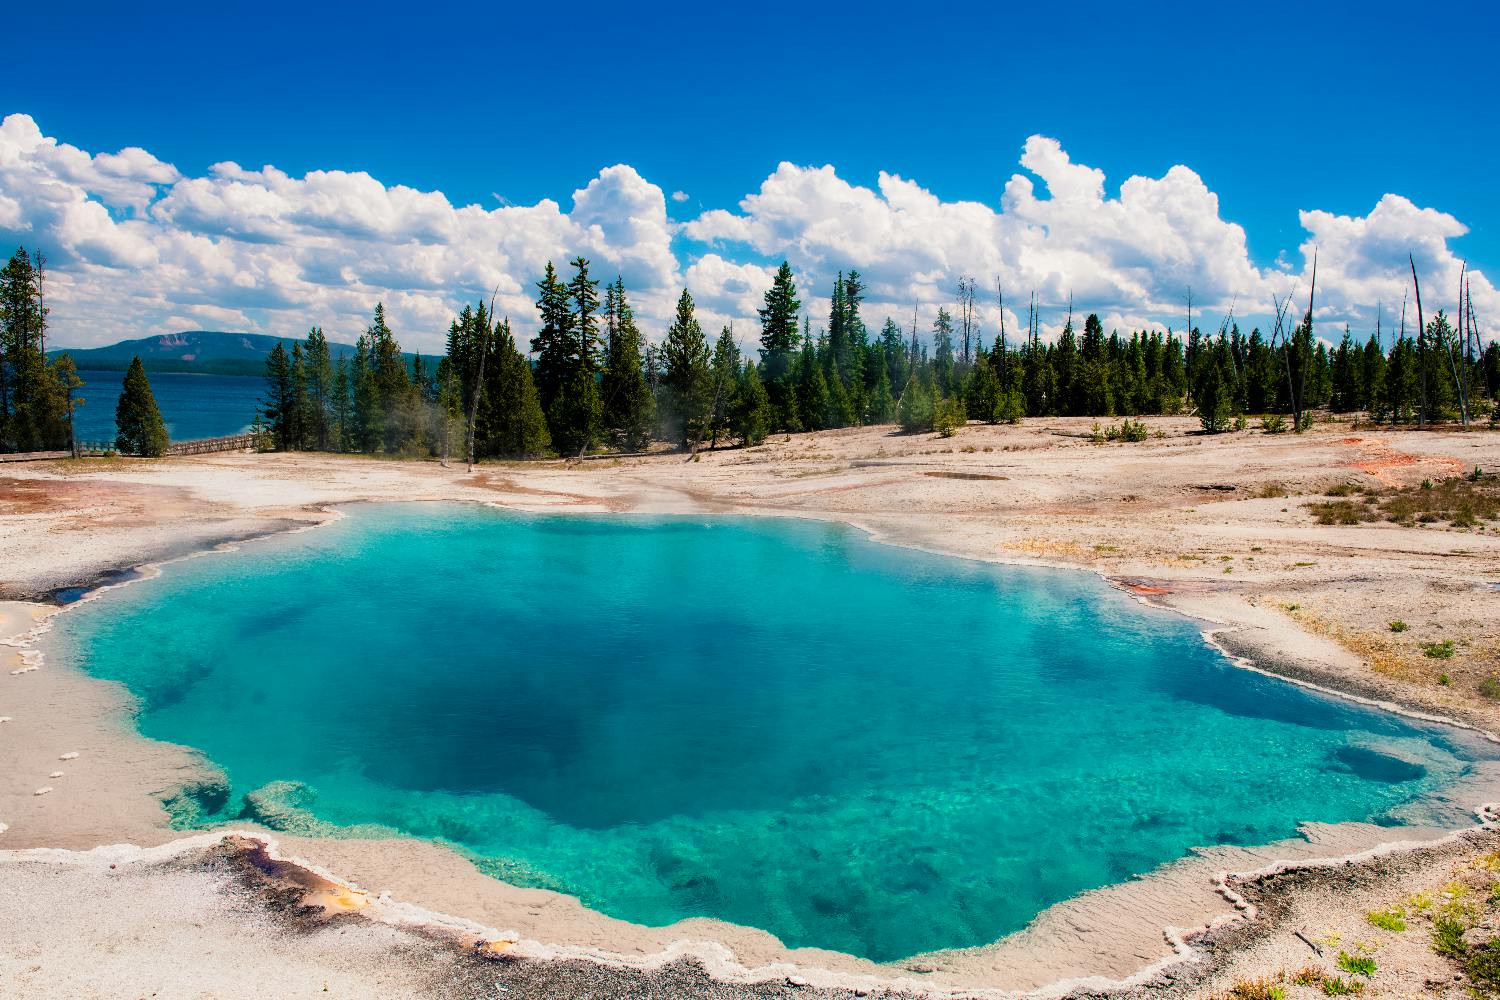
Grand Prismatic Spring is one of Yellowstone’s most photographed sights. Its blue centre, orange and yellow microbial mats, steam and large circular shape make it one of the park’s most visually striking thermal features.
There are two main ways to experience it. The boardwalk at Midway Geyser Basin takes you close to the spring, where you can see the colours and steam from ground level. The Grand Prismatic Overlook trail gives a higher view, which is often better for seeing the full shape and colour pattern.
For the best photos, visit on a cooler morning for steam effects or later in the day for clearer colour, depending on conditions. Crowds and parking can be heavy, so allow extra time.
Mammoth Hot Springs
Mammoth Hot Springs is located in the northern part of Yellowstone and is known for its pale travertine terraces. The terraces are formed by mineral-rich hot water flowing over limestone, creating stepped formations that look very different from the geyser basins near Old Faithful.
The area includes upper and lower terrace boardwalks, historic buildings, visitor services and frequent elk sightings around Mammoth village. Because the northern road corridor is one of the most accessible parts of the park, Mammoth is also important for shoulder-season and winter planning.
Grand Canyon of the Yellowstone
The Grand Canyon of the Yellowstone is one of the park’s most dramatic landscapes. The canyon is known for steep yellow, orange and rust-coloured walls, the Yellowstone River and powerful waterfalls.
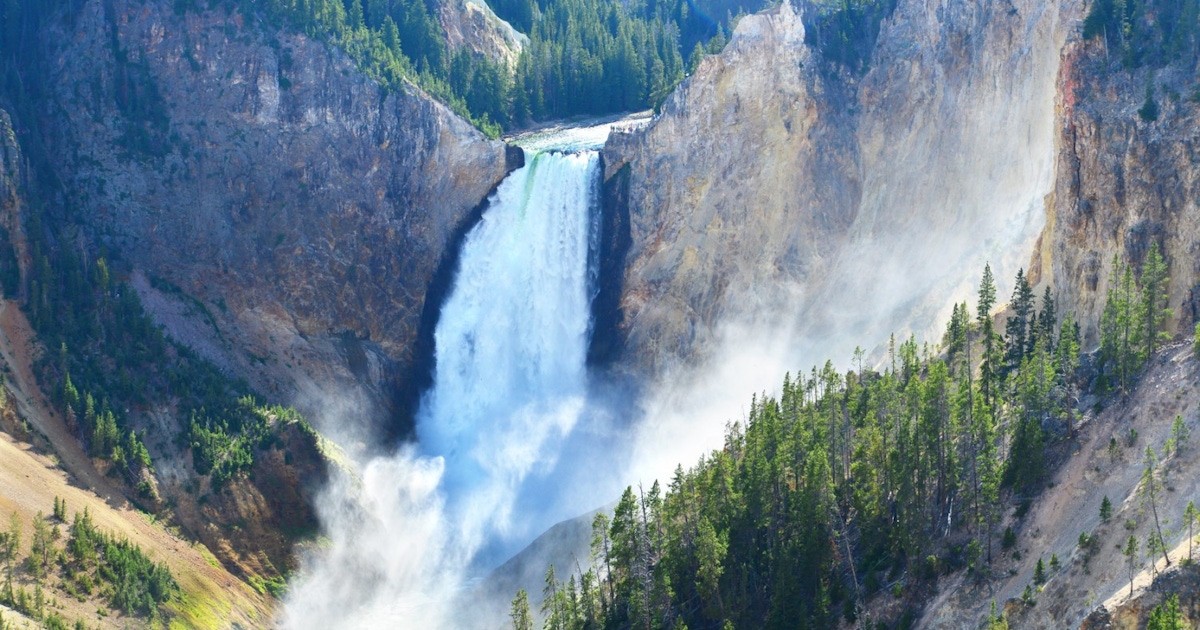
The two most famous waterfalls are Upper Falls and Lower Falls. Lower Falls is the taller and more iconic of the two, often viewed from overlooks such as Artist Point, Lookout Point, Red Rock Point and the Brink of the Lower Falls area.
This region is excellent for photography and short viewpoint walks. It is also one of the best places in the park to appreciate Yellowstone’s scale beyond the geysers.
Yellowstone Lake
Yellowstone Lake is the largest body of water in the park and one of the largest high-elevation lakes in North America. It gives the park a very different mood from the geyser basins and wildlife valleys.
The lake area is good for scenic driving, photography, picnic stops, boating access where permitted, lakeside walks and a calmer break from the busier thermal areas. Lake Village, Fishing Bridge, Bridge Bay and West Thumb are useful lake-region stops.
West Thumb Geyser Basin is especially worth visiting because it combines thermal features with lake views. Steam, hot pools and the wide lake backdrop make it one of Yellowstone’s most scenic boardwalk areas.
Lamar Valley
Lamar Valley is one of the best wildlife-watching areas in Yellowstone. Located in the park’s northeast, it is famous for bison, pronghorn, wolves, bears, coyotes and wide-open valley scenery.
Wildlife viewing is best early in the morning or late in the evening. Bring binoculars or a spotting scope if possible. Many animals will be far away, and approaching wildlife is dangerous and illegal.
Lamar Valley is farther from the park’s busiest southern attractions, so it works best if you stay near Mammoth, Roosevelt, Cooke City, Gardiner or plan a long wildlife-focused driving day.
Hayden Valley
Hayden Valley is another prime wildlife area, located between Canyon Village and Yellowstone Lake. It is one of the easiest places to see bison from the road and is also good for birdlife, elk, coyotes and occasional bear or wolf sightings.
Traffic can slow dramatically when animals are near the road. This is part of the Yellowstone experience, but it also means drive times can be much longer than expected. Use pullouts, do not stop in the road, and stay inside your vehicle when wildlife is close.
Wildlife in Yellowstone
Yellowstone is one of the best wildlife destinations in the United States. Commonly seen animals include bison, elk, mule deer, pronghorn, bighorn sheep, coyotes and many birds. With luck, visitors may also see black bears, grizzly bears, wolves, moose, foxes and river otters.
The safest and best wildlife viewing is done from a distance. Binoculars and telephoto lenses are essential if you want close-looking views without approaching animals.
Important wildlife safety rules include staying at least 100 yards from bears and wolves, and at least 25 yards from all other wildlife, including bison and elk. Bison may look calm but can run fast and injure visitors who get too close.
Yellowstone Entrances
Yellowstone has five main entrances, and the best one depends on your route.
West Entrance
The West Entrance near West Yellowstone, Montana, is one of the most popular entrances. It is convenient for Old Faithful, Grand Prismatic Spring, Madison and geyser basin routes.
North Entrance
The North Entrance near Gardiner, Montana, is useful for Mammoth Hot Springs, Lamar Valley and northern Yellowstone. It is also important for shoulder-season access.
Northeast Entrance
The Northeast Entrance near Cooke City and Silver Gate is best for Lamar Valley and wildlife-focused trips. It is one of the most scenic approaches, but road conditions and seasonal access matter.
East Entrance
The East Entrance connects Yellowstone with Cody, Wyoming. It works well for travellers coming from eastern Wyoming or building a route with Cody’s museums and western heritage.
South Entrance
The South Entrance connects Yellowstone with Grand Teton National Park and Jackson. It is ideal for travellers combining both parks, but visitors entering from the south usually pass through Grand Teton first and may need to account for separate park fees.
Where to Stay
Yellowstone is large, so where you stay has a major impact on your trip. In-park lodging is convenient but books far ahead. Gateway towns can offer more choice but add driving time.
Inside the Park
Staying inside Yellowstone saves driving and lets you reach major sights earlier. Useful areas include Old Faithful, Canyon Village, Lake Yellowstone, Grant Village, Mammoth Hot Springs and Roosevelt. In-park lodging and campgrounds are seasonal and should be booked as early as possible.
West Yellowstone
West Yellowstone is one of the most convenient gateway towns for first-time visitors. It has hotels, restaurants, tour operators and easy access to the West Entrance.
Gardiner
Gardiner is useful for the North Entrance, Mammoth Hot Springs and northern wildlife routes.
Cooke City and Silver Gate
These small towns are good for Lamar Valley and wildlife photographers, especially early morning starts.
Cody
Cody is farther from Yellowstone’s central sights but works well for travellers entering from the east or wanting a western-town experience.
Jackson and Grand Teton
Jackson is best if you are combining Yellowstone with Grand Teton National Park. It is not ideal as your only base for Yellowstone because many park highlights are a long drive away.
How Long to Spend in Yellowstone
One day: Very rushed. Choose either Old Faithful and Grand Prismatic, or Canyon and Hayden Valley, but do not expect to see the whole park.
Two days: Enough for the main southern highlights, including Old Faithful, Grand Prismatic, Yellowstone Lake and the Grand Canyon of the Yellowstone.
Three days: A good minimum for first-time visitors. This allows geyser basins, Canyon, Yellowstone Lake and one wildlife valley.
Four to five days: Better for most travellers. You can slow down, add Lamar Valley, Mammoth Hot Springs and more boardwalk walks.
One week: Ideal for deeper wildlife watching, hiking, photography, sunrise starts, less rushing and combining multiple regions of the park.
Simple Yellowstone Itinerary
Day 1: Old Faithful and Geyser Country
Enter through the West or South Entrance, depending on your route.
Visit Old Faithful and check the next predicted eruption time.
Walk the Upper Geyser Basin boardwalks.
Visit Biscuit Basin or Black Sand Basin if time allows.
Continue to Grand Prismatic Spring at Midway Geyser Basin.
Walk to the Grand Prismatic Overlook if conditions are suitable.
Stay near Old Faithful, West Yellowstone or Madison if available.
Day 2: Yellowstone Lake and Canyon
Start early and drive toward West Thumb Geyser Basin.
Visit Yellowstone Lake and Lake Village viewpoints.
Drive through Hayden Valley for wildlife viewing.
Explore the Grand Canyon of the Yellowstone.
Stop at Artist Point, Lookout Point and other waterfall viewpoints.
Stay near Canyon Village, Lake, West Yellowstone or Gardiner depending on route.
Day 3: Mammoth Hot Springs and Lamar Valley
Visit Mammoth Hot Springs terraces in the morning.
Drive toward Lamar Valley for wildlife scenery.
Bring binoculars and allow time at pullouts.
Return through Roosevelt or continue to Cooke City if staying nearby.
Watch for wildlife at dusk, but avoid driving too fast or too late when visibility is poor.
Optional Day 4: Slower Stops and Short Hikes
Add Norris Geyser Basin, Tower Fall or additional Canyon viewpoints.
Take a short hike suited to your ability.
Revisit a favourite area in better light.
Use this day as a weather buffer if earlier days were smoky, stormy or crowded.
Best Time to Visit Yellowstone
The best time to visit Yellowstone depends on what you want to see.
Late Spring
Late spring brings wildlife activity, newborn animals, waterfalls and cooler weather. Some roads and facilities may still be opening, so check current conditions carefully.
Summer
Summer is the busiest season, with most roads, lodges, campgrounds and visitor services open. It is the easiest time for a first visit, but crowds, full parking lots and traffic jams are common.
Autumn
Autumn is one of the best times for wildlife, cooler weather and fewer crowds. Elk rut activity can be dramatic, and the light is beautiful for photography. Services begin closing gradually, so check operating dates.
Winter
Winter is quiet, snowy and beautiful, but access is limited. Most park roads are closed to regular vehicles, with travel to many areas by snowcoach or snowmobile. Mammoth and the northern road corridor remain especially important in winter planning.
Driving and Road Planning
Yellowstone driving takes longer than maps suggest. Roads are winding, speed limits are modest, parking areas fill, wildlife jams happen often and construction or weather can slow travel.
Plan by region rather than distance. For example, group Old Faithful, Upper Geyser Basin and Grand Prismatic together. Group Canyon, Hayden Valley and Yellowstone Lake together. Group Mammoth and Lamar Valley together.
Always check current road status before and during your trip. Yellowstone’s weather can change quickly, and seasonal closures are normal.
Entrance Fees and Reservations
Yellowstone requires an entrance pass, but the National Park Service currently states that vehicle reservations are not required to enter the park. A standard private vehicle entrance pass is typically valid for seven consecutive days.
Non-US residents should check the current fee rules carefully before arrival, as Yellowstone currently lists an additional nonresident fee for visitors aged 16 and over unless admitted with an Annual or America the Beautiful Pass.
Separate reservations are needed for lodging, campgrounds, some tours, guided activities and backcountry camping. Accommodation inside the park can book out far ahead, especially in summer.
Safety Tips
Stay on Boardwalks
Thermal areas are dangerous. The ground around hot springs and geysers can look solid but may be thin crust over superheated water. Stay on boardwalks and designated trails at all times.
Never Touch Thermal Water
Even runoff from thermal features can burn skin. Do not touch, enter or throw objects into hot springs, geysers or thermal pools.
Keep Wildlife Distance
Stay at least 100 yards from bears and wolves, and at least 25 yards from bison, elk and other wildlife. Use binoculars instead of approaching animals.
Carry Bear Spray on Trails
Yellowstone is bear country. Carry bear spray where it is quickly accessible, know how to use it and hike in groups where possible.
Drive Carefully
Wildlife often crosses roads. Bison may walk on roads and cause long delays. Use pullouts for photos and never block traffic.
Prepare for Fast Weather Changes
Yellowstone can have cold nights, storms, wind and even winter-like weather outside winter. Bring layers and rain protection.
What to Wear and Pack
Comfortable walking shoes or hiking shoes
Layered clothing for changing temperatures
Rain jacket
Warm jacket or fleece, even in summer
Hat, sunglasses and sunscreen
Reusable water bottle
Snacks or picnic supplies
Binoculars for wildlife
Camera or phone with power bank
Bear spray for hiking
Paper map or offline maps
Insect repellent in summer
Small first-aid kit
FAQs About Yellowstone National Park
Is Yellowstone National Park worth visiting?
Yes. Yellowstone is one of the most extraordinary national parks in the world, with geysers, hot springs, wildlife, waterfalls, canyons, lakes and mountain scenery.
What is Yellowstone famous for?
Yellowstone is famous for Old Faithful, Grand Prismatic Spring, Mammoth Hot Springs, the Grand Canyon of the Yellowstone, Yellowstone Lake, bison herds, wolves, bears and hydrothermal activity.
How many days do you need in Yellowstone?
Three days is a good minimum for first-time visitors. Four to five days is better if you want a less rushed trip with Lamar Valley, Mammoth Hot Springs and more wildlife time.
Do you need a reservation to enter Yellowstone?
Vehicle reservations are not currently required to enter Yellowstone, but an entrance pass is required. Lodging, campgrounds and tours should be reserved ahead.
What is the best entrance for Yellowstone?
The West Entrance is very convenient for Old Faithful and geyser basins. The North Entrance is good for Mammoth and Lamar Valley. The South Entrance is best for combining Yellowstone with Grand Teton.
Can you visit Yellowstone in one day?
You can visit for one day, but it will be very rushed. Focus on one region, such as Old Faithful and Grand Prismatic, rather than trying to cross the whole park.
When is the best time to visit Yellowstone?
Summer has the most services open, but also the biggest crowds. Late spring and autumn can be excellent for wildlife and fewer visitors, while winter offers a snowy, quieter experience with limited access.
Is Yellowstone good for families?
Yes. Yellowstone is excellent for families, especially with short boardwalk walks, wildlife viewing, geyser eruptions and scenic drives. Children must be closely supervised near thermal areas and wildlife.
Can you see wildlife from the road?
Yes. Many visitors see bison, elk and other animals from roads and pullouts. Lamar Valley and Hayden Valley are especially good for wildlife viewing.
Is Yellowstone dangerous?
Yellowstone is safe if visitors follow rules, but it has real hazards: hot springs, wild animals, fast-changing weather, traffic, rivers and bear country. Stay on boardwalks, keep wildlife distance and prepare properly.
Final Thoughts
Yellowstone National Park is a destination that deserves time and respect. Its geysers, hot springs, wildlife valleys, waterfalls and volcanic landscapes are unforgettable, but the park is large and seasonal, so careful planning matters.
For the best first visit, allow at least three or four days, stay in or near the park if possible, start early each morning, group your sightseeing by region and build in extra time for wildlife jams and weather changes. Whether you come for Old Faithful, Grand Prismatic Spring, Lamar Valley wolves or the Grand Canyon of the Yellowstone, this is one of America’s great natural journeys.
Sponsored Popular Items
Quick take: Musement.com offers a worldwide selection of tours and attractions
Yellowstone National Park Self-Driving Audio Tour United States Yellowstone national park self-driving audio tour is designed for travellers who prefer independent exploration while still having structured digital guidance available. Check current availability, inclusions and booking details before you go.
Yellowstone National Park Tours & Visitor Attractions United States Compare sightseeing experiences in Yellowstone National Park Tours & Visitor, with practical tips on timing, inclusions and choosing the right option. Check current availability, prices and booking conditions before you go.
Hoover Dam is one of the most impressive engineering landmarks in the United States and one of the easiest day trips from Las Vegas. Built across the Colorado River in Black Canyon, on the border of Nevada and Arizona, the dam holds back Lake Mead and remains a powerful symbol of 20th-century construction, water management and hydroelectric power.
For travellers, Hoover Dam is practical, scenic and historically fascinating. You can walk across the top of the dam, look down into the Colorado River canyon, visit the powerplant, explore the Visitor Center, see Lake Mead, photograph the Mike O’Callaghan-Pat Tillman Memorial Bridge and combine the trip with Boulder City, Lake Mead or the Grand Canyon West Rim.
Sponsored Popular Items
Quick take: Musement.com offers a worldwide selection of tours and attractions
Hoover Dam Half-Day Raft Tour from Las Vegas – Guided Sightseeing Tour United States Hoover Dam half-day raft tour from Las Vegas USD 119 adds structure, local context and purposeful sightseeing to the itinerary. Check current availability, inclusions and booking details before you go.
What Is Hoover Dam?
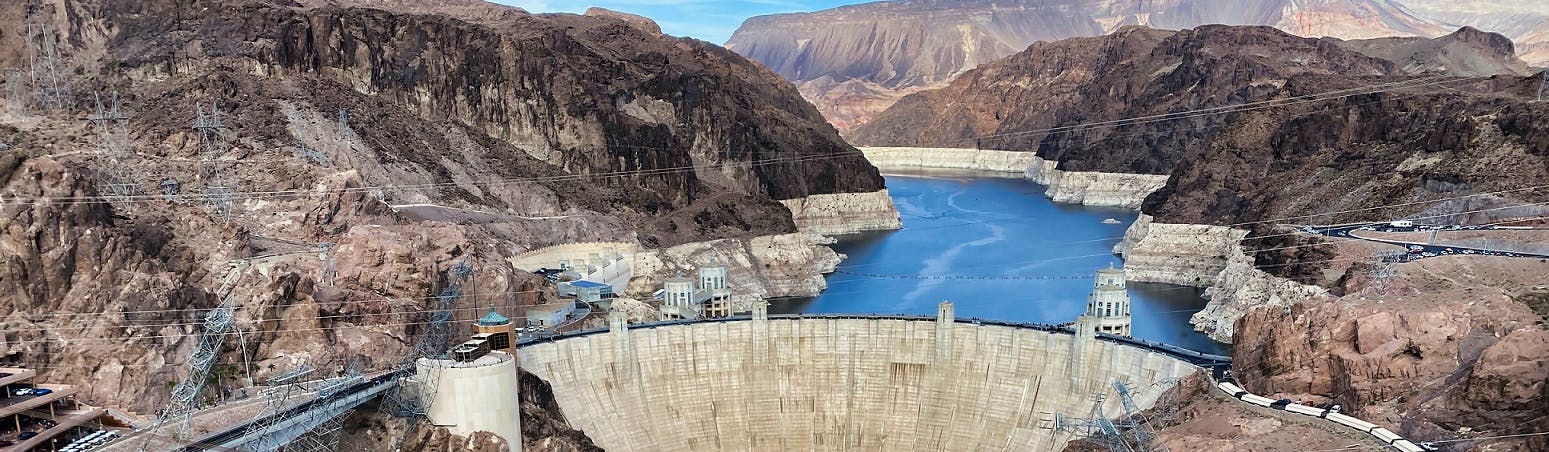
Hoover Dam is a massive concrete arch-gravity dam built across the Colorado River between Nevada and Arizona. It created Lake Mead, one of the largest reservoirs in the United States, and was designed to control floods, store water, support irrigation and municipal water supply, and generate hydroelectric power.
The dam sits in Black Canyon, close to Boulder City and around 30 miles southeast of Las Vegas. Its size, curved concrete wall, intake towers, powerplant buildings and canyon setting make it one of the most visually impressive man-made landmarks in the American Southwest.
Why Visit Hoover Dam?
Hoover Dam is worth visiting because it combines history, engineering, scenery and easy access from Las Vegas. You do not need a full day of hiking or a long national park drive to enjoy it. In a few hours, you can see the dam from above, walk across the crest, visit the Visitor Center, join a tour and stand on the bridge walkway for one of the best views of the whole structure.
It is also a good stop for families, road-trippers, engineering fans, history lovers and travellers heading toward Arizona, Lake Mead or Grand Canyon West.
A Short History of Hoover Dam
Hoover Dam was built during the Great Depression and remains one of America’s most famous public works projects. Thousands of workers came to Black Canyon to build what was then the largest dam of its time. The Bureau of Reclamation describes it as a National Historic Landmark and one of America’s Seven Modern Civil Engineering Wonders.
The project changed the American Southwest by helping control the Colorado River, creating Lake Mead, producing power and supporting the growth of cities and agriculture across the region.
Hoover Dam Visitor Center
The Hoover Dam Visitor Center is the main place to begin if you want more than a quick photo stop. It includes exhibits, information about the dam’s construction and operations, access to the observation deck and ticketing for tours.
The observation deck is especially useful because it gives a high view over the dam, Lake Mead, the Colorado River and the Hoover Bypass Bridge. If you are visiting independently, this is a good first stop before walking across the dam itself.
Hoover Dam Tours
Hoover Dam has several visitor options. These may include a self-guided Visitor Center Tour, Guided Power Plant Tour and Guided Dam Tour. Tour availability can change because of operations, staffing, maintenance or security, so always check the current official information before you go.
The self-guided Visitor Center option is the simplest. The Power Plant Tour adds a guided underground experience. The full Dam Tour is more in-depth but is sold only on site and can sell out, so early arrival is recommended if that is your priority.
Guided Power Plant Tour
The Guided Power Plant Tour is one of the most popular ways to experience Hoover Dam. It usually includes original construction tunnels, a viewing platform near a large penstock and a look at generators inside the Nevada Powerhouse.
This is a good option if you want to understand how water moves through the dam and how hydroelectric power generation works. It is also usually more accessible and easier to book than the full Dam Tour.
Guided Dam Tour
The Guided Dam Tour is the more in-depth experience. It may include historic tour tunnels, the original elevator, inspection tunnels inside the dam and views through an inspection ventilation shaft, along with the Power Plant Tour.
This tour is best for visitors who are especially interested in engineering and construction history. Tickets are generally sold in person only, first come first served, and the whole group must be present at purchase. It is not ideal if you are short on time or arriving late in the day.
Walking Across the Dam
Walking across the top of Hoover Dam is one of the best free experiences at the site. From the crest, you can look toward Lake Mead on one side and down toward the Colorado River and powerplant on the other.
You can also stand with one foot in Nevada and one foot in Arizona, because the state line runs across the dam. Look for the clock displays showing the time difference between the two sides, although daylight saving time can affect how meaningful that is depending on the season.
Mike O’Callaghan-Pat Tillman Memorial Bridge
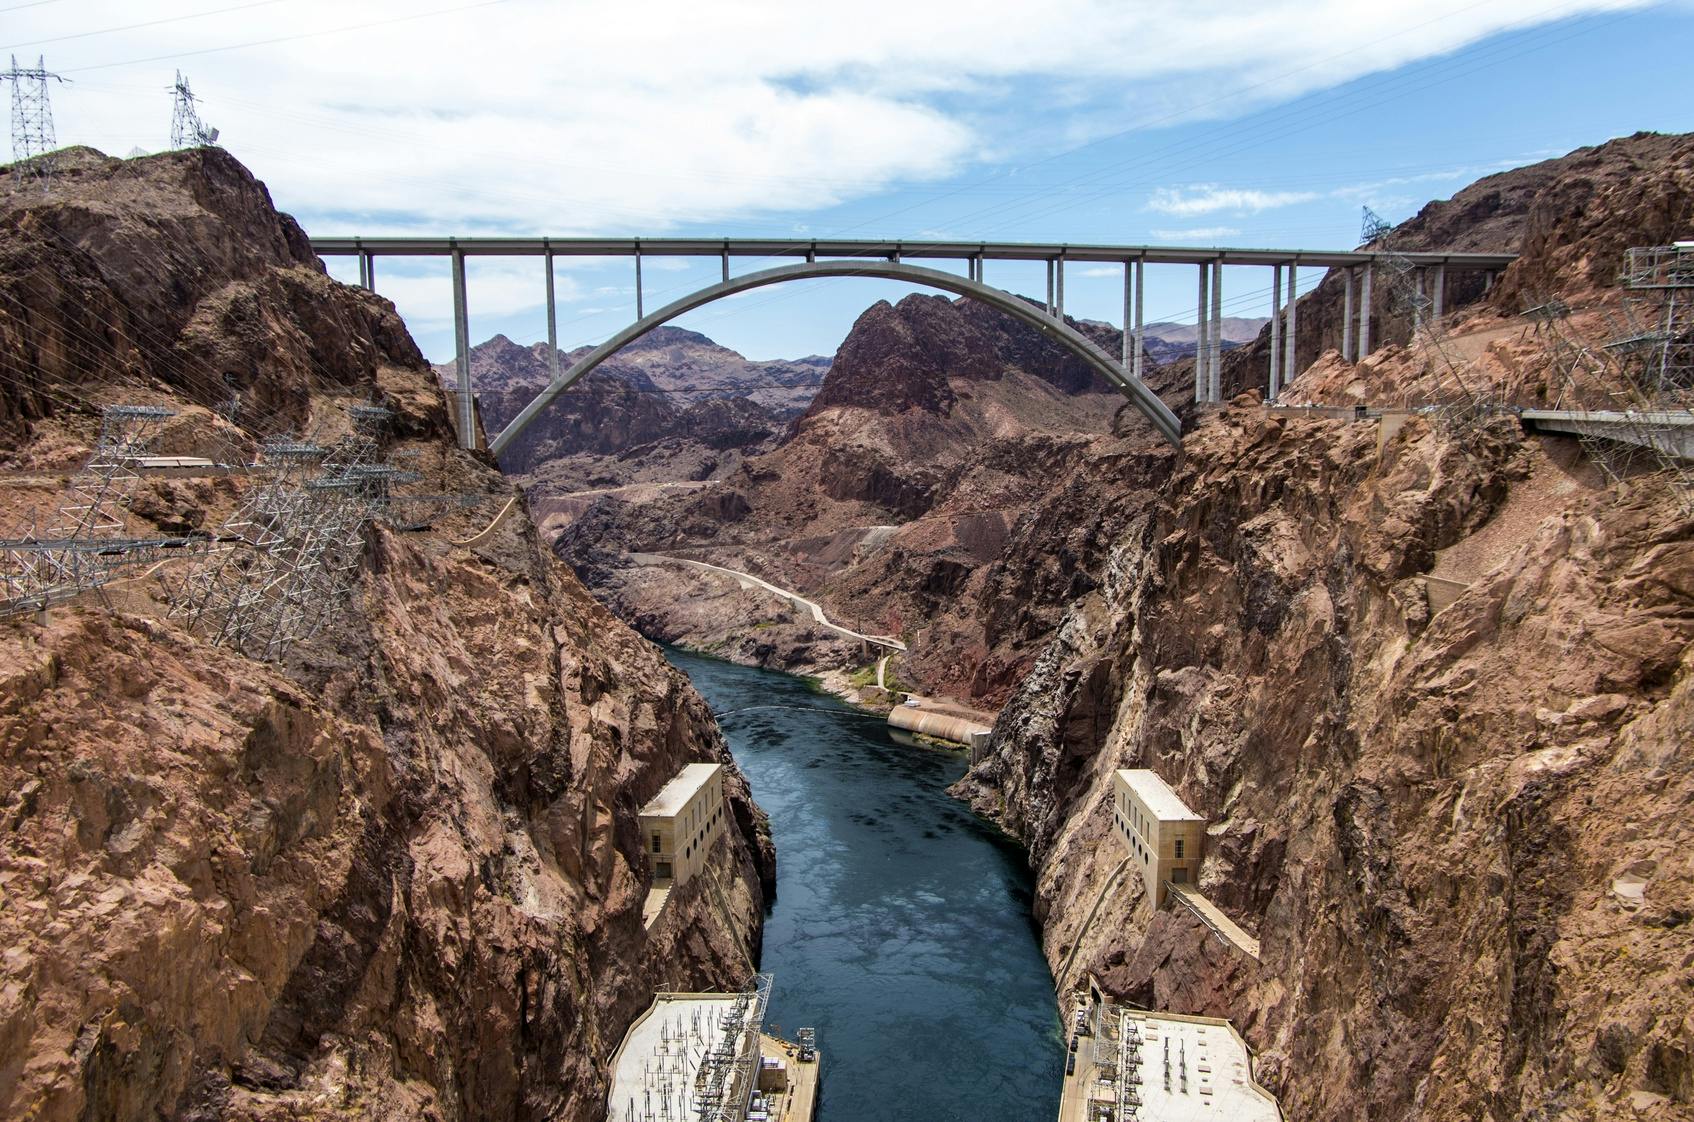
The Mike O’Callaghan-Pat Tillman Memorial Bridge is the large bypass bridge downstream from Hoover Dam. It carries highway traffic across the canyon and also has a pedestrian walkway with one of the best views of the dam.
If you want the classic full-dam photo, the bridge walkway is the best viewpoint. The walk involves stairs or ramp access from the parking area, and it can be windy and exposed. It is worth doing before or after visiting the dam itself.
Lake Mead
Lake Mead sits behind Hoover Dam and is part of Lake Mead National Recreation Area. The lake offers boating, fishing, swimming, scenic drives, desert landscapes and recreation areas, although water levels and access conditions can vary.
If you have extra time, combine Hoover Dam with the Lake Mead Visitor Center, Boulder Beach, viewpoints or a short scenic drive through the recreation area. Always check current National Park Service alerts for closures, weather and launch ramp conditions before planning water activities.
How to Get to Hoover Dam from Las Vegas
Hoover Dam is about 30 miles southeast of Las Vegas. The drive usually takes around 40 to 60 minutes from the Strip, depending on traffic, your hotel location and road conditions.
By Car
Self-driving is straightforward. From Las Vegas, travel toward Boulder City and follow signs for Hoover Dam. The official guidance notes that the dam does not have a normal street address; entering “Hoover Dam” in a map app is usually the easiest approach.
By Tour
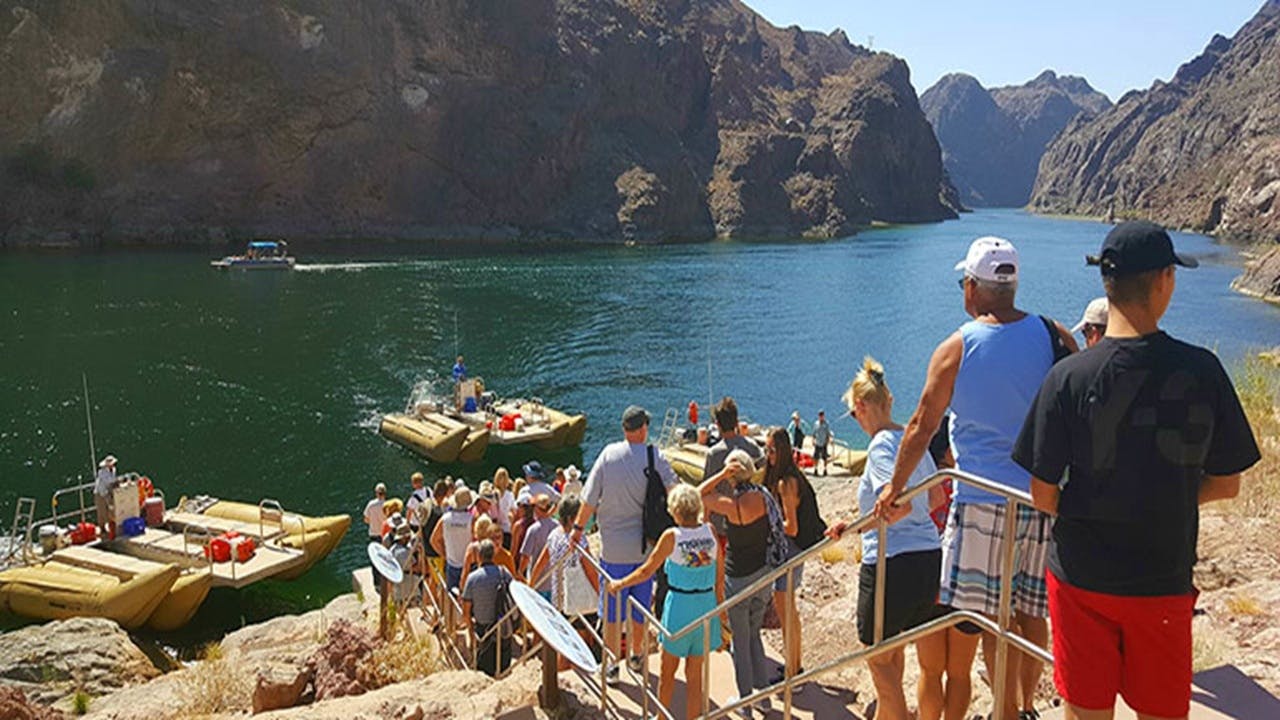
Guided tours from Las Vegas are very common. Options range from short half-day tours to longer trips combining Hoover Dam with Lake Mead, Boulder City, Seven Magic Mountains or Grand Canyon West.
By Rideshare or Taxi
A rideshare or taxi may work one way, but return availability can be less predictable than in central Las Vegas. For most visitors without a car, an organised tour is easier.
Parking at Hoover Dam
The main parking garage is on the Nevada side near the Visitor Center and usually charges a vehicle fee. Oversized vehicles, recreational vehicles and vehicles with trailers must use designated parking areas, some of which are on the Arizona side.
Free parking may be available farther away on the Arizona side, but it requires more walking. In hot weather, the closer paid parking is often worth it.
Best Time to Visit
The best time to visit Hoover Dam is early in the morning, especially in warm months. You will have cooler temperatures, easier parking and a better chance of tour availability.
Spring and autumn are generally the most comfortable seasons. Summer can be extremely hot and exposed, especially on the dam crest and bridge walkway. Winter is cooler and often pleasant for walking, although mornings can feel cold and windy.
How Long to Spend There
One hour: Enough for a quick photo stop, short walk across the dam and bridge viewpoint if you move quickly.
Two to three hours: Best for most visitors. This gives time for the Visitor Center, dam walk, photos and bridge viewpoint.
Half day: Ideal if you want a guided tour, lunch in Boulder City and extra time at Lake Mead.
Full day: Best if combining Hoover Dam with Grand Canyon West, Valley of Fire or a broader Las Vegas desert road trip.
Simple Hoover Dam Itinerary from Las Vegas
Half-Day Self-Drive Plan
8:00 am: Leave Las Vegas early.
8:45 am: Stop at the Mike O’Callaghan-Pat Tillman Memorial Bridge walkway for photos.
9:30 am: Park near the Hoover Dam Visitor Center.
10:00 am: Visit the Visitor Center or join a Power Plant Tour.
11:30 am: Walk across the dam and take photos from both Nevada and Arizona sides.
12:30 pm: Drive to Boulder City for lunch.
2:00 pm: Return to Las Vegas or continue to Lake Mead.
Hoover Dam and Lake Mead Plan
Start early at the dam and bridge viewpoint.
Take a Visitor Center or Power Plant Tour.
Drive to Lake Mead National Recreation Area.
Stop at the Lake Mead Visitor Center or a scenic overlook.
Return through Boulder City for food or a museum stop.
What to Combine With Hoover Dam
Boulder City
Boulder City is the closest town to Hoover Dam and a good stop for lunch, coffee, small-town streets and history. It was closely connected with the dam’s construction era and has a calmer atmosphere than Las Vegas.
Lake Mead National Recreation Area
Lake Mead is useful for scenic drives, water views, boating access, desert landscapes and short stops before or after Hoover Dam.
Historic Railroad Trail
The Historic Railroad Trail near Lake Mead follows part of the old railway route used during dam construction. It is a good option for walkers who want a level trail with tunnels and lake views.
Grand Canyon West Rim
Hoover Dam is often combined with Grand Canyon West on a long day trip from Las Vegas. This works best with an organised tour or an early self-drive start.
Seven Magic Mountains
Seven Magic Mountains is in a different direction from Hoover Dam, but some tours combine it with dam sightseeing. It is a colourful outdoor art stop south of Las Vegas.
What to Wear and Bring
Comfortable walking shoes
Hat and sunglasses
Sunscreen
Reusable water bottle
Light jacket in winter or for windy bridge conditions
Camera or phone with enough battery
Photo ID and booking confirmation if taking a tour
Small bag, as security screening applies for Visitor Center entry
Snacks if self-driving
Practical Travel Tips
Arrive Early for Tours
The Guided Dam Tour can sell out and is sold on site only. Arrive early if this tour is important to you.
Check Current Hours Before You Go
Hours may change for maintenance, events or holidays. Check the official Hoover Dam site before travelling.
Do the Bridge Viewpoint
The bridge walkway gives the best full view of Hoover Dam. It is worth the extra stop, especially for photos.
Expect Security Screening
Visitor Center entry requires security screening. Travel light and allow extra time.
Do Not Rely on National Park Passes
America the Beautiful and similar interagency passes are not accepted for Hoover Dam Visitor Center admission or guided tours.
Prepare for Heat
In summer, the dam, parking areas and bridge walkway can be extremely hot. Bring water and avoid the middle of the day where possible.
Know That Through-Traffic Cannot Cross the Dam
You can drive to the dam, but it is not a through-route into Arizona. To continue into Arizona, you must return to the highway and use the bypass bridge route.
Wear Proper Shoes
The bridge walkway, stairs, ramps and dam area involve more walking than many visitors expect.
Combine It With Boulder City
Boulder City makes the trip more relaxed, especially if you want lunch or a quieter break before returning to Las Vegas.
FAQs About Hoover Dam
Where is Hoover Dam?
Hoover Dam is on the Colorado River at the Nevada-Arizona border, about 30 miles southeast of Las Vegas and close to Boulder City.
Is Hoover Dam worth visiting?
Yes. Hoover Dam is one of the best short day trips from Las Vegas, especially for engineering, history, canyon views and Lake Mead scenery.
How far is Hoover Dam from Las Vegas?
Hoover Dam is about 30 miles from Las Vegas. The drive usually takes around 40 to 60 minutes from the Strip, depending on traffic.
Can you walk across Hoover Dam?
Yes. Visitors can walk across the top of the dam and view both the Lake Mead side and the Colorado River side.
Can you drive across Hoover Dam?
You can drive to Hoover Dam, but it is not a through-route for continuing into Arizona. Through traffic uses the Mike O’Callaghan-Pat Tillman Memorial Bridge.
Do you need a ticket to see Hoover Dam?
You can see the outside of the dam without taking a tour, but the Visitor Center and guided tours require paid tickets.
Which Hoover Dam tour is best?
The Power Plant Tour is the best choice for many visitors because it gives a guided underground experience without requiring the more limited full Dam Tour. The Guided Dam Tour is best for deeper engineering interest.
How long should you spend at Hoover Dam?
Most visitors should allow two to three hours. Add more time if taking a guided tour, visiting Lake Mead or stopping in Boulder City.
Is Hoover Dam good for children?
Yes. Children can enjoy the scale of the dam, the bridge view, the exhibits and the engineering story. Younger children may find long tours less engaging, so choose the visit length carefully.
What is the best viewpoint for Hoover Dam?
The Mike O’Callaghan-Pat Tillman Memorial Bridge walkway gives the best full view of the dam from above the Colorado River canyon.
Final Thoughts
Hoover Dam is one of the most rewarding short trips from Las Vegas. It is close enough for a half-day visit, but interesting enough to fill several hours with viewpoints, history, tours and Lake Mead scenery.
For the best experience, arrive early, stop at the bridge walkway for the classic photo, visit the Visitor Center or Power Plant Tour if time allows, then walk across the dam itself. Add Boulder City or Lake Mead to make the outing more relaxed and complete.
Sponsored Popular Items
Quick take: Musement.com offers a worldwide selection of tours and attractions
Hoover Dam Half-Day Raft Tour from Las Vegas – Guided Sightseeing Tour United States Hoover Dam half-day raft tour from Las Vegas USD 119 adds structure, local context and purposeful sightseeing to the itinerary. Check current availability, inclusions and booking details before you go.
Ultimate Hoover Dam VIP Tour with Lunch from Las Vegas United States Ultimate Hoover Dam VIP tour with lunch from Las Vegas explores the destination through flavour, regional customs and the stories connected with food or drink. Check current availability, inclusions and booking details before you go.
Hoover Dam Highlights Tour from Las Vegas – City Tour United States Hoover Dam highlights tour from Las Vegas is a convenient way to add structure, local context and purposeful sightseeing to the itinerary. Check current availability, inclusions and booking details before you go.
Yardang National Geopark, usually called Dunhuang Yardang National Geopark or Dunhuang Yadan National Geopark, is one of the most unusual desert landscapes in north-west China. Located beyond Dunhuang in Gansu Province, it is famous for wind-carved rock formations, dry Gobi scenery, long desert horizons and a strange ruined-city atmosphere that has earned it the nickname “Devil City” or “Ghost City.”
Yardang National Geopark Dunhuang: A Guide to China’s Desert “Ghost City”
For travellers following China’s Silk Road route, the geopark is a memorable contrast to Dunhuang’s Buddhist cave art, sand dunes and oasis scenery. It is remote, stark and powerful, with rock shapes that resemble castles, ships, animals, towers and ancient walls rising from the desert floor.
Sponsored Popular Items
Quick take: Musement.com offers a worldwide selection of tours and attractions
Private Shore Excursion: Eastern Kochi with UNESCO Geopark Best deals for Private Shore Excursion: Eastern Kochi with UNESCO Geopark. Explore the landscapes and culture of eastern Kochi in an itinerary perfect for cruise passengers. Visit the Muroto Global Geopark Center, and Mikurodo Cave. Available from getyourguide.com.
What Is Yardang National Geopark?
Dunhuang Yardang National Geopark is a protected desert landscape north-west of Dunhuang, in Gansu Province, China. It is known for yardang landforms: long, sculpted ridges and isolated rock masses shaped by wind, water erosion and the harsh conditions of the Gobi Desert.
The formations look like a ruined ancient city when seen from a distance. Some resemble towers, city walls, ships, animals or palaces. This makes the park one of the most dramatic geological stops on a Dunhuang itinerary.
The Chinese name is 敦煌雅丹国家地质公园. In travel listings, it may also appear as Dunhuang Yadan National Geological Park, Dunhuang Yardang Geopark, Yadan Devil City or simply Yardang National Geopark.
Why Visit Dunhuang Yardang?
Yardang National Geopark is worth visiting because it shows a completely different side of Dunhuang. The Mogao Caves reveal the region’s Buddhist art and Silk Road history, while Mingsha Mountain and Crescent Spring show classic oasis-and-dune scenery. Yardang Geopark gives you the raw desert geology: wind, rock, silence, distance and strange natural sculpture.
The landscape feels remote and almost otherworldly. In strong sun, the formations look pale and harsh. At sunset, the rocks turn gold, orange and red, and the shadows make the desert shapes more dramatic.
It is especially appealing for photographers, geology lovers, Silk Road travellers, desert scenery fans and visitors who want to see something beyond Dunhuang’s more famous attractions.
What Is a Yardang Landform?
A yardang is a wind-eroded landform shaped from softer rock, sediment or compacted material. Over long periods, wind and sand carve the landscape into ridges, grooves, mounds and streamlined shapes.
Many yardangs are longer than they are wide, and some look like boats, walls or long ridges when viewed from above. In Dunhuang, the formations are especially striking because they are concentrated across a dry desert plain and appear in many different shapes.
The result is not a normal mountain range or canyon. It is more like a natural sculpture field, shaped by desert wind and time.
Why Is It Called Devil City?
Dunhuang Yardang is often nicknamed “Devil City” or “Ghost City” because of its eerie landscape and the sound of wind moving through the formations. When strong winds blow across the desert, the rock corridors and ridges can create howling sounds.
The shapes also contribute to the name. From a distance, the formations can look like abandoned walls, ruined towers or a lost city in the desert. This gives the place a mysterious atmosphere, especially in late afternoon or after sunset.
What to See in the Geopark
The main attraction is the yardang landscape itself. Visitors usually see several named formations and viewing areas by shuttle bus or organised sightseeing route. Exact stops can vary, but common highlights may include formations compared to animals, ships, castles, towers or famous landmarks.
Wind-Carved Rock Formations
The park’s most distinctive feature is its natural rock architecture. Some formations rise like fortresses. Others look like crouching animals, ancient ships or broken city walls.
“Fleet” Landscapes
Some areas contain long ridges arranged across the desert like a fleet of ships. These shapes are among the most memorable examples of yardang erosion.
Desert Horizon Views
The openness is part of the experience. The Gobi landscape stretches far beyond the visitor route, giving the park a sense of isolation and scale.
Photography Stops
The formations are highly photogenic, especially when low-angle light creates strong shadows. Wide landscape shots work well, but close views of layered rock textures are also worth capturing.
Sunset at Yardang National Geopark
Sunset is the best time to see Yardang National Geopark. During the middle of the day, the desert light can be flat, bright and harsh. Late afternoon light adds colour, depth and shadow to the rock formations.
If possible, plan your visit so you are inside the scenic area during golden hour. The rock shapes become more dramatic, the desert temperature begins to ease, and the strange “lost city” feeling becomes much stronger.
Sunset visits require careful planning because the park is far from Dunhuang and tour schedules vary. Confirm return transport before committing to a late visit.
How the Visit Usually Works
Most visitors do not freely wander across the desert. Yardang National Geopark is usually visited through a managed route, commonly using scenic-area shuttle buses that stop at selected viewing points.
This system helps protect the fragile landforms and keeps visitors safe in a remote desert environment. Some areas may allow short walks around marked viewing zones, but visitors should not climb on formations or walk away into unmarked desert areas.
Some operators or scenic-area options may offer deeper exploration by special vehicle, but availability, cost and rules can change. Always confirm current arrangements locally.
How to Get There from Dunhuang
Yardang National Geopark is far outside Dunhuang city, so it is best visited by private driver, organised tour or a Silk Road day-trip route. It is not a quick town attraction.
Many travellers combine it with Yumen Pass, Han Great Wall ruins and other western Dunhuang historic sites. This makes better use of the long drive and gives the day both geological and Silk Road historical interest.
If you are travelling independently, ask your hotel or local travel agency to arrange a driver. Confirm the full price, route, waiting time, sunset timing and return to Dunhuang before departure.
What to Combine With Yardang Geopark
Yumen Pass
Yumen Pass, also known as Jade Gate Pass, is one of the classic historic stops west of Dunhuang. It was connected with ancient frontier routes and Silk Road travel.
Han Great Wall Ruins
Fragments of Han Dynasty frontier walls can be included on western Dunhuang routes. They add historical context to the desert landscape.
Yangguan Pass
Yangguan Pass is another important ancient pass linked with travel west from China. It can be visited on some Dunhuang itineraries depending on route planning.
Mogao Caves
The Mogao Caves are Dunhuang’s most famous cultural attraction. They are best visited separately rather than squeezed into a rushed Yardang day, because Mogao needs careful ticketing and a focused half-day visit.
Mingsha Mountain and Crescent Spring
Mingsha Mountain and Crescent Spring are best for sand dunes, camel rides and oasis scenery. They are closer to Dunhuang town and work well on a different day or evening.
Best Time to Visit
The best seasons for Dunhuang Yardang National Geopark are spring and autumn, when desert temperatures are generally more comfortable than peak summer and less cold than winter.
Summer can be very hot and exposed, especially at midday. Winter can be cold, windy and stark, but it may also be quieter. Desert weather can shift quickly, so check local conditions before leaving Dunhuang.
The best time of day is late afternoon into sunset. If photography matters, avoid the harshest midday light where possible.
How Long to Spend There
Allow at least half a day from Dunhuang because of the distance. The actual time inside the geopark may be around one to two hours for a standard visit, depending on the route, shuttle stops and whether you add sunset viewing.
If combining the geopark with Yumen Pass and other western Dunhuang sites, plan for a long day. Start early or plan carefully around sunset so you are not rushing the most scenic part of the visit.
What to Wear and Bring
Comfortable walking shoes
Hat or cap
Sunglasses
Sunscreen
Light scarf or face covering for dust and wind
Plenty of drinking water
Snacks for the long drive
Light jacket for sunset or cooler months
Phone with power bank
Camera with spare battery
Passport or ID if required for ticketing or travel checks
Cash or mobile payment option
Practical Travel Tips
Do Not Underestimate the Distance
Yardang National Geopark is remote. It is not like visiting a city museum or nearby temple. Plan transport properly and allow enough time for the return to Dunhuang.
Visit Near Sunset if You Can
The landscape is far more dramatic in low light. Sunset gives the formations colour, texture and stronger shadows.
Confirm Ticket and Shuttle Rules
Scenic-area ticketing, shuttle buses, special vehicle options and opening times can change. Confirm locally before travelling.
Bring Water
The desert is dry, exposed and far from city services. Carry more water than you think you need.
Stay on Marked Routes
The landforms are fragile and the desert can be disorienting. Do not wander into unmarked areas or climb the formations.
Prepare for Wind
Wind is part of the Yardang experience. A scarf, sunglasses and secure hat can make the visit more comfortable.
Use a Local Driver or Tour
For most travellers, a local driver or organised tour is the easiest way to visit. Public transport options can be limited and inconvenient.
Pair It With Silk Road Sites
Combining Yardang with Yumen Pass and Han Great Wall ruins gives the day more variety and helps justify the long drive.
Protect Your Camera Gear
Dust and sand can be hard on cameras and phones. Use a protective case or bag when wind picks up.
Check Weather Before Departure
Extreme heat, cold, dust or wind can affect the experience. Ask locally about conditions before committing to the journey.
FAQs About Yardang National Geopark
Where is Yardang National Geopark?
Dunhuang Yardang National Geopark is north-west of Dunhuang in Gansu Province, China, in the Gobi Desert region.
Is Yardang National Geopark worth visiting?
Yes, it is worth visiting if you enjoy desert scenery, geology, photography and unusual landscapes. It is especially good as part of a Dunhuang Silk Road itinerary.
What is a yardang?
A yardang is a wind-eroded landform, usually shaped into ridges, mounds or streamlined rock forms by desert erosion over long periods.
Why is Dunhuang Yardang called Devil City?
It is called Devil City because the wind can howl through the formations, and the rock shapes look like a ruined ghost city in the desert.
Can you visit Yardang National Geopark from Dunhuang in one day?
Yes, but it is a long outing. Most visitors combine it with Yumen Pass, Han Great Wall ruins or other western Dunhuang sites.
What is the best time to visit Yardang National Geopark?
Spring and autumn are generally the best seasons. Late afternoon and sunset are the best times of day for photography.
Can you walk freely inside the geopark?
No, visitors usually follow managed routes and shuttle stops. This protects the fragile formations and keeps visitors safe in the desert.
Do you need a guide?
A guide is not always essential, but a local driver or tour is strongly recommended because the geopark is far from Dunhuang and transport logistics can be difficult.
What should I combine with Yardang Geopark?
Good combinations include Yumen Pass, Han Great Wall ruins, Yangguan Pass, Mingsha Mountain, Crescent Spring and the Mogao Caves on a separate day.
Is Yardang National Geopark good for children?
It can be interesting for older children who enjoy unusual landscapes, but the long drive, heat, wind and limited shade may be difficult for younger children.
Final Thoughts
Yardang National Geopark is one of Dunhuang’s most striking natural attractions. Its wind-carved ridges, desert towers and ghost-city atmosphere make it feel very different from the oasis, cave and dune landscapes closer to town.
For the best experience, plan it as a proper half-day or full-day outing from Dunhuang, aim for sunset light, bring water and sun protection, and combine it with nearby Silk Road sites if time allows. The journey is long, but the reward is one of north-west China’s most memorable desert landscapes.
Sponsored Popular Items
Quick take: Musement.com offers a worldwide selection of tours and attractions
Private Shore Excursion: Eastern Kochi with UNESCO Geopark Best deals for Private Shore Excursion: Eastern Kochi with UNESCO Geopark. Explore the landscapes and culture of eastern Kochi in an itinerary perfect for cruise passengers. Visit the Muroto Global Geopark Center, and Mikurodo Cave. Available from getyourguide.com.
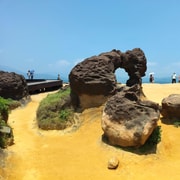
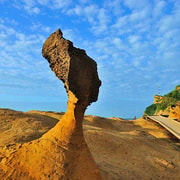
Yehliu Geopark, Jiufen Street, Shihfen Lantern One-Day Tour Best deals for Yehliu Geopark, Jiufen Street, Shihfen Lantern One-Day Tour. The most famous and must see spots in Taipei city for foreign visitors who just want to explore the exciting of Taiwan. Guests can visit the exciting places in one day and have unforgettable memory. Available from getyourguide.com.
Yehliu Geopark Admission Ticket Best deals for Yehliu Geopark Admission Ticket. Appreciate northern Taiwan's natural masterpieces. Witness sea erosion shaping rocks and the cape into real-life object forms. Enjoy convenient entry with QR codes. Available from getyourguide.com.
Las Vegas is one of the most famous entertainment cities in the world. Known for its neon lights, casino resorts, live shows, celebrity restaurants, nightlife, shopping, pool clubs and desert scenery, it is a destination built around spectacle, choice and energy.
Las Vegas Travel Guide: The Strip, Shows, Casinos, Food, Fremont Street and Desert Day Trips
Most first-time visitors focus on the Las Vegas Strip, where huge themed resorts line Las Vegas Boulevard. But the city also offers Downtown Las Vegas, Fremont Street, the Arts District, museums, sports venues, family attractions and easy day trips to places like Red Rock Canyon, Hoover Dam, Valley of Fire and the Grand Canyon West Rim.
Sponsored Popular Items
Quick take: Musement.com offers a worldwide selection of tours and attractions
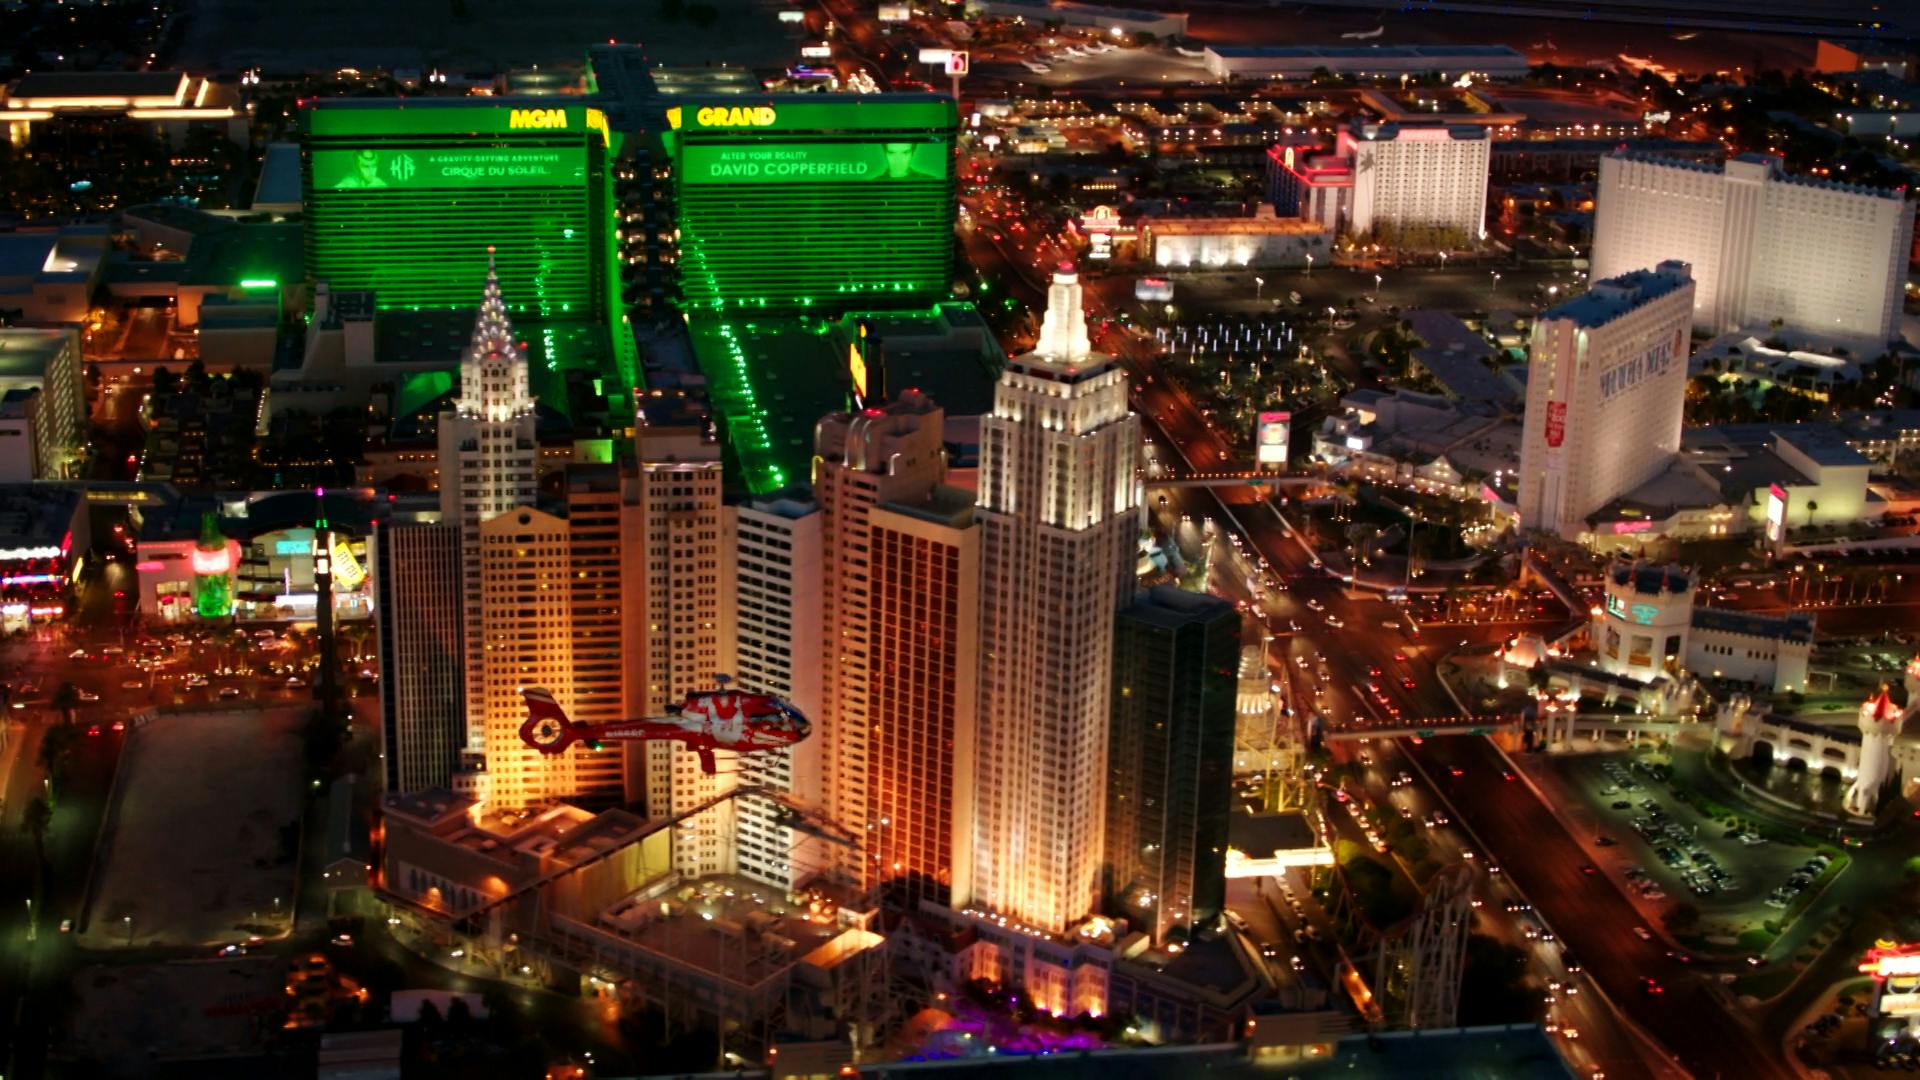
Las Vegas Strip Highlights Night Flight - Guided Sightseeing Tour United States Las Vegas Strip highlights night flight is a convenient way to add structure, local context and purposeful sightseeing to the itinerary. Check current availability, inclusions and booking details before you go.
Why Visit Las Vegas?
Las Vegas is worth visiting because it combines entertainment, food, nightlife, architecture, shopping and desert scenery in one compact travel experience. You can watch a world-class show, eat at a celebrity-chef restaurant, walk through themed resorts, see free attractions, visit a casino, relax by a pool and take a canyon or desert day trip all in the same holiday.
The city works for many travel styles. It can be a party weekend, a luxury escape, a food-focused break, a sports trip, a family holiday, a wedding destination, a road-trip stop or a base for exploring Nevada, Arizona and Utah landscapes.
The Las Vegas Strip
The Las Vegas Strip is the city’s main visitor zone. It is the stretch of Las Vegas Boulevard lined with large casino resorts, theatres, restaurants, bars, shops, fountains, themed architecture and bright signage.
Walking the Strip is part of the experience, but distances are longer than they look. Resorts are huge, pedestrian bridges add extra walking, and summer heat can make short distances feel tiring. Choose a few key areas each day rather than trying to walk everything at once.
Popular Strip Areas
Central Strip: Bellagio, Caesars Palace, Paris Las Vegas, The Cosmopolitan and nearby resorts.
South Strip: MGM Grand, New York-New York, Excalibur, Luxor and Mandalay Bay.
North Strip: The Venetian, Wynn, Encore, Resorts World, Fontainebleau and The STRAT area.
Bellagio Fountains
The Bellagio Fountains are one of the best free things to see in Las Vegas. The show combines water, lights and music on the lake in front of Bellagio, with the Paris Las Vegas Eiffel Tower replica and Strip lights nearby.
It is especially beautiful at night, but daytime shows are also worth seeing if you are nearby. For the best view, stand along the Bellagio lake railings, across the street near Paris Las Vegas, or from a restaurant or bar with a fountain view.
Sphere Las Vegas
Sphere has quickly become one of Las Vegas’ most talked-about modern venues. Its huge exterior display is visible from many parts of the Strip, while the interior hosts immersive shows, concerts and special events.
If you want to attend an event, book ahead and check the exact show schedule. Sphere is not only a building to photograph from outside; it is designed as a full entertainment venue with immersive visuals and sound.
Fremont Street and Downtown Las Vegas
Downtown Las Vegas offers a different atmosphere from the Strip. Fremont Street is famous for its covered light canopy, street performers, live music, older casinos, bars and the SlotZilla zipline.
This area feels louder, grittier and more compact than the Strip. It is good for an evening out, especially if you want old-school Vegas energy, neon signs, casual bars and a less polished casino scene.
Nearby, the Downtown Arts District offers murals, independent restaurants, bars, vintage shops, galleries and a more local-feeling side of Las Vegas.
Casinos and Resorts
Las Vegas casinos are not only for gambling. Many resorts are attractions in themselves, with themed architecture, restaurants, shops, gardens, aquariums, theatres, art, pools and nightlife.
If you do gamble, set a strict budget before you start and treat it as entertainment money, not a way to make money. Casino floors are designed to keep you inside, so take breaks, drink water and keep track of time.
Resorts Worth Walking Through
Bellagio: Fountains, conservatory, restaurants and elegant interiors.
The Venetian: Canals, gondolas, shops and Italian-inspired design.
Caesars Palace: Roman-inspired interiors, Forum Shops and entertainment venues.
Wynn and Encore: Luxury design, gardens, restaurants and nightlife.
Paris Las Vegas: Eiffel Tower replica and central Strip views.
New York-New York: City-themed exterior and roller coaster.
Shows and Entertainment
Shows are one of the best reasons to visit Las Vegas. Options include Cirque-style productions, magic, comedy, concerts, residencies, tribute shows, adult revues, immersive experiences and sports events.
Book popular shows ahead, especially on weekends and holiday periods. If you are flexible, same-day ticket booths and apps may offer discounted seats for selected performances.
Common Entertainment Types
Cirque-style acrobatic shows
Magic and illusion shows
Comedy shows
Concert residencies
Sphere immersive shows
Sports events
Nightclubs and dayclubs
Family-friendly performances
Where and What to Eat
Las Vegas has one of the most varied dining scenes in the United States. You can eat at luxury fine-dining restaurants, buffets, celebrity-chef venues, steak houses, casual food halls, late-night diners, Asian restaurants, Mexican eateries, pizza shops and local neighbourhood favourites.
The Strip is best for big-name restaurants, hotel dining and special occasion meals. Downtown and the Arts District can be better for a more local, less resort-focused food experience.
Food Experiences to Consider
A classic Las Vegas buffet
A steakhouse dinner
A celebrity-chef restaurant
Late-night pizza or diner food
Chinatown restaurants west of the Strip
Downtown Arts District dining
Rooftop or fountain-view cocktails
Family-Friendly Las Vegas
Las Vegas is famous for adult entertainment, but it also has plenty for families. The key is choosing the right hotel, location and activities.
Family-friendly options include the Bellagio Fountains, themed resort walks, aquariums, observation wheels, museums, arcades, magic shows, roller coasters, chocolate shops, pool time and day trips to natural attractions.
Family-Friendly Ideas
Bellagio Fountains
Bellagio Conservatory
High Roller Observation Wheel
Shark Reef Aquarium at Mandalay Bay
Discovery Children’s Museum
AREA15 attractions
Red Rock Canyon scenic drive
Hoover Dam day trip
Shopping in Las Vegas
Las Vegas is excellent for shopping, especially if you enjoy large malls, luxury brands, outlet centres and resort shopping arcades.
Popular Shopping Areas
Forum Shops at Caesars Palace: Luxury and designer shopping in a themed setting.
Grand Canal Shoppes: Venetian-style shopping, restaurants and indoor canals.
Fashion Show Las Vegas: Large mall opposite Wynn and The Venetian.
Miracle Mile Shops: Central Strip shopping at Planet Hollywood.
Las Vegas North Premium Outlets: Popular outlet shopping north of Downtown.
Las Vegas South Premium Outlets: Outlet shopping south of the Strip.
Best Day Trips from Las Vegas
Las Vegas is surrounded by desert, canyons, mountains and historic sites. If you stay more than two or three nights, adding a day trip can balance the bright lights with natural scenery.
Red Rock Canyon
Red Rock Canyon is one of the easiest nature escapes from Las Vegas. It is ideal for scenic drives, short walks, desert photography and sandstone cliffs.
Hoover Dam
Hoover Dam is a classic engineering and history day trip, often combined with Lake Mead or the Grand Canyon West Rim.
Valley of Fire State Park
Valley of Fire is known for red sandstone formations, desert colours, short hikes and dramatic photo stops.
Grand Canyon West Rim
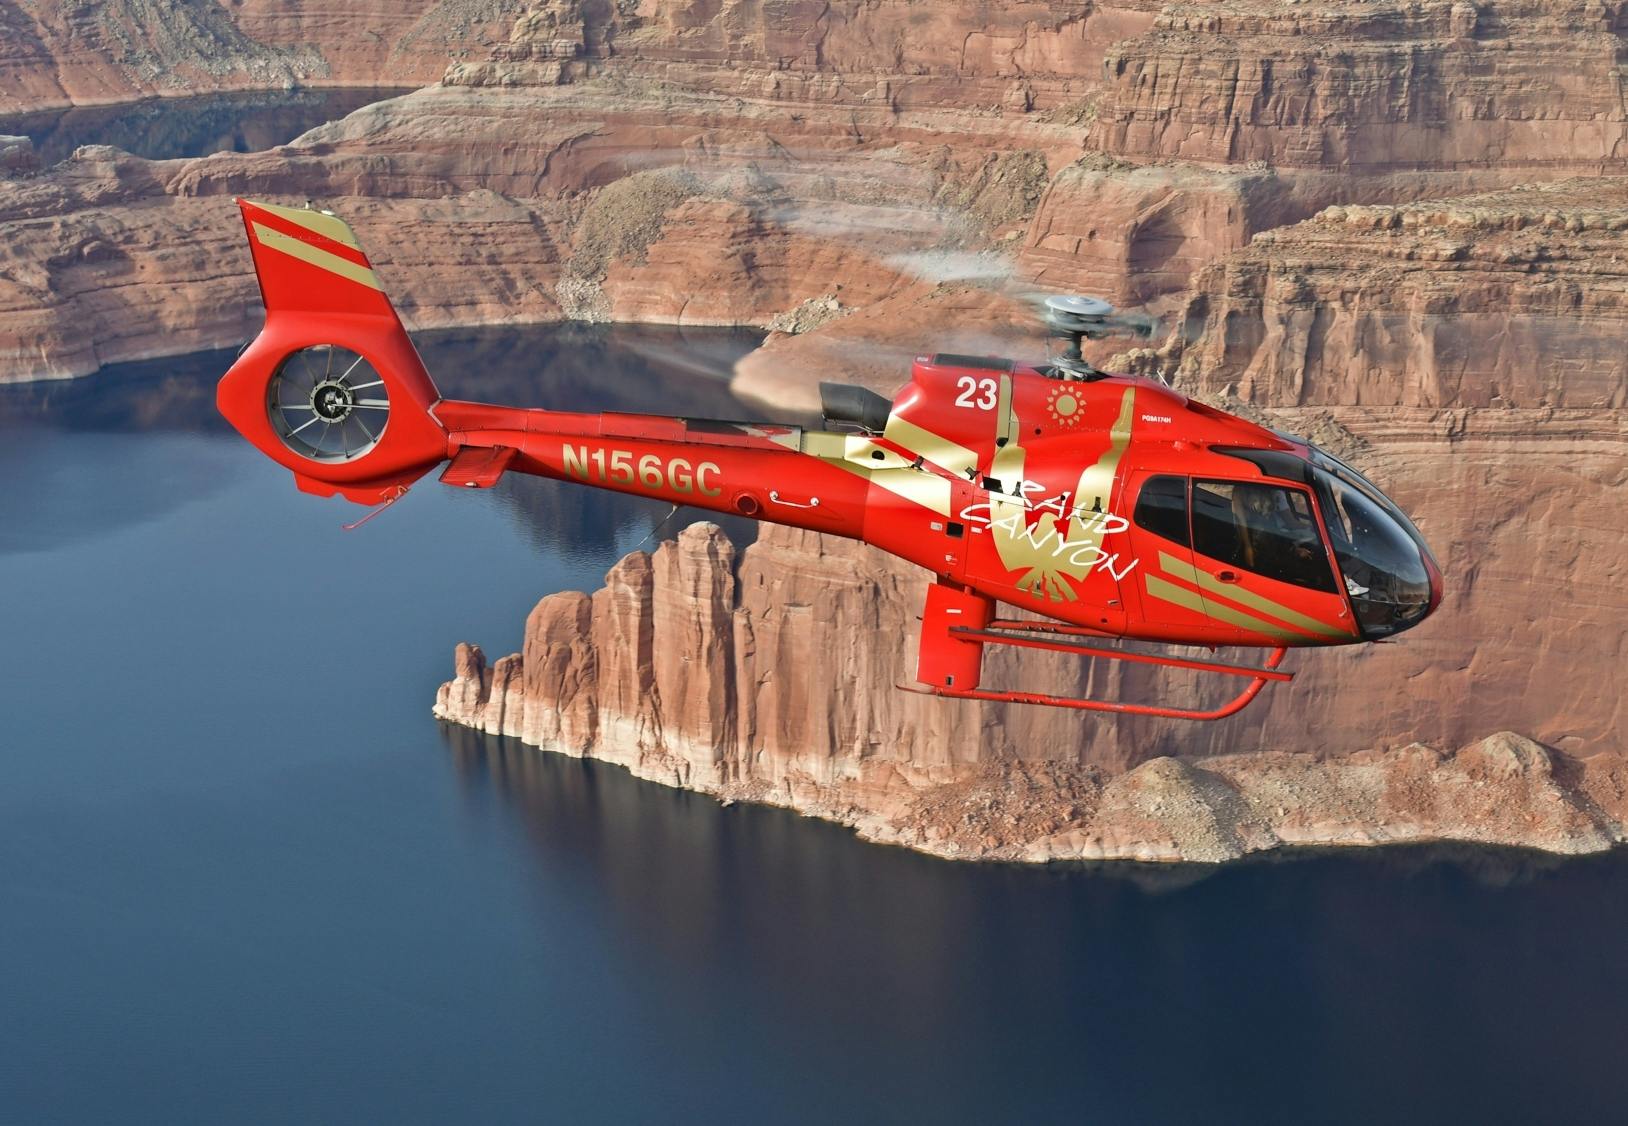
Grand Canyon West is the closest major Grand Canyon experience to Las Vegas and is known for the Skywalk at Eagle Point. The official Grand Canyon West FAQ describes Las Vegas as approximately a two-hour drive from Grand Canyon West. :contentReference[oaicite:4]{index=4}
Death Valley National Park
Death Valley can be visited from Las Vegas on a long day trip, especially in cooler months. Avoid extreme heat and check road and weather conditions carefully.
Where to Stay
Where you stay in Las Vegas shapes the whole trip. First-time visitors usually do best on or near the Strip, especially if they want shows, casinos, dining and easy walking access.
Best Areas
Central Strip: Best for first-timers who want easy access to major resorts and attractions.
South Strip: Good for families, events, sports venues and airport access.
North Strip: Good for newer luxury resorts and a slightly less central base.
Downtown Las Vegas: Good for Fremont Street, lower room rates and old-school Vegas atmosphere.
Off-Strip: Good for quieter stays, local dining and travellers with a car.
Always check resort fees before booking. Las Vegas hotel rates can look cheap at first, but resort fees, parking charges and taxes can change the true cost.
How Long to Stay
Two nights: Enough for a quick Strip visit, one show and a few major attractions.
Three nights: A good minimum for first-time visitors. You can explore the Strip, see a show, visit Fremont Street and enjoy several restaurants.
Four nights: Better if you want a day trip to Red Rock Canyon, Hoover Dam or Grand Canyon West.
Five nights or more: Good for a slower trip with pool time, shopping, shows, food, nightlife and multiple day trips.
Simple Las Vegas Itinerary
Day 1: Arrival and Central Strip
Arrive at Harry Reid International Airport and transfer to your hotel.
Explore your resort and nearby Strip area.
See the Bellagio Fountains at night.
Have dinner at a central Strip restaurant.
Day 2: Resorts, Shopping and a Show
Walk through Bellagio, Caesars Palace, Paris Las Vegas and The Venetian.
Shop at the Forum Shops, Grand Canal Shoppes or Fashion Show mall.
Relax by the pool or visit a museum or attraction in the afternoon.
Book a show or concert for the evening.
Day 3: Downtown Las Vegas and Fremont Street
Spend the morning at a relaxed breakfast or brunch.
Visit the Arts District, Neon Museum or Mob Museum.
Head to Fremont Street in the evening for lights, music and old-school casinos.
Return to the Strip or stay Downtown for nightlife.
Day 4: Desert Day Trip
Choose Red Rock Canyon for an easy nature escape.
Choose Hoover Dam for history and engineering.
Choose Grand Canyon West for a longer canyon day trip.
Return to Las Vegas for a final dinner or rooftop drink.
Best Time to Visit
The best time to visit Las Vegas is generally spring or autumn, when temperatures are warm but not as extreme as summer. These seasons are good for walking the Strip and taking day trips into the desert.
Summer can be very hot, especially from June to September. If visiting in summer, plan outdoor walking early or late, use rideshare or taxis more often, and stay hydrated.
Winter is cooler and can be a good value period outside major holidays, conventions and event weekends. Pool season may be limited depending on the hotel.
Getting Around Las Vegas
Las Vegas looks walkable on a map, but resorts are large and distances are deceptive. Use a mix of walking, rideshare, taxis, monorail, trams and buses depending on your route.
Transport Options
Walking: Best for short Strip sections, especially in cooler weather.
Rideshare and taxis: Convenient, but pickup points can be inside hotel garages or designated zones.
Las Vegas Monorail: Useful on the east side of the Strip.
Free resort trams: Helpful between selected resort clusters.
Rental car: Useful for day trips, but not always needed for a Strip-focused stay.
Bus: Useful for budget travellers, especially between the Strip and Downtown.
Las Vegas Airport
Harry Reid International Airport is the main airport serving Las Vegas. It is close to the Strip compared with many major city airports, making transfers relatively straightforward by taxi, rideshare, shuttle or rental car.
Check whether your flight uses Terminal 1 or Terminal 3, as they are separate terminal areas. If departing during busy convention, holiday or weekend periods, allow extra time for traffic, check-in and security.
Practical Travel Tips
Watch Resort Fees
Resort fees are common in Las Vegas and can add a significant amount to the nightly price. Check the full cost before booking.
Book Shows Early
Popular shows, concerts and Sphere events can sell out or become expensive close to the date. Book early for must-see performances.
Use Comfortable Shoes
You will walk more than expected. The Strip is long, casinos are huge and pedestrian bridges add extra steps.
Stay Hydrated
The desert climate can dehydrate you quickly, especially in summer or when drinking alcohol.
Do Not Overpack Each Day
Las Vegas can be tiring. Leave time for pool breaks, naps, long meals or simply exploring your hotel.
Set a Gambling Budget
If you gamble, decide your limit before you start. Treat it as entertainment, not income.
Check Restaurant Dress Codes
Casual clothes are fine in many places, but high-end restaurants, clubs and lounges may have dress codes.
Plan Day Trips Carefully
Desert day trips can involve heat, long drives and limited services. Carry water, fuel up before leaving and check weather conditions.
Expect Dynamic Pricing
Hotel prices can change dramatically during conventions, sports events, concerts and holiday weekends.
Use Designated Pickup Areas
Large resorts often have specific taxi and rideshare pickup zones. Follow signs rather than waiting at random entrances.
FAQs About Las Vegas
Is Las Vegas worth visiting?
Yes. Las Vegas is worth visiting for entertainment, shows, restaurants, nightlife, casinos, shopping, pool resorts, sports events and desert day trips.
How many days do you need in Las Vegas?
Three nights is a good minimum for first-time visitors. Four nights is better if you want a day trip to Red Rock Canyon, Hoover Dam or Grand Canyon West.
What is Las Vegas famous for?
Las Vegas is famous for the Strip, casino resorts, live shows, Bellagio Fountains, nightlife, celebrity restaurants, weddings, pool clubs and nearby desert attractions.
Where should first-time visitors stay?
First-time visitors usually do best on the central Strip, close to Bellagio, Caesars Palace, Paris Las Vegas, The Cosmopolitan and nearby resorts.
Is Las Vegas only for gambling?
No. Gambling is a major part of Las Vegas, but many visitors come for shows, dining, shopping, spas, pools, sports, museums, nightlife and day trips.
Is Las Vegas suitable for families?
Yes, if you choose activities carefully. Families can enjoy fountains, aquariums, observation wheels, museums, magic shows, pools, arcades and nearby nature trips.
What is the best free thing to do in Las Vegas?
The Bellagio Fountains are one of the best free attractions. Walking through themed resorts and exploring Fremont Street are also popular low-cost experiences.
Do you need a car in Las Vegas?
You do not need a car for a Strip-focused stay. A car is useful if you want to visit Red Rock Canyon, Hoover Dam, Valley of Fire or other day-trip destinations.
What is the best time of year to visit Las Vegas?
Spring and autumn are generally the most comfortable. Summer is very hot, while winter is cooler and can be good for lower prices outside major events.
Can you do the Grand Canyon as a day trip from Las Vegas?
Yes. Grand Canyon West is the easiest Grand Canyon day trip from Las Vegas. The South Rim is farther and is better with an overnight stay if possible.
Final Thoughts
Las Vegas is a city built for variety. You can make it glamorous, casual, food-focused, family-friendly, outdoorsy, nightlife-heavy or completely show-centred depending on how you plan your trip.
For the best first visit, stay on or near the Strip, see at least one show, watch the Bellagio Fountains, spend an evening Downtown at Fremont Street, try a memorable restaurant and leave time for a desert day trip. Las Vegas is brightest at night, but its best trips balance neon, food, entertainment and the dramatic landscapes just beyond the city.
Sponsored Popular Items
Quick take: Musement.com offers a worldwide selection of tours and attractions
Las Vegas Strip Highlights Night Flight - Guided Sightseeing Tour United States Las Vegas Strip highlights night flight is a convenient way to add structure, local context and purposeful sightseeing to the itinerary. Check current availability, inclusions and booking details before you go.
King of Canyons Landing Tour with Las Vegas Strip – Guided Tour King of Canyons Landing Tour with Las Vegas Strip is a convenient way to add structure, local context and purposeful sightseeing to the itinerary. Check current availability, inclusions and booking details before you go.
Grand Canyon West Rim is one of the most popular Grand Canyon day trips from Las Vegas. Famous for the glass Skywalk at Eagle Point, wide canyon views at Guano Point, Hualapai cultural experiences and optional adventure activities, it offers a very different experience from the South Rim inside Grand Canyon National Park.
Grand Canyon West Rim: A Practical Guide to the Skywalk, Eagle Point, Guano Point and Las Vegas Day Trips
Grand Canyon West is located on Hualapai tribal land in north-west Arizona. It is closer to Las Vegas than the South Rim, making it a practical choice for visitors who want to see the Grand Canyon in one long day without driving four to five hours each way.
Sponsored Popular Items
Quick take: Musement.com offers a worldwide selection of tours and attractions
North Canyon Helicopter Tour from Grand Canyon South Rim – Tusayan Scenic Flight United States North Canyon Helicopter Tour from the Grand Canyon South Rim: What to Expect A short, narrated helicopter flight designed to show the Grand Canyon’s widest, deepest sections from above. Check current availability, inclusions and booking details before you go.
What Is Grand Canyon West Rim?
Grand Canyon West Rim, usually promoted as Grand Canyon West, is a visitor area on the Hualapai Reservation in Arizona. It is best known for the Skywalk, a glass bridge that extends out over the canyon at Eagle Point.
The West Rim is not part of Grand Canyon National Park. It has its own ticketing, opening hours, shuttle system, activities and visitor rules. This is important because national park passes, South Rim advice and National Park Service shuttle information do not apply in the same way here.
The main visitor areas are Eagle Point, Guano Point and Hualapai Point. Visitors usually park at the main terminal and use the in-park shuttle to move between stops.
Grand Canyon West Rim vs South Rim
The West Rim and South Rim are often confused, but they are very different experiences.
Grand Canyon West Rim
Closest major Grand Canyon experience to Las Vegas.
Home to the Skywalk glass bridge.
Located on Hualapai tribal land.
Operates with its own admission tickets and shuttle system.
Good for a one-day Las Vegas tour.
More commercial and activity-focused than the South Rim.
Grand Canyon South Rim
Part of Grand Canyon National Park.
Farther from Las Vegas but more iconic for classic national park scenery.
Offers extensive rim trails, viewpoints, lodges, visitor centres and ranger programs.
Better for hiking, photography and a deeper national park visit.
Usually best with an overnight stay if travelling from Las Vegas.
If you want the classic national park experience, choose the South Rim. If you want the closest Grand Canyon day trip from Las Vegas and the Skywalk experience, choose Grand Canyon West.
Why Visit the West Rim?
Grand Canyon West Rim is worth visiting if you want dramatic canyon views within a manageable day trip from Las Vegas. It is especially popular with travellers who have limited time, want to walk on the Skywalk, or prefer an organised tour with transport included.
The West Rim also gives visitors a chance to learn about the Hualapai Tribe, whose land and culture are central to the experience. Cultural exhibits, performances and guided interpretation may be included depending on your ticket and timing.
It is a good choice for families, first-time visitors, cruise-style coach tour travellers, and anyone wanting a mix of sightseeing, photos, food stops and optional adventure activities.
Grand Canyon Skywalk
The Skywalk is the signature attraction at Grand Canyon West. It is a horseshoe-shaped glass bridge that extends out from the rim at Eagle Point, giving visitors the sensation of standing above the canyon.
The glass floor is the main thrill. Looking down through the transparent walkway can be exciting, intimidating or slightly dizzying depending on how you feel about heights. Visitors wear protective booties over their shoes to help protect the glass surface.
The Skywalk is not a long walk, but it is memorable. It is best for travellers who want a unique photo experience and a dramatic viewpoint rather than a long hiking route.
Skywalk Rules to Know
Shoes are required.
Protective booties are worn over shoes.
Cell phones are currently permitted, but visitors are responsible for their own device.
Cameras, purses, backpacks and similar belongings are not allowed on the glass bridge.
Free lockers are provided for personal items.
Professional photos may be available for purchase.
Peak Skywalk hours are often late morning to mid-afternoon.
Eagle Point
Eagle Point is the home of the Skywalk and one of the main stops at Grand Canyon West. It is named for a natural rock formation that resembles an eagle with outstretched wings.
This area is usually the busiest part of the West Rim because most visitors come specifically for the Skywalk. It also includes canyon viewpoints, cultural exhibits, dining and shopping options depending on current operations.
Take time to look beyond the Skywalk. The canyon views around Eagle Point are impressive, and the eagle-shaped rock formation is part of the cultural and visual identity of this stop.
Guano Point
Guano Point is often the favourite West Rim stop for travellers who care most about open canyon scenery. It has wide views, rugged walking areas and a more natural feel than the Skywalk area.
The viewpoint offers broad canyon panoramas and a chance to walk along rocky areas for different angles. This is one of the best places at Grand Canyon West for photography, especially if you want sweeping views rather than the glass-bridge experience.
Wear proper shoes and stay well back from edges. Some areas are uneven, exposed and unfenced.
Hualapai Point
Hualapai Point is a visitor area with food, family activities, cultural experiences, shopping, cabins and optional attractions depending on your ticket and availability. It can be a useful stop for meals, shade and a break between canyon viewpoints.
The zipline is associated with Hualapai Point and may be included in some ticket packages, but availability can depend on weather, wind, operations and capacity. Always check current details before planning your day around it.
Tickets and Passes
Grand Canyon West uses its own ticket system. The main ticket types usually include general admission and upgraded passes that include the Skywalk and other activities.
General admission is suitable if you want canyon views and walking areas without the Skywalk. The All-Access Pass is better if the Skywalk is your main reason for visiting or if you want access to additional activities such as the zipline, shuttle service, cultural experiences and other inclusions.
Ticket inclusions and prices can change, so always check the official Grand Canyon West ticket page before booking. If you are joining a tour from Las Vegas, confirm whether your tour includes admission, Skywalk, lunch, helicopter rides, boat rides or optional upgrades.
How to Get There from Las Vegas
Grand Canyon West is one of the easiest Grand Canyon areas to visit from Las Vegas. The drive is usually around two hours each way, depending on traffic, road conditions and stops.
The official address is:
Grand Canyon West
5001 E. Diamond Bar Road
Meadview, AZ 86444
Many visitors combine the trip with Hoover Dam, Lake Mead, Joshua tree desert scenery or a photo stop along the route.
Self-Drive from Las Vegas
Self-driving gives you the most flexibility. You can leave early, stop at Hoover Dam, spend as long as you want at the viewpoints and avoid being tied to a coach schedule.
Before self-driving, check the following:
Opening hours and last entry time.
Current ticket prices and inclusions.
Fuel level before leaving Las Vegas.
Road conditions and weather.
Arizona time zone details.
Rental car rules and insurance coverage.
Once you arrive, expect to park and use the Grand Canyon West shuttle system to move between visitor points.
Tours from Las Vegas
Guided tours from Las Vegas are very popular. They can be simpler than self-driving because transport, timing and ticketing are handled for you.
Common Tour Options
Coach tours from Las Vegas.
Small-group van tours.
Skywalk admission upgrade tours.
Helicopter tours to the West Rim.
Helicopter and Colorado River boat combinations.
Hoover Dam and West Rim combination tours.
Sunset tours.
When comparing tours, check exactly what is included. Some tours advertise a low base price but charge extra for Skywalk, lunch, helicopter rides, boat rides or hotel pickup from certain locations.
Best Time to Visit
The best time to visit Grand Canyon West is usually spring or autumn, when temperatures are more comfortable than peak summer. Winter can be quieter and cooler, while summer can be very hot and exposed.
For the best experience, arrive early. Morning visits can mean easier parking, shorter queues, cooler temperatures and better light before the busiest part of the day.
Late afternoon can be beautiful for softer light and sunset views, but you must pay attention to last entry and park closing times. If using a sunset pass or evening tour, check timing carefully.
How Long to Spend There
Two hours: Very rushed, enough only for a short visit to the main viewpoints.
Three to four hours: A reasonable amount of time for Eagle Point, Skywalk and Guano Point.
Four to five hours: Better if you want lunch, Hualapai Point, cultural experiences or a slower pace.
Full day from Las Vegas: Most visitors should treat the West Rim as a full-day outing once driving, tickets, shuttles and stops are included.
Simple Grand Canyon West Rim Itinerary
Self-Drive Day Trip from Las Vegas
7:00 am: Leave Las Vegas early.
8:00 am: Optional Hoover Dam photo stop.
10:00 am: Arrive at Grand Canyon West and check in.
10:30 am: Visit Eagle Point and walk the Skywalk if included.
12:00 pm: Take the shuttle to Guano Point for canyon views and photos.
1:30 pm: Lunch at a Grand Canyon West dining stop.
2:30 pm: Visit Hualapai Point or return to favourite viewpoints.
3:30 pm: Begin the drive back to Las Vegas.
5:30 pm: Arrive back in Las Vegas, depending on traffic and stops.
Las Vegas Tour Plan
Choose a tour that clearly states whether Skywalk is included.
Confirm hotel pickup time and pickup location.
Bring water, sun protection and a charged phone.
Expect a long day with early departure and several hours on the road.
Use free time at Grand Canyon West to prioritise Eagle Point and Guano Point.
What to Wear and Bring
Comfortable walking shoes
Hat and sunglasses
Sunscreen
Reusable water bottle
Light jacket in winter or for early morning
Breathable clothing in summer
Phone with enough battery
Power bank
Small bag for items not taken onto the Skywalk
Photo ID and booking confirmation
Snacks if driving independently
Practical Travel Tips
Know That It Is Not the National Park
Grand Canyon West is operated by the Hualapai Tribe and is not part of Grand Canyon National Park. Check Grand Canyon West rules, not South Rim rules, before visiting.
Check Ticket Inclusions Carefully
General admission may not include the Skywalk. If walking on the glass bridge matters to you, book a ticket or tour that clearly includes it.
Arrive Early
Early arrival helps you avoid the busiest Skywalk period, which is often late morning through mid-afternoon.
Use the Free Lockers for Skywalk Items
Backpacks, cameras, purses and similar personal items are not allowed on the glass bridge. Use the lockers and only take permitted items.
Keep Your Phone Secure
Phones are currently allowed on the Skywalk, but you are responsible for your device. Do not lean over railings or hold your phone in unsafe ways.
Wear Proper Shoes
Guano Point and other walking areas can be rocky and uneven. Avoid flip-flops or slippery sandals.
Respect Hualapai Land
You are visiting sovereign tribal land. Follow posted rules, respect cultural exhibits and do not enter restricted areas.
Prepare for Heat
Summer can be extremely hot and exposed. Carry water, wear sun protection and avoid overexertion during the hottest part of the day.
Watch the Time Zone
Grand Canyon West operates on Arizona time. Check the current time difference from Las Vegas when planning departures, tours and last entry.
Do Not Underestimate the Drive
Even though Grand Canyon West is closer to Las Vegas than the South Rim, it is still a long day. Avoid driving tired, especially after sunset.
FAQs About Grand Canyon West Rim
Is Grand Canyon West Rim worth visiting?
Yes, Grand Canyon West Rim is worth visiting if you want a convenient Grand Canyon day trip from Las Vegas, Skywalk access and dramatic canyon views. Choose the South Rim instead if you want the classic national park experience.
Is Grand Canyon West part of Grand Canyon National Park?
No. Grand Canyon West is on Hualapai tribal land and is not part of Grand Canyon National Park.
How far is Grand Canyon West from Las Vegas?
Grand Canyon West is about a two-hour drive from Las Vegas, depending on traffic, road conditions and stops.
What is the Skywalk?
The Skywalk is a horseshoe-shaped glass bridge at Eagle Point that extends over the canyon rim, allowing visitors to look down through the glass floor.
Can you take photos on the Skywalk?
Cell phones are currently permitted on the Skywalk, but cameras, backpacks, purses and similar items are not allowed. Professional photos may also be available.
What are the main viewpoints at Grand Canyon West?
The main visitor stops are Eagle Point, Guano Point and Hualapai Point. Eagle Point has the Skywalk, while Guano Point is especially good for wide canyon views.
How long do you need at Grand Canyon West?
Allow at least three to four hours at Grand Canyon West itself. From Las Vegas, plan for a full-day outing including travel time.
Can you visit Grand Canyon West without a tour?
Yes. You can self-drive from Las Vegas or other areas, buy admission and use the in-park shuttle system. Tours are easier if you do not want to drive.
Is the West Rim better than the South Rim?
Neither is simply better. The West Rim is closer to Las Vegas and has the Skywalk. The South Rim is part of Grand Canyon National Park and offers the classic national park scenery, trails and viewpoints.
Is Grand Canyon West good for families?
Yes. Families can enjoy the viewpoints, shuttle stops, cultural experiences and Skywalk. Children are welcome on the Skywalk, but strollers are not permitted on the glass bridge.
Final Thoughts
Grand Canyon West Rim is one of the easiest ways to experience the Grand Canyon from Las Vegas. The Skywalk gives it a unique thrill, Eagle Point adds cultural and visual interest, and Guano Point offers some of the best open canyon views in the area.
For the best visit, book the right ticket, arrive early, check Skywalk rules, wear proper shoes and allow enough time for both Eagle Point and Guano Point. If you understand that Grand Canyon West is a Hualapai-operated destination rather than part of the national park, you can plan the day properly and enjoy it for what it does best: dramatic canyon views, cultural context and a convenient West Rim experience from Las Vegas.
Sponsored Popular Items
Quick take: Musement.com offers a worldwide selection of tours and attractions
North Canyon Helicopter Tour from Grand Canyon South Rim – Tusayan Scenic Flight United States North Canyon Helicopter Tour from the Grand Canyon South Rim: What to Expect A short, narrated helicopter flight designed to show the Grand Canyon’s widest, deepest sections from above. Check current availability, inclusions and booking details before you go.
Grand Canyon West Rim Bus Tour, Helicopter Ride, Skywalk, Hoover Dam Stop United States Grand Canyon West Rim bus tour, helicopter ride, Skywalk, Hoover Dam stop is a convenient way to add structure, local context and purposeful sightseeing to the itinerary. Check current availability, inclusions and booking details before you go.
Grand Canyon West Rim Bus Tour with Skywalk Ticket & Hoover Dam Stop United States Grand Canyon West Rim bus tour with Skywalk ticket and Hoover Dam stop is a convenient way to add structure, local context and purposeful sightseeing to the itinerary. Check current availability, inclusions and booking details before you go.
Tokiwa-tei Ikebukuro is a lively Tokyo yakiniku and horumon restaurant best known for its table-side “0-second lemon sour” experience. Instead of waiting for drinks to be made at the bar, diners can pour lemon sour directly from a server installed at the table, making it a fun, casual and very Japanese izakaya-style dining experience.
Tokiwa-tei Ikebukuro: A Guide to 0-Second Lemon Sour, Sendai Horumon and Yakiniku in Tokyo
The Ikebukuro branch is a convenient choice for travellers staying around Tokyo’s north-west side, especially those exploring Ikebukuro, Sunshine City, anime shops, department stores, nightlife streets and casual dining spots. It is best suited to groups, couples, friends, solo diners who enjoy counter-style meals, and anyone wanting an energetic yakiniku meal with drinks.
What Is Tokiwa-tei Ikebukuro?
Tokiwa-tei Ikebukuro is part of the 0-Second Lemon Sour Sendai Horumon Yakiniku Sakaba Tokiwa-tei chain. The concept combines Japanese barbecue, horumon grilled offal, beef tongue, casual izakaya dishes and a self-pour lemon sour system at the table.
The Ikebukuro East Exit branch is located in Higashi-Ikebukuro, close to Ikebukuro Station. It is a basement restaurant with a casual, retro-style interior, table grills and a lively drinking atmosphere.
This is not fine dining. It is a fun, affordable, social yakiniku restaurant where diners cook meat themselves at the table, pour drinks quickly and order a mix of grilled meats, side dishes and drinking snacks.
Why Visit Tokiwa-tei Ikebukuro?
Tokiwa-tei is worth visiting if you want a casual Tokyo food experience that feels more energetic than a standard restaurant meal. The appeal is not only the food, but the format: grilling your own meat, pouring lemon sour at the table, sharing plates and enjoying the izakaya-style atmosphere.
It works especially well for travellers who want a relaxed night out in Ikebukuro without spending luxury-restaurant prices. The menu is built around horumon, yakiniku, beef tongue, wagyu options, side dishes and drink plans, so it is best for meat eaters and groups who enjoy barbecue-style dining.
The location also makes it easy to combine with Sunshine City, Ikebukuro shopping, anime stores, game centres, department stores and evening entertainment.
What Is 0-Second Lemon Sour?
The “0-second lemon sour” is Tokiwa-tei’s signature drink experience. Each table has a lemon sour tower or server, allowing diners to pour lemon sour themselves without waiting for staff to bring each drink.
The idea is simple: sit down, order the lemon sour plan, fill your glass from the table server and customise the drink with flavour syrups or toppings if available. It is called “0-second” because there is no waiting time once the server is ready at your table.
For visitors to Japan, this can be a fun novelty. Lemon sour is a popular Japanese alcoholic drink, usually made with shochu or spirits, soda and lemon flavour. At Tokiwa-tei, the table-side pouring makes it feel more interactive and social.
What to Eat at Tokiwa-tei
The food menu focuses on grilled meat and casual izakaya-style dishes. The exact menu may change, but Tokiwa-tei is especially associated with Sendai-style salt horumon, beef tongue, grilled meats, wagyu options, kalbi and side dishes.
Good dishes to look for include:
Sendai-style salt horumon
Beef tongue dishes
Lemon beef tongue or thick-cut tongue items
Kalbi and other grilled beef cuts
Wagyu options where available
Kimchi and namul
Rice bowls and noodle-style sides
Small izakaya dishes for sharing
Sendai Horumon
Horumon refers to grilled offal or organ meats, a popular category in Japanese yakiniku. Tokiwa-tei is strongly associated with Sendai-style horumon, especially salt-seasoned horumon cooked over the table grill.
Horumon has a chewy, rich texture and is usually enjoyed with drinks. It is not for everyone, especially if you prefer lean or familiar cuts of meat, but it is one of the restaurant’s key specialities.
If you are new to horumon, start with a small portion and order other grilled meats as well. That way, you can try the speciality without making the whole meal depend on offal cuts.
Beef Tongue Specialities
Beef tongue is another major feature at Tokiwa-tei. Tongue, or tan, is a popular yakiniku item in Japan and is often grilled quickly before being eaten with lemon, salt, spring onion or dipping sauce.
The Ikebukuro branch promotes tongue specialities, including thicker or more distinctive tongue dishes. This makes it a good place to try Japanese-style beef tongue if you have not had it before.
For the best texture, do not overcook thin slices of tongue. Grill them briefly, watch the edges, and eat while hot.
All-You-Can-Eat and Drink Courses
Tokiwa-tei often offers all-you-can-eat and all-you-can-drink course options. These can be good value if you are hungry, drinking lemon sour, and visiting with friends or family who all want to eat a similar style of meal.
Before ordering a course, check:
How long the course lasts
Whether lemon sour is included or costs extra
Whether beer, highballs or other alcohol are included
Which meat cuts are part of the course
Last order time for food and drinks
Whether everyone at the table must order the same plan
Any seating time limits
Course menus can be convenient for visitors because they reduce decision-making and make the total cost easier to estimate.
Atmosphere and Dining Style
The atmosphere is casual, loud, energetic and social. Expect table grills, drinks, smoke or grilled-meat aromas, groups of friends, quick service and a retro izakaya feeling.
This is a hands-on meal. Diners usually cook the meat themselves at the table, pour their own lemon sour if using the drink plan, and share plates. If you prefer quiet dining, formal service or a smoke-free fine dining environment, this may not be the right choice.
For a fun Tokyo night out, however, it can be exactly the kind of memorable casual restaurant experience travellers enjoy.
Location and Access
The Ikebukuro East Exit branch is located at:
1-22-13 Higashiikebukuro, Toshima-ku, Tokyo, THE KINDAI 11 IKEBUKURO B1F
It is around a five-minute walk from Ikebukuro Station and also accessible from Higashi-Ikebukuro Station on the Tokyo Metro Yurakucho Line. Because the restaurant is in a basement level, look carefully for building signage when you arrive.
Use the Japanese name when searching maps:
0秒レモンサワー 仙台ホルモン焼肉酒場 ときわ亭 池袋東口店
Opening Hours and Booking Tips
Opening hours can change, but the Ikebukuro East Exit branch is commonly listed as opening from late afternoon on weekdays and from midday on weekends and public holidays.
Bookings are recommended for evenings, weekends, groups and peak dining times. Ikebukuro is a busy nightlife and shopping area, so walk-in seats may be harder to secure during popular hours.
If you are travelling from overseas, booking through a restaurant platform or asking your hotel to help can make the process easier.
What to Do Nearby in Ikebukuro
Tokiwa-tei Ikebukuro is easy to combine with a broader evening or half-day in Ikebukuro.
Sunshine City
Sunshine City is one of Ikebukuro’s major shopping and entertainment complexes. It includes shops, restaurants, observation areas, attractions and family-friendly stops.
Anime and Character Shops
Ikebukuro is a major area for anime, manga, games and character goods. It is especially popular around Otome Road and surrounding specialty stores.
Department Stores
Ikebukuro Station is surrounded by large department stores and shopping complexes, making it easy to shop before dinner.
Game Centres and Nightlife
After dinner, you can continue to nearby game centres, karaoke rooms, bars or late-night entertainment spots around Ikebukuro.
Simple Ikebukuro Evening Plan
Food and Shopping Evening
4:00 pm: Arrive at Ikebukuro Station and explore department stores or Sunshine City.
5:30 pm: Browse anime, character or game shops around the east side of Ikebukuro.
7:00 pm: Have dinner at Tokiwa-tei Ikebukuro with yakiniku and lemon sour.
8:30 pm: Continue to karaoke, game centres or a relaxed café.
10:00 pm: Return by train from Ikebukuro Station.
Casual Dinner Plan
Book a table in advance if visiting at night.
Start with the lemon sour plan if everyone drinking wants the experience.
Order Sendai horumon, beef tongue and one or two familiar cuts such as kalbi.
Add rice, kimchi or side dishes to balance the grilled meat.
Check last order timing before adding extra food or drinks.
Practical Dining Tips
Book Ahead for Groups
Ikebukuro is busy, and Tokiwa-tei is a casual group-friendly restaurant. Book ahead if travelling with more than two people.
Check the Branch Name
Tokiwa-tei has multiple branches. Confirm whether you are booking Ikebukuro East Exit or another nearby branch before travelling.
Use the Japanese Name in Maps
Search for 0秒レモンサワー 仙台ホルモン焼肉酒場 ときわ亭 池袋東口店 to reduce confusion.
Expect a Meat-Focused Menu
This is not the best choice for vegetarians or travellers who do not eat offal or grilled meat. Check the menu carefully before booking.
Watch the Grill
Yakiniku is cooked at the table, so pay attention to thin cuts. Beef tongue and small pieces of meat can overcook quickly.
Understand the Drink Plan
The lemon sour system is fun, but check the time limit, price, extension rules and whether everyone at the table must order the same drink plan.
Be Careful with Pacing
Because the lemon sour is self-pour, it is easy to drink quickly. Pace yourself, especially if you are heading back by train or continuing your night in Ikebukuro.
Check Smoking Rules
Some listings mention a separate smoking room. If smoke sensitivity matters to you, confirm the current smoking setup before visiting.
Allow Time to Find the Basement Entrance
The restaurant is in a basement level, so allow a few extra minutes to locate the building and entrance, especially at night.
FAQs About Tokiwa-tei Ikebukuro
What is Tokiwa-tei Ikebukuro?
Tokiwa-tei Ikebukuro is a casual yakiniku and horumon restaurant in Tokyo, known for Sendai-style grilled offal, beef tongue and table-side 0-second lemon sour.
Where is Tokiwa-tei Ikebukuro?
The Ikebukuro East Exit branch is at 1-22-13 Higashiikebukuro, Toshima-ku, Tokyo, THE KINDAI 11 IKEBUKURO B1F.
How far is it from Ikebukuro Station?
It is usually listed as about a five-minute walk from Ikebukuro Station.
What is 0-second lemon sour?
0-second lemon sour is a self-pour drink system where diners pour lemon sour directly from a server installed at the table, reducing waiting time for drinks.
What food is Tokiwa-tei known for?
It is known for Sendai-style salt horumon, yakiniku, beef tongue dishes, wagyu options and casual izakaya-style side dishes.
Is Tokiwa-tei good for tourists?
Yes, it can be good for tourists who want a fun, casual yakiniku and drinking experience in Ikebukuro. Some listings mention menu support in English, Traditional Chinese and Korean, but it is still useful to have a translation app.
Do I need a reservation?
A reservation is recommended, especially for dinner, weekends, groups and peak times.
Is it suitable for solo diners?
Yes, solo diners are generally welcome, although the restaurant is especially suited to pairs and groups because yakiniku and drink courses are social.
Is it family-friendly?
Some restaurant listings indicate children are welcome, but the lively barbecue-and-drinks atmosphere may suit older children and teenagers better than very young children.
Is it good for vegetarians?
It is not an ideal vegetarian restaurant because the menu is heavily focused on grilled meat, horumon and beef tongue. Vegetarians should choose another Ikebukuro dining option.
Final Thoughts
Tokiwa-tei Ikebukuro is a fun choice if you want casual Tokyo yakiniku with a memorable drinks concept. The table-side 0-second lemon sour system makes the meal feel interactive, while the menu focuses on Sendai horumon, beef tongue, grilled meats and izakaya-style sharing dishes.
For the best experience, book ahead, confirm the exact Ikebukuro branch, arrive hungry, try the beef tongue and Sendai horumon, and pace yourself with the self-pour lemon sour. Combined with shopping, anime stores or nightlife around Ikebukuro, it makes an easy and lively Tokyo evening.
Zhangjiajie is one of China’s most dramatic natural destinations. Located in Hunan Province, it is famous for towering sandstone pillars, misty mountain scenery, cliffside walkways, glass bridges, cable cars, forest trails and landscapes often linked with the floating mountains in the film Avatar.
Zhangjiajie What to Expect: Avatar Mountains, Glass Walkways, Cable Cars and Travel Tips
For first-time visitors, Zhangjiajie can be both breathtaking and overwhelming. The scenery is spectacular, but the area is large, transport can be confusing, tickets are separate for different attractions, and weather can change quickly. With good planning, it becomes one of the most memorable mountain trips in China.
Sponsored Popular Items
Quick take: Musement.com offers a worldwide selection of tours and attractions
Zhangjiajie Avatar Mountains, Tianmen & Glass Bridge 1–2-Day – Nature &… China 1-2 Days All-inclusive Mini Tour:Avatar+Tianmen+Glass Bridge adds structure, local context and purposeful sightseeing to the itinerary. Check current availability, inclusions and booking details before you go.
What Is Zhangjiajie?
Zhangjiajie is a city and mountain tourism region in Hunan Province, China. Most travellers visit for the Wulingyuan Scenic Area, Zhangjiajie National Forest Park, Tianmen Mountain and the Zhangjiajie Grand Canyon Glass Bridge.
The scenery is famous for tall sandstone pillars rising from forested valleys. Mist, cloud and changing light make the landscape feel otherworldly, especially after rain or in the early morning.
Zhangjiajie is not one single park entrance with one simple walking route. It is a region with several major attractions spread across different areas. Planning your route before arrival will make the trip much easier.
What to Expect in Zhangjiajie
Expect huge mountain views, dramatic cliffs, cable cars, shuttle buses, stairs, viewpoints, crowds at famous places and weather that can shift quickly from clear to misty. Some parts are very accessible, while others require more walking and patience.
You do not need to be a serious hiker to enjoy Zhangjiajie. Many famous viewpoints can be reached by cable car, elevator, shuttle bus or short walks. However, you should still expect stairs, uneven paths, busy platforms and long days on your feet.
The main challenge is logistics. Different attractions have different tickets, entrances, transport systems and travel times. It is best to treat Zhangjiajie as a multi-day destination rather than a quick photo stop.
The Avatar Mountains
The so-called Avatar Mountains are usually associated with the sandstone pillars of Zhangjiajie National Forest Park, especially around Yuanjiajie Scenic Area. One of the best-known formations is often promoted as the Avatar Hallelujah Mountain.
The landscape really does feel cinematic. Tall stone columns rise vertically from the forest, often surrounded by mist. In cloudy weather, the peaks appear and disappear, creating the floating-mountain effect that Zhangjiajie is famous for.
For the best experience, visit early in the day and allow enough time for viewpoints. If visibility is poor, be patient. Cloud can move quickly, and a completely hidden valley can open up within minutes.
Zhangjiajie National Forest Park
Zhangjiajie National Forest Park is the core area most travellers imagine when they think of Zhangjiajie. It includes several scenic zones, shuttle buses, cable cars, walking trails, viewpoints and famous pillar landscapes.
The park is large, so do not expect to see everything in one day. The best-known areas include Yuanjiajie, Tianzi Mountain, Yangjiajie, Huangshi Village and Golden Whip Stream.
Most visitors use a combination of park shuttle buses, the Bailong Elevator, cable cars and walking paths. The internal transport system is useful, but it can be confusing at first, especially if signs, crowds and language barriers make route planning harder.
Yuanjiajie Scenic Area
Yuanjiajie is one of the most famous parts of Zhangjiajie National Forest Park. This is where many visitors go to see the classic sandstone pillar views associated with the Avatar-style scenery.
The area has viewing platforms connected by paths, and it can be reached using the Bailong Elevator or other park routes. Expect crowds, especially at the most famous viewpoints.
If you only have limited time in Zhangjiajie National Forest Park, Yuanjiajie should be one of your priorities.
Tianzi Mountain
Tianzi Mountain is another major scenic area in Zhangjiajie National Forest Park. It is known for wide views across peak forests, cloud-filled valleys and clustered sandstone formations.
The scenery here can be especially beautiful when mist moves through the peaks. Cable cars and shuttle buses make it more accessible than a full mountain hike, but you should still expect walking between viewpoints.
Tianzi Mountain pairs well with Yuanjiajie for a full day inside the national forest park.
Golden Whip Stream
Golden Whip Stream offers a different Zhangjiajie experience. Instead of viewing the pillars from above, this route follows a valley floor beside water, cliffs and forest.
The walk is gentler than many mountain routes and gives a closer view of the lower forest and rock walls. It is a good option if you want a more peaceful trail after busy viewpoints.
Expect monkeys in some areas. Keep food secure, do not feed wildlife and avoid holding snacks openly where monkeys can grab them.
Tianmen Mountain
Tianmen Mountain is separate from Zhangjiajie National Forest Park and is closer to Zhangjiajie city. It is famous for its long cable car, cliffside walkways, glass skywalks, winding mountain road and the huge natural arch known as Tianmen Cave or Heaven’s Gate.
This is one of the most dramatic visitor experiences in Zhangjiajie. You may take a cable car high above the city, walk along cliffside paths, step onto glass sections if you are comfortable with heights, and visit the stairway leading toward the natural arch.
Tianmen Mountain can be done in half a day to a full day, depending on queues, weather and how slowly you move around the summit paths.
Zhangjiajie Grand Canyon Glass Bridge
The Zhangjiajie Grand Canyon Glass Bridge is a separate attraction from both Zhangjiajie National Forest Park and Tianmen Mountain. It is known for its transparent glass deck suspended across a canyon.
This is best for travellers who enjoy thrill attractions, glass bridges and high canyon views. If you dislike heights, it may be more stressful than enjoyable. The bridge is often combined with canyon walking routes and adventure activities depending on the ticket type and current operations.
Do not confuse the Grand Canyon Glass Bridge with the glass skywalks on Tianmen Mountain. They are different attractions in different locations.
Crowds and Queues
Zhangjiajie is very popular with domestic and international visitors. Expect crowds at major viewpoints, cable car stations, the Bailong Elevator, Tianmen Mountain and the Glass Bridge.
Chinese public holidays can be extremely busy, especially National Day Golden Week, Labour Day holidays and summer school holidays. If possible, avoid these periods.
Early starts help. Arriving at major entrances before peak tour-group times can make the day much smoother.
Weather and Visibility
Weather is one of the biggest factors in Zhangjiajie. The mountain scenery can be clear, misty, rainy or completely hidden by fog. This can be frustrating, but mist is also part of the magic.
Cloudy weather can make the pillars look mysterious and atmospheric. Heavy fog, however, can block the views entirely. If you have several days, build flexibility into your itinerary so you can adjust plans according to visibility.
Spring and autumn are generally popular for comfortable temperatures and scenic conditions. Summer can be hot, humid and crowded. Winter can be quiet and beautiful, but some paths may be cold, slippery or affected by weather.
Walking Difficulty
Zhangjiajie is easier than it looks in some ways and harder in others. Cable cars, elevators and shuttle buses reduce the need for long climbs, but there are still many stairs, slopes, platforms and walking sections.
Travellers with moderate fitness can enjoy the main sights, especially with careful route planning. Those with knee problems, mobility issues or fear of heights should choose easier routes and avoid overly ambitious schedules.
The most tiring part is often not one difficult hike but the combination of early starts, transfers, queues, stairs and a full day moving between viewpoints.
Where to Stay
The two main base areas are Zhangjiajie city and Wulingyuan.
Wulingyuan
Wulingyuan is the best base for Zhangjiajie National Forest Park. Staying here gives easier access to the park entrances and saves travel time if your main priority is the Avatar mountain scenery.
Zhangjiajie City
Zhangjiajie city is better for Tianmen Mountain, the airport, train station and some transport connections. It is useful at the start or end of your trip.
Best Strategy
If you have enough time, split your stay: spend one or two nights in Wulingyuan for the national forest park, then one night in Zhangjiajie city for Tianmen Mountain and departure.
How Long to Spend
Two days: Enough for a rushed visit to Zhangjiajie National Forest Park and Tianmen Mountain.
Three days: A good minimum for most travellers. You can spend two days in the national forest park and one day at Tianmen Mountain.
Four days: Better if you also want the Grand Canyon Glass Bridge or need weather flexibility.
Five days or more: Ideal for a slower visit, photography, hiking, nearby ancient towns or more relaxed travel between areas.
Simple Zhangjiajie Itinerary
Day 1: Arrive and Stay in Wulingyuan
Arrive in Zhangjiajie by flight or train.
Transfer to Wulingyuan if focusing on the national forest park first.
Check in and organise tickets, route plans and transport for the next day.
Have an early night so you can start the park day early.
Day 2: Zhangjiajie National Forest Park Highlights
Start early from the Wulingyuan entrance.
Visit Yuanjiajie for the Avatar-style sandstone pillar views.
Use the Bailong Elevator or park transport depending on your route.
Continue to Tianzi Mountain for panoramic peak forest views.
Return to Wulingyuan in the late afternoon.
Day 3: Golden Whip Stream or Second Park Day
Walk part or all of Golden Whip Stream for valley scenery.
Visit Huangshi Village or Yangjiajie if you want more viewpoints.
Keep this day flexible in case weather affected your first park day.
Transfer to Zhangjiajie city in the evening if visiting Tianmen Mountain next.
Day 4: Tianmen Mountain
Take the cable car or current official route up Tianmen Mountain.
Walk the summit paths and glass skywalks if open and suitable.
Visit Tianmen Cave and the Heaven’s Gate stairway area.
Return to Zhangjiajie city for departure or another overnight stay.
Optional Day 5: Grand Canyon Glass Bridge
Travel to Zhangjiajie Grand Canyon.
Walk the glass bridge if you are comfortable with heights.
Add canyon walking or activity routes depending on current tickets.
Return to Zhangjiajie city or Wulingyuan.
What to Wear and Pack
Comfortable walking shoes with good grip
Light rain jacket or poncho
Layered clothing for changing mountain weather
Small day backpack
Water bottle
Snacks
Power bank
Phone with translation and map apps
Passport for ticket checks and hotel registration
Sunscreen, hat and sunglasses in warmer months
Warm layer in winter or early morning
Practical Travel Tips
Do Not Try to See Everything in One Day
Zhangjiajie is too large and too weather-dependent for a rushed visit. Give yourself at least three days if possible.
Stay in the Right Area
Stay in Wulingyuan for Zhangjiajie National Forest Park and in Zhangjiajie city for Tianmen Mountain. This reduces unnecessary travel time.
Start Early
Early starts help with queues, shuttle buses, cable cars and viewpoints. This is especially important during busy travel periods.
Check Weather but Stay Flexible
Weather forecasts are useful, but mountain conditions can change quickly. If fog blocks one viewpoint, wait or move to another area.
Bring Your Passport
Tourist sites, hotels and transport in China often require passport identification. Keep it secure but accessible.
Use a Guide if Logistics Worry You
A local guide can be useful in Zhangjiajie because park transport, entrances and route choices can be confusing.
Prepare for Heights
Cable cars, cliff paths, glass walkways and high viewpoints are part of the Zhangjiajie experience. If you dislike heights, choose routes carefully.
Carry Snacks and Water
Food is available in tourist areas, but queues and prices can vary. Carry basic supplies for long park days.
Avoid Major Chinese Holidays
If possible, avoid National Day Golden Week, Labour Day holidays and peak summer periods. Crowds can change the entire experience.
Expect Lots of Stairs
Even with elevators and cable cars, Zhangjiajie involves many stairs and platforms. Pace yourself and wear proper shoes.
FAQs About Zhangjiajie
Is Zhangjiajie worth visiting?
Yes. Zhangjiajie is one of China’s most spectacular natural destinations, especially for sandstone pillars, mountain viewpoints, cable cars, misty scenery and glass walkways.
What is Zhangjiajie famous for?
Zhangjiajie is famous for the sandstone pillar landscape of Wulingyuan, the Avatar-style mountains, Zhangjiajie National Forest Park, Tianmen Mountain and the Zhangjiajie Grand Canyon Glass Bridge.
How many days do you need in Zhangjiajie?
Three days is a good minimum. Four days is better if you want Zhangjiajie National Forest Park, Tianmen Mountain and the Grand Canyon Glass Bridge without rushing.
Where should I stay in Zhangjiajie?
Stay in Wulingyuan for Zhangjiajie National Forest Park. Stay in Zhangjiajie city for Tianmen Mountain, the airport and train connections. Splitting your stay can work well.
Is Zhangjiajie difficult to walk around?
It can be tiring but not always technically difficult. Cable cars, elevators and shuttle buses help, but you should still expect stairs, slopes and long walking days.
Is Zhangjiajie good for older travellers?
Yes, if routes are chosen carefully. Use cable cars, elevators and shorter viewpoint walks. Avoid overly long hiking days and allow extra rest time.
Can you visit Zhangjiajie without a guide?
Yes, independent travel is possible, but a guide can make logistics easier, especially for first-time visitors who do not speak Chinese.
When is the best time to visit Zhangjiajie?
Spring and autumn are generally the most comfortable seasons. Summer can be hot and crowded, while winter can be quieter but colder.
Will fog ruin the views?
Heavy fog can block views, but mist can also make Zhangjiajie look magical. Staying several days gives you a better chance of clear or partly clear conditions.
Is the Zhangjiajie Glass Bridge the same as Tianmen Mountain glass walk?
No. The Grand Canyon Glass Bridge and Tianmen Mountain glass skywalks are separate attractions in different areas.
Final Thoughts
Zhangjiajie is a destination that feels larger and more complex than many travellers expect. The views are extraordinary, but the trip works best when you allow enough time, choose your base carefully and avoid trying to rush every attraction into one day.
For the best experience, spend at least three or four days in the region, stay near Wulingyuan for the national forest park, add Tianmen Mountain from Zhangjiajie city, and keep one flexible day for weather or the Grand Canyon Glass Bridge. Expect mist, stairs, shuttle buses, crowds and unforgettable mountain scenery.
Sponsored Popular Items
Quick take: Musement.com offers a worldwide selection of tours and attractions
Paphos Half-Day BBQ Cruise: What to Expect – Boat & Water Experience Cyprus Quick overview Duration: the cruise time is described as four hours (the listing also shows a broader “duration” range depending on options/logistics). Check current availability, inclusions and booking details before you go.
Hanfu is the traditional clothing associated with Han Chinese culture. Rather than being one single outfit, Hanfu is an umbrella term for a wide range of historical clothing styles that changed across Chinese dynasties, social classes, occasions and regions. Today, Hanfu is also a growing fashion movement, worn for cultural festivals, photography, weddings, coming-of-age ceremonies, historical events and everyday styling by modern enthusiasts.
Hanfu: A Guide to Traditional Chinese Clothing, Styles, History and Modern Revival
Elegant, layered and symbolic, Hanfu is known for flowing lines, wrapped fronts, wide sleeves, long skirts, robes, sashes and graceful proportions. It is often seen in styles inspired by the Han, Tang, Song and Ming periods, each with its own distinctive shape and mood.
Sponsored Popular Items
Quick take: Musement.com offers a worldwide selection of tours and attractions
Traditional Chinese Lord Rabbit Painting Class in Beijing – Hands-On Workshop China Traditional Chinese Lord Rabbit Painting Class in Beijing turns part of the trip into a practical learning experience and an alternative to conventional sightseeing. Check current availability, inclusions and booking details before you go.
What Is Hanfu?
Hanfu means clothing of the Han people. In modern use, it usually refers to traditional Han Chinese clothing styles that existed before the Qing dynasty, although the exact definition can vary among scholars, enthusiasts and fashion communities.
Hanfu is not one fixed dress. It includes robes, jackets, skirts, coats, ceremonial garments, scholar robes, court-inspired clothing and everyday-style outfits. Some designs are historically researched, while others are modern interpretations inspired by historical silhouettes.
The most recognisable Hanfu forms often include a wrapped or cross-collar upper garment, a skirt or robe body, wide sleeves, flowing fabric and ties or sashes rather than buttons or zips. These features create the graceful, layered appearance people now associate with Hanfu.
Hanfu vs Qipao: What Is the Difference?
Hanfu and qipao are often confused, but they are different garments from different fashion histories.
Hanfu refers broadly to historical Han Chinese clothing styles, especially pre-Qing dynasty garments with robes, skirts, sashes, wrapped fronts and wide sleeves.
Qipao, also called cheongsam, is a fitted dress associated with the 20th century and influenced by Manchu and modern Shanghai fashion. It usually has a high collar, side fastenings, close-fitting shape and side slits.
In simple terms, Hanfu is usually loose, layered and robe-like, while qipao is usually tailored, fitted and dress-like. Both are important in Chinese fashion history, but they should not be treated as the same thing.
Key Features of Hanfu
Hanfu styles vary widely, but several features often appear across many traditional and modern designs.
Cross collar: A wrapped neckline that crosses over the chest, often closing to the wearer’s right side.
Wide sleeves: Flowing sleeves that create graceful movement.
Sashes and ties: Fabric belts or ribbons used instead of modern zips or buttons.
Long lines: Vertical, flowing shapes that create elegance and formality.
Natural drape: Soft fabric movement rather than tight body shaping.
Symbolic colours and motifs: Embroidery, borders, florals, clouds, cranes, dragons, phoenixes and seasonal designs may carry meaning.
Main Hanfu Styles
Because Hanfu covers many historical periods, there are many different styles. Some are more formal, some are easier to wear, and some are popular for photography or festivals. The following styles are among the most commonly seen in modern Hanfu fashion.
Ruqun
Ruqun is one of the best-known Hanfu styles. It usually consists of a short upper garment called a ru and a long skirt called a qun. The skirt may be tied at the waist, high waist or chest, depending on the historical inspiration.
Ruqun is popular because it is elegant, feminine and adaptable. It can look simple and fresh in light fabrics, or formal and dramatic with embroidery, wide sleeves and layered outer garments.
Common Ruqun Variations
Waist-high ruqun: Skirt tied around the natural waist.
High-waist ruqun: Skirt sits above the waist for a longer, flowing silhouette.
Chest-high ruqun: Skirt tied high at the chest, often associated with Tang-inspired styling.
Shenyi
Shenyi is a robe-like Hanfu style in which the upper and lower parts are connected into one long garment. It has a dignified, formal appearance and is often linked with ancient ceremonial, scholarly or philosophical traditions.
Shenyi usually has a wrapped front, long body and structured simplicity. Compared with highly decorative Tang-style Hanfu, shenyi can look more restrained and classical.
Aoqun
Aoqun combines an upper jacket or coat called an ao with a skirt called a qun. It is often associated with later historical styles, especially Ming-inspired Hanfu.
Aoqun can be practical, elegant and easy to adapt for modern wear. The jacket gives more structure than a loose robe, while the skirt maintains the traditional flowing line. Modern Hanfu wearers often choose aoqun for a balanced look that feels both historical and wearable.
Beizi
Beizi is a long, open-front outer garment often worn over other Hanfu layers. It can look light, graceful and relaxed, especially in Song-inspired styling.
A beizi may be narrow-sleeved or wide-sleeved depending on the style. It is useful for modern wear because it adds a traditional silhouette without feeling overly heavy or formal.
Tang-Inspired Hanfu
Tang-inspired Hanfu is often bold, colourful and flowing. Popular features include chest-high skirts, long scarves, sheer outer layers, rich colours, floral embroidery and elaborate hair accessories.
This style is especially popular for photography because it creates movement and drama. The Tang aesthetic is often associated with confidence, luxury, openness and artistic expression.
Song-Inspired Hanfu
Song-inspired Hanfu tends to look softer, slimmer and more understated than Tang-inspired styles. It often includes beizi outer garments, simple skirts, gentle colours and elegant proportions.
This style is popular with people who want Hanfu that feels refined, practical and easier to adapt to modern daily wear. It can look beautiful without being overly formal or theatrical.
Ming-Inspired Hanfu
Ming-inspired Hanfu is one of the strongest influences in the modern Hanfu revival. It often includes aoqun sets, standing collars, mamianqun horse-face skirts, structured jackets, woven patterns and more formal silhouettes.
The mamianqun has become especially popular in modern fashion because it pairs well with both traditional tops and contemporary blouses, knitwear or jackets. This makes Ming-inspired styling one of the easiest ways to bring Hanfu elements into everyday wardrobes.
The Modern Hanfu Revival
The modern Hanfu revival began as a cultural and fashion movement among people interested in reconnecting with traditional Chinese aesthetics. Over time, it has grown into a visible youth-led trend supported by social media, online stores, photography communities, festivals, cultural events and specialised designers.
Today, Hanfu is worn in many ways. Some people prefer historically accurate reconstructions. Others enjoy fantasy-inspired styling, drama-influenced looks, casual Hanfu-inspired outfits or modernised pieces that borrow traditional shapes.
The movement is not only about clothing. It often overlaps with interest in Chinese history, poetry, calligraphy, tea culture, traditional festivals, ancient music, photography and national cultural identity.
How to Wear Hanfu
Wearing Hanfu depends on the style, but most outfits are built from layers. A simple beginner outfit might include an inner top, a skirt, an outer robe or jacket and a sash.
Basic Wearing Steps
Start with a comfortable inner layer or undergarment.
Put on the main upper garment, wrapping it correctly if it has a cross collar.
Tie the inner ribbons securely but not too tightly.
Put on the skirt or lower garment and fasten it with ties.
Add the outer robe, beizi, coat or shawl if included.
Finish with a sash, belt, hair accessories or simple jewellery.
For cross-collar Hanfu, the right side is usually wrapped over the left from the wearer’s perspective. This detail matters because it is one of the most recognisable features of many traditional Hanfu styles.
Modern Hanfu Styling Tips
Hanfu can be worn traditionally or adapted into modern styling. The right approach depends on the occasion, the garment and your comfort level.
For a Traditional Look
Wear the full set as designed.
Use matching sashes, shoes and hair accessories.
Choose a hairstyle that suits the dynasty-inspired style.
Keep modern bags and shoes subtle.
Use natural-looking makeup or historically inspired details.
For a Modern Everyday Look
Pair a mamianqun skirt with a blouse, knit top or fitted jacket.
Wear a beizi-style outer layer over a simple dress or trousers.
Choose muted colours for easier daily wear.
Use minimal accessories rather than full ceremonial styling.
Balance one traditional piece with modern basics.
For Photography
Choose flowing fabrics that move well in wind.
Use soft light, gardens, temples, old streets or natural scenery as backgrounds.
Match the hairstyle and accessories to the clothing style.
Consider colours that contrast well with the setting.
Allow extra time for dressing, adjusting layers and arranging sleeves.
When to Wear Hanfu
Hanfu can be worn for many occasions, depending on the formality of the outfit.
Chinese cultural festivals
Hanfu meetups and parades
Tea ceremonies
Photography sessions
Traditional weddings
Coming-of-age ceremonies
Historical reenactment events
Performances and stage events
Museum or heritage visits
Modern casual fashion, when styled lightly
Highly formal Hanfu may feel too elaborate for daily wear, while simpler Song or Ming-inspired pieces can be easier to adapt into normal outfits.
What to Look for When Buying Hanfu
Buying Hanfu can be confusing for beginners because styles, fabrics, sizing and historical references vary. Before buying, decide whether you want a historically inspired outfit, a modern fashion piece, a costume-style garment or something suitable for regular wear.
Check the Style
Look for clear information about whether the piece is Tang-inspired, Song-inspired, Ming-inspired, ruqun, aoqun, shenyi, beizi or mamianqun. This helps you understand how it should be worn.
Check the Fabric
Light chiffon and synthetic fabrics can be affordable and flowing, but may look costume-like if too shiny. Cotton, linen, silk blends and higher-quality jacquard fabrics often look more refined.
Check the Construction
Look at stitching, embroidery, lining, skirt pleats, waist ties and sleeve finish. Poor construction can make Hanfu difficult to wear neatly.
Check the Sizing
Hanfu sizing often depends on height, bust, waist and garment length. Skirt length is especially important. A skirt that is too long can drag on the ground, while one that is too short changes the silhouette.
Check What Is Included
Some listings include only the skirt, while others include the full set. Check whether you are getting the inner garment, outer robe, sash, skirt, accessories or only one layer.
How to Wear Hanfu Respectfully
Hanfu can be appreciated by people from many backgrounds, but it should be worn with awareness. It is not just a fantasy costume; it has cultural, historical and identity meaning for many people.
Learn the name of the style you are wearing.
Avoid calling all Chinese clothing “kimono” or “qipao.”
Do not mix sacred or ceremonial elements carelessly.
Respect religious, wedding or mourning contexts.
Avoid exaggerated stereotypes in makeup, poses or captions.
Credit the cultural origin when posting photos or articles.
Support knowledgeable makers, designers and educators where possible.
Respectful wear does not mean Hanfu must be treated as untouchable. It means wearing it with curiosity, care and basic cultural literacy.
FAQs About Hanfu
What does Hanfu mean?
Hanfu means clothing of the Han people. In modern use, it refers broadly to traditional Han Chinese clothing styles, especially those inspired by pre-Qing dynasty garments.
Is Hanfu one specific outfit?
No. Hanfu is an umbrella term covering many styles, including ruqun, shenyi, aoqun, beizi, robes, skirts, jackets and ceremonial garments.
Is Hanfu the same as qipao?
No. Hanfu and qipao are different. Hanfu is usually loose, layered and based on older Han Chinese clothing traditions, while qipao is a fitted modern dress associated with later Chinese fashion history.
What are the most popular Hanfu styles?
Popular styles include ruqun, chest-high ruqun, shenyi, aoqun, beizi, mamianqun and Tang, Song or Ming-inspired outfits.
Can Hanfu be worn every day?
Yes, but some styles are easier for daily wear than others. Simple Song-inspired pieces, beizi layers and mamianqun skirts are often easier to adapt into modern wardrobes.
What is a mamianqun?
Mamianqun, often called a horse-face skirt, is a pleated skirt strongly associated with Ming-style clothing. It has become popular in modern fashion because it can be worn with both Hanfu tops and contemporary clothing.
Which side should Hanfu close on?
Many cross-collar Hanfu styles close to the wearer’s right side, with the right panel over the left. This is commonly known as right-over-left wrapping.
Is Hanfu only for women?
No. Hanfu includes men’s, women’s and children’s clothing. Men’s Hanfu may include robes, scholar-style garments, round-collar robes, jackets and ceremonial outfits.
Why is Hanfu popular again?
Hanfu has become popular again through youth fashion, social media, cultural pride, historical dramas, photography, festivals and interest in traditional Chinese aesthetics.
Can non-Chinese people wear Hanfu?
Yes, many people can appreciate and wear Hanfu respectfully. The key is to learn what it is, avoid stereotypes, use the correct terminology and treat it as cultural clothing rather than a joke costume.
Final Thoughts
Hanfu is one of the most visually graceful and culturally rich clothing traditions associated with China. Its flowing shapes, layered construction, elegant sleeves and historical variety make it far more than a single dress style.
Whether worn for festivals, photography, weddings, cultural events or modern fashion, Hanfu connects clothing with history, identity, beauty and craft. For beginners, the best starting point is to learn the main styles, understand the difference between Hanfu and qipao, choose a simple well-made outfit, and wear it with respect for the culture and history behind it.
Sponsored Popular Items
Quick take: Musement.com offers a worldwide selection of tours and attractions
Traditional Chinese Lord Rabbit Painting Class in Beijing – Hands-On Workshop China Traditional Chinese Lord Rabbit Painting Class in Beijing turns part of the trip into a practical learning experience and an alternative to conventional sightseeing. Check current availability, inclusions and booking details before you go.
Mornington Peninsula Private Tour with Chinese Guide Australia Explore the Mornington Peninsula on a private tour with hotel pickup. Visit Pure Peninsula Honey, enjoy a wine tasting at Pt Leo Estate, and relax at the Hot Springs. Check current availability, inclusions and booking conditions.
The Temple of Hatshepsut is one of the most striking ancient monuments in Egypt. Built into the cliffs of Deir el-Bahari on Luxor’s West Bank, this terraced mortuary temple is famous for its grand ramps, colonnades, statues, relief carvings and dramatic desert setting beneath towering limestone cliffs.
Temple of Hatshepsut Egypt: A Guide to Deir el-Bahari on Luxor’s West Bank
Officially known as Djeser-Djeseru, meaning “Holy of Holies,” the temple was built for Hatshepsut, one of ancient Egypt’s most successful and fascinating female pharaohs. Its elegant design, mountain backdrop and historical importance make it one of the essential stops on any Luxor itinerary.
Sponsored Popular Items
Quick take: Musement.com offers a worldwide selection of tours and attractions
Ancient Egypt Sunset Tour with 3-Course Dinner in Cairns Australia Explore the Tomb of the Pharaohs on an after-hours tour. Discover 11 burial chambers and learn about ancient Egypt's history. Enjoy a 3-course dinner in our aquatic themed Squire's… Check current availability, inclusions and booking conditions.
What Is the Temple of Hatshepsut?
The Temple of Hatshepsut is a mortuary temple at Deir el-Bahari, on the west bank of the Nile near Luxor. Mortuary temples were built for the worship and commemoration of deceased pharaohs, but Hatshepsut’s temple is far more than a memorial. It is a carefully designed statement of royal power, divine legitimacy and architectural ambition.
The temple is set at the base of a high cliff, with three broad terraces rising from the desert floor. Long ramps connect the levels, while rows of square columns create a strong horizontal rhythm against the vertical rock face behind.
The result is one of the most visually balanced temples in Egypt. It feels both monumental and restrained, blending architecture and landscape in a way that still looks surprisingly modern.
Who Was Hatshepsut?
Hatshepsut was one of ancient Egypt’s most remarkable rulers. She began as queen and regent, then took on the full titles and visual symbolism of a pharaoh. Her reign during the 18th Dynasty was known for building projects, trade, religious patronage and political stability.
Because Egyptian kingship was traditionally male, Hatshepsut’s rule was unusual. In temple art, she was often shown with the royal beard and symbols of a male pharaoh, not because she was hiding her identity, but because pharaonic imagery followed established royal conventions.
Her temple at Deir el-Bahari helped present her reign as divinely approved. Reliefs showed her divine birth, her relationship with the god Amun, and the prosperity brought by her rule.
Why Visit the Temple of Hatshepsut?
The Temple of Hatshepsut is worth visiting because it is one of the most architecturally impressive sites in Luxor. While the Valley of the Kings is mostly underground and Karnak is a vast temple complex, Hatshepsut’s temple is immediately dramatic from the moment you see it from the desert approach.
Its setting is unforgettable. The pale stone terraces stand against rugged cliffs, creating a powerful contrast between human design and natural geology. In the morning light, the temple can appear almost carved from the mountain itself.
The site is also historically important because it tells the story of one of Egypt’s most successful female rulers. For many travellers, it is one of the most memorable stops on the Luxor West Bank.
The Architecture of Djeser-Djeseru
The temple’s design is based on terraces, ramps and colonnades. Instead of a traditional enclosed temple layout, Djeser-Djeseru rises in layers toward the cliff face.
The long central ramp draws the eye upward, while the horizontal terraces create a calm, ordered appearance. This symmetry is one of the reasons the temple is often described as a masterpiece of ancient Egyptian architecture.
The temple was designed by Senenmut, an important official in Hatshepsut’s court. His role in the project shows the close connection between architecture, royal ideology and religious worship in New Kingdom Egypt.
What to See at the Temple
The Terraces and Central Ramp
The first thing to notice is the temple’s overall form. Stand back before entering and look at how the ramps, terraces and colonnades align with the cliff. The wide approach gives one of the best photo angles in Luxor.
The Colonnades
The rows of columns are central to the temple’s visual identity. They create shade, rhythm and structure, while framing the relief-covered walls behind them.
Statues of Hatshepsut
Several statues and reconstructed figures show Hatshepsut in pharaonic form. These images are important because they show how she presented herself as a legitimate ruler within Egyptian royal tradition.
Relief Carvings
The temple walls include carved scenes connected with trade, religion, royal birth and offerings. Some reliefs are damaged, but many still give valuable insight into Hatshepsut’s reign and the messages she wanted to project.
The Cliff Backdrop
The natural cliff is part of the experience. The temple was not placed randomly; it was designed to work with the mountain behind it. This gives the site much of its power.
The Expedition to Punt Reliefs
One of the most famous parts of the Temple of Hatshepsut is the relief cycle showing an expedition to the Land of Punt. Punt was a distant trading region associated with luxury goods such as incense, exotic trees, animals, gold and other valuable materials.
The scenes are important because they show Hatshepsut as a successful ruler who brought wealth and prestige to Egypt through trade rather than only through military conquest.
Look for details such as ships, goods, people, animals and plants. These carvings are among the most historically interesting features of the temple.
Hathor Chapel
The Hathor Chapel is one of the most atmospheric areas of the temple. Hathor was a goddess associated with motherhood, music, joy, protection and the western necropolis. At Deir el-Bahari, her presence connects the temple with both royal worship and the sacred landscape of the West Bank.
The chapel is known for Hathor-headed columns, where the goddess is shown with cow ears and a human face. These columns are among the temple’s most distinctive decorative elements.
Anubis Chapel
The Anubis Chapel is dedicated to Anubis, the jackal-headed god associated with mummification and the protection of tombs. This is fitting for a mortuary temple on the West Bank, where ancient Egyptians placed many royal tombs and funerary monuments.
The chapel includes reliefs and painted details that help visitors understand the temple’s funerary and religious purpose. Even where colours have faded, the space still feels deeply connected to ancient beliefs about death, protection and the afterlife.
How to Visit from Luxor
The Temple of Hatshepsut is on Luxor’s West Bank, near the Valley of the Kings, the Valley of the Queens, the Colossi of Memnon and other major ancient sites.
Most visitors reach the temple by private driver, guided tour, taxi, organised day trip or cruise excursion. Independent travellers can also cross the Nile by local ferry and then arrange transport on the West Bank.
For a first visit, a guide is useful. The temple’s history is rich, and the reliefs are much more meaningful when someone explains Hatshepsut’s reign, her connection to Amun, the expedition to Punt and the temple’s role in the Theban landscape.
What to Combine With the Temple of Hatshepsut
The Temple of Hatshepsut is usually visited as part of a Luxor West Bank itinerary. Good nearby combinations include:
Valley of the Kings: The most famous royal tomb area in Luxor.
Valley of the Queens: Known for royal women’s tombs, including the famous tomb of Queen Nefertari when open and ticketed.
Colossi of Memnon: Two huge seated statues of Amenhotep III, often visited as a quick photo stop.
Medinet Habu: A beautifully preserved temple of Ramesses III with vivid reliefs.
Deir el-Medina: The ancient workers’ village of the artisans who built royal tombs.
Ramesseum: The mortuary temple of Ramesses II.
Best Time to Visit
The best time to visit the Temple of Hatshepsut is early in the morning. The light is softer, the temperature is cooler and the temple’s pale stone looks beautiful against the cliffs.
Midday can be very hot, especially because there is limited shade across the open approach and terraces. If you visit later in the day, bring water, sun protection and allow time to rest.
The best months for Luxor sightseeing are generally from October to April, when temperatures are more comfortable than in the peak summer heat. Summer visits are possible, but temple touring should start very early.
How Long to Spend There
Allow at least one hour for a standard visit to the Temple of Hatshepsut. This gives you time to walk the terraces, take photos, see the main chapels and appreciate the setting.
If you are especially interested in history, photography or relief carvings, allow 90 minutes. If visiting as part of a guided West Bank tour, your time may be shorter, so tell your guide if this temple is a priority.
What to Wear and Bring
Comfortable walking shoes
Hat or cap
Sunglasses
Sunscreen
Lightweight breathable clothing
Reusable water bottle
Small cash for tips, toilets or shuttle transport if needed
Camera or phone with enough battery
Light scarf or cover-up for sun protection
Practical Travel Tips
Visit Early
Early morning is the best time for cooler temperatures, fewer crowds and better light on the temple façade.
Use a Guide for Context
The temple is visually impressive on its own, but a guide helps explain Hatshepsut’s unusual role, the Punt expedition, the divine birth scenes and the religious meaning of the temple.
Bring Water
The West Bank can be extremely dry and hot. Carry water even if you are only planning a short visit.
Stand Back for the Best Photo
The temple is best photographed from the approach path, where you can capture the terraces and cliff backdrop together.
Look Closely at the Reliefs
Do not only photograph the grand façade. Some of the temple’s most interesting stories are carved into the walls.
Combine It With the Valley of the Kings
The Temple of Hatshepsut is close to the Valley of the Kings, making the two sites a natural pairing on the same West Bank visit.
Respect Barriers and Restricted Areas
Ancient reliefs, statues and reconstructed sections are fragile. Stay on permitted paths and avoid touching stonework.
Prepare for Strong Sun
The temple’s open terraces reflect heat and light. Sun protection is essential, especially from late morning onward.
FAQs About the Temple of Hatshepsut
Where is the Temple of Hatshepsut?
The Temple of Hatshepsut is at Deir el-Bahari on the West Bank of Luxor, Egypt, near the Valley of the Kings.
Who built the Temple of Hatshepsut?
The temple was built for Hatshepsut, the queen who became pharaoh. It was designed by Senenmut, an important official and architect in her court.
What is the real name of the Temple of Hatshepsut?
Its ancient name is Djeser-Djeseru, usually translated as “Holy of Holies.”
Why is the Temple of Hatshepsut famous?
It is famous for its terraced architecture, cliffside setting, elegant ramps and colonnades, relief carvings, and connection with one of Egypt’s most important female pharaohs.
Is the Temple of Hatshepsut worth visiting?
Yes. It is one of the most visually striking monuments in Luxor and an essential stop on the West Bank.
How long do you need at the Temple of Hatshepsut?
Most visitors need about one hour. History lovers and photographers may want 90 minutes or more.
Can you visit the Temple of Hatshepsut and Valley of the Kings together?
Yes. They are close enough to visit on the same Luxor West Bank tour, along with the Colossi of Memnon and other sites.
What is the best time of day to visit?
Early morning is best for cooler weather and better light. Midday can be very hot and bright.
Do you need a guide?
You can visit independently, but a guide makes the experience much richer because the temple’s reliefs and historical background are important.
Is the Temple of Hatshepsut suitable for children?
Yes, children can visit, but the site can be hot and exposed. Bring water, hats and sun protection, and keep younger children close on steps and terraces.
Final Thoughts
The Temple of Hatshepsut is one of the great highlights of Luxor. Its clean lines, broad terraces and powerful cliffside setting make it unlike any other temple in Egypt.
For the best visit, go early, take time to admire the full façade from a distance, then look closely at the reliefs, chapels and statues that tell the story of Hatshepsut’s reign. Combined with the Valley of the Kings, Medinet Habu and the Colossi of Memnon, it forms one of the most rewarding sightseeing days on Luxor’s West Bank.
Sponsored Popular Items
Quick take: Musement.com offers a worldwide selection of tours and attractions
Ancient Egypt Sunset Tour with 3-Course Dinner in Cairns Australia Explore the Tomb of the Pharaohs on an after-hours tour. Discover 11 burial chambers and learn about ancient Egypt's history. Enjoy a 3-course dinner in our aquatic themed Squire's… Check current availability, inclusions and booking conditions.
Ancient Egypt Sunset Tour in the heart of Cairns Australia Explore the Tomb of the Pharaohs on an after-hours tour. Learn about the daily rituals and funerary practices of the ancient Egyptians and gain insight into over 3,000 years of history. Check current availability, inclusions and booking conditions.
Ancient Egypt Night Tour with 2 Course Dinner in Cairns Australia Explore the Tomb of the Pharaohs on an after-hours tour. Discover eleven lavishly decorated burial chambers and enjoy a 2-course dinner. Check current availability, inclusions and booking conditions.
Hubu Lane, also known as Hubu Alley or 户部巷, is one of Wuhan’s best-known food streets. Located in Wuchang District near Yellow Crane Tower and the Yangtze River, it is famous for local snacks, quick street food, breakfast culture and the lively atmosphere of old Wuhan.
Hubu Lane Wuhan: A Guide to the Famous Snack Street Near Yellow Crane Tower
For travellers visiting Wuhan, Hubu Lane is an easy and enjoyable stop. It works especially well before or after Yellow Crane Tower, a Yangtze River walk, Simenkou, Tanhualin or a Wuchang city itinerary. The lane is not a quiet hidden-food street; it is popular, busy and touristy, but it remains a useful place to try several Wuhan snacks in one compact area.
Sponsored Popular Items
Quick take: Musement.com offers a worldwide selection of tours and attractions
Dublin: Windmill Lane Recording Studios Tour Best deals for Dublin: Windmill Lane Recording Studios Tour. Visit the iconic studios which have been making music history since 1978. Get right to the heart of both the Irish and global music scene. Available from getyourguide.com.
What Is Hubu Lane?
Hubu Lane is a historic snack street in Wuhan’s Wuchang District. It is located around Simenkou, one of Wuchang’s traditional busy areas, and is closely associated with Wuhan-style breakfast snacks and street food.
The name “Hubu” is linked to a nearby Qing Dynasty government office connected with revenue administration. The area itself has deeper historical roots, with Wuhan tourism sources tracing Hubu Lane back to the Ming Dynasty.
Today, the lane is known as a concentrated food street where visitors can sample many Wuhan snacks in a short time. It is often visited by tourists, domestic travellers, food lovers and people combining it with Yellow Crane Tower.
Why Visit Hubu Lane?
Hubu Lane is worth visiting because it gives travellers an easy introduction to Wuhan food. The city is famous for its breakfast culture, and Hubu Lane gathers many recognisable snacks in one walkable place.
The lane is also convenient. It sits near some of Wuchang’s major tourist areas, so you do not need to travel far out of your way to include it. If you are already visiting Yellow Crane Tower, Hubu Lane can become your lunch, dinner or snack stop.
Visitors should go with the right expectations. Hubu Lane is famous and commercial, so it can be crowded and tourist-focused. For a polished, easy food stop, it works well. For a deeper local breakfast experience, you may also want to explore other Wuhan food streets and neighbourhood breakfast shops.
Wuhan Breakfast Culture
Wuhan is famous for “guo zao,” the local expression for eating breakfast. Breakfast in Wuhan is not just toast and coffee; it is a fast, flavourful street-food ritual built around noodles, dumplings, rice-based snacks, soups and takeaway bowls eaten on the way to work.
Hubu Lane is strongly connected with this breakfast culture. Even if you visit later in the day, many of the foods sold here come from the city’s morning food traditions.
If you want the most authentic breakfast feeling, visit earlier rather than only at night. If you prefer atmosphere, lights and a wider tourist crowd, evening can also be enjoyable.
Best Foods to Try at Hubu Lane
Hubu Lane is best approached as a tasting walk. Instead of ordering one large meal, try several small dishes from different stalls. This lets you sample more flavours and avoids filling up too quickly.
Good foods to look for include hot dry noodles, doupi, steamed dumplings, soup dumplings, fried dough snacks, grilled skewers, lotus root soup, sweet rice snacks and local-style noodle bowls.
Hot Dry Noodles
Hot dry noodles, or re gan mian, are Wuhan’s most famous dish. The noodles are usually mixed with sesame paste, soy sauce, pickled vegetables, chilli oil, spring onion and other seasonings.
The texture is rich, savoury and slightly sticky because of the sesame paste. It is simple, filling and strongly associated with Wuhan daily life. If you only try one dish at Hubu Lane, make it hot dry noodles.
Three-Delicacy Doupi
Three-delicacy doupi is another classic Wuhan snack. It is made with layers of sticky rice, egg-like skin, meat, mushrooms, bamboo shoots or other savoury fillings, then pan-fried and cut into squares.
Doupi is more filling than it looks. The outside can be lightly crisp, while the inside is warm, savoury and rice-based. It is a good choice if you want something more substantial than noodles.
Steamed Dumplings and Snack Stalls
Hubu Lane also has steamed dumplings, buns, grilled snacks, fried snacks and quick takeaway foods. Some stalls specialise in long-standing Wuhan brands, while others sell broader Chinese snack-street favourites.
As with any busy food street, choose stalls with good turnover. A queue is not always a guarantee of quality, but it usually means food is moving quickly and being cooked fresh.
What to See Nearby
Yellow Crane Tower
Yellow Crane Tower is the major landmark near Hubu Lane. It is one of Wuhan’s most famous historic and cultural attractions, and the two places are commonly visited together.
Yangtze River
The Yangtze River is close to the Wuchang side of the city. After eating at Hubu Lane, you can continue toward the river for views, riverside walking or onward transport.
Wuhan Yangtze River Bridge
The first Wuhan Yangtze River Bridge is another important landmark nearby. It connects Wuchang and Hanyang and is useful if you want to understand Wuhan’s identity as a city built around rivers.
Tanhualin
Tanhualin is a historic and creative neighbourhood in Wuchang with cafés, old buildings, small shops and a slower walking atmosphere. It pairs well with Hubu Lane if you want a mix of food and urban wandering.
Simenkou Area
Simenkou is the broader commercial area around Hubu Lane. It is busy, local, practical and useful for shopping, eating and transport connections.
Best Time to Visit Hubu Lane
The best time to visit depends on the experience you want.
Morning
Morning is best if you want to connect Hubu Lane with Wuhan breakfast culture. Try hot dry noodles, doupi or dumplings before visiting Yellow Crane Tower.
Late Afternoon
Late afternoon can be a good compromise. The area is active, but you may avoid the strongest lunchtime or evening crowds.
Evening
Evening is best for atmosphere. Lights, crowds, smells and busy stalls create the classic snack-street feeling. However, it can be crowded, especially on weekends and holidays.
How to Get There
Hubu Lane is in Wuchang District, Wuhan. The easiest way to reach it depends on where you are staying, but taxis, ride-hailing apps, metro connections and walking from nearby attractions are all practical options.
If you are visiting Yellow Crane Tower, Hubu Lane can usually be added before or after the tower visit. Use the Chinese name 户部巷 in map apps or show it to your driver.
Because Wuhan is large and spread across three historic towns—Wuchang, Hankou and Hanyang—allow time for traffic and river crossings if you are coming from another side of the city.
Simple Hubu Lane Itinerary
Half-Day Wuchang Food and Landmark Route
Morning: Start at Hubu Lane for hot dry noodles and doupi.
Late morning: Walk or travel to Yellow Crane Tower.
Midday: Visit the tower and enjoy views over Wuhan.
Afternoon: Continue toward the Yangtze River Bridge or Tanhualin.
Evening: Return to the river area, Hankou, or another food district for dinner.
Evening Snack Walk
Arrive at Hubu Lane before peak dinner crowds if possible.
Walk the lane once before choosing what to eat.
Try several small dishes rather than one large meal.
Take photos of signs, stalls and food preparation.
Finish with a walk toward the river or return by taxi or metro.
Practical Travel Tips
Use the Chinese Name
Search for 户部巷 in Chinese map apps. This is more reliable than English spellings such as Hubu Lane, Hubu Alley or Huhu Xiang.
Bring Small Cash or Mobile Payment
Many stalls in China prefer mobile payment, but carrying some cash is useful for visitors. Ask your hotel or guide about the best payment method before heading out.
Walk First, Eat Second
Do one slow walk through the lane before ordering. This lets you compare stalls and avoid filling up at the first place you see.
Expect Crowds
Hubu Lane is famous, so crowds are normal. Weekends, public holidays and evenings can be especially busy.
Choose Busy Stalls
For street food, high turnover usually means fresher food. Choose stalls where food is being cooked or served continuously.
Try Local Specialities First
Prioritise Wuhan foods such as hot dry noodles, doupi and local dumplings before filling up on generic snack-street items.
Combine It With Yellow Crane Tower
Hubu Lane’s location makes it a natural food stop before or after Yellow Crane Tower. This is one of the easiest Wuchang pairings for visitors.
Go Early If You Want Better Photos
Evening is more atmospheric, but morning or late afternoon is easier for cleaner street photos and less crowd pressure.
Keep Expectations Realistic
Hubu Lane is famous and convenient, but not every stall will be the best version of each dish. Treat it as a fun introduction to Wuhan food rather than the only food stop in the city.
FAQs About Hubu Lane
Where is Hubu Lane?
Hubu Lane is in Wuchang District, Wuhan, near Simenkou, Yellow Crane Tower and the Yangtze River area.
What is Hubu Lane famous for?
Hubu Lane is famous for Wuhan snacks and breakfast foods, especially hot dry noodles, doupi, steamed dumplings and other local street foods.
Is Hubu Lane worth visiting?
Yes, Hubu Lane is worth visiting if you want an easy introduction to Wuhan snack culture. It is touristy, but convenient and lively.
What should I eat at Hubu Lane?
Try hot dry noodles, three-delicacy doupi, steamed dumplings, soup buns, grilled skewers, lotus root soup and local-style noodle snacks.
Is Hubu Lane close to Yellow Crane Tower?
Yes. Hubu Lane is close enough to combine with Yellow Crane Tower on the same Wuchang sightseeing route.
What is the best time to visit Hubu Lane?
Morning is best for Wuhan breakfast culture, while evening is best for atmosphere and snack-street energy.
Is Hubu Lane good for families?
Yes, families can enjoy Hubu Lane, but it can be crowded. Keep children close, especially around busy food stalls and narrow walking areas.
Do vendors speak English?
Some may know simple English, but do not rely on it. Use translation apps, photos, pointing and basic Chinese food names where possible.
How long do you need at Hubu Lane?
Allow 45 minutes to 90 minutes for a snack walk. Add more time if you are combining it with nearby attractions or visiting during busy periods.
Is Hubu Lane authentic?
Hubu Lane is historically important and strongly associated with Wuhan snacks, but it is also a famous tourist food street. For deeper local food experiences, combine it with smaller neighbourhood breakfast shops elsewhere in Wuhan.
Final Thoughts
Hubu Lane is one of Wuhan’s easiest places to experience the city’s food culture. It is busy, famous and commercial, but it also offers a compact introduction to the flavours that define Wuhan: hot dry noodles, doupi, dumplings, fried snacks and quick breakfast-style dishes.
For the best visit, go with an appetite, try several small dishes, use the Chinese name 户部巷 for transport, and combine the lane with Yellow Crane Tower or a Wuchang walking route. Hubu Lane may not be the quietest food street in Wuhan, but it remains one of the city’s most recognisable snack landmarks.
Sponsored Popular Items
Quick take: Musement.com offers a worldwide selection of tours and attractions
Dublin: Windmill Lane Recording Studios Tour Best deals for Dublin: Windmill Lane Recording Studios Tour. Visit the iconic studios which have been making music history since 1978. Get right to the heart of both the Irish and global music scene. Available from getyourguide.com.
Photography | Moments at Haji Lane Singapore This unique narrow street is filled colourful murals, artistic paintings and funky Haji Lane cafes. We will also be heading to the historic Kampong Glam area to view the iconic Sultan Mosque
Suvarnabhumi Airport Priority Lane Butler Service Thailand Plan Suvarnabhumi Airport Priority Lane Butler Service, a travel service, with practical tips on timing, inclusions and what to check before booking. Compare current availability, prices and booking conditions before you go.
Japan rail travel is one of the easiest, fastest and most enjoyable ways to explore the country. From sleek Shinkansen bullet trains to scenic limited express routes, local city lines and rural mountain railways, Japan’s train network can take you from Tokyo to Kyoto, Osaka, Hiroshima, Kanazawa, Hokkaido, Kyushu and beyond with remarkable efficiency.
For first-time visitors, the system can look confusing at first: Japan Rail Passes, regional passes, reserved seats, IC cards, Shinkansen lines, private railways, luggage rules and station transfers all have their own logic. Once you understand the basics, train travel becomes one of the best parts of visiting Japan.
Sponsored Popular Items
Quick take: Musement.com offers a worldwide selection of tours and attractions
Singapore: City cards Singapore Book the most popular City cards in Singapore. Best price and money back guarantee! Read the reviews of your fellow travelers
Why Travel by Train in Japan?
Train travel in Japan is fast, reliable, clean and convenient. Major cities are connected by high-speed Shinkansen services, while local and regional lines make it possible to reach smaller towns, hot spring areas, castles, temples, ski resorts, coastal villages and mountain regions.
For visitors, trains are often easier than driving. You avoid tolls, parking, city traffic, unfamiliar road signs and left-side driving if you are not used to it. Trains also let you relax, eat an ekiben station lunch box, watch the scenery and arrive directly in city centres.
The strongest rail routes for visitors include Tokyo to Kyoto, Kyoto to Osaka, Osaka to Hiroshima, Tokyo to Kanazawa, Tokyo to Nagano, Osaka to Kanazawa via Tsuruga, and longer routes into Kyushu or Hokkaido.
Shinkansen Bullet Trains
The Shinkansen is Japan’s famous bullet train network. It is the fastest way to travel between many major cities and is one of the most comfortable long-distance train systems in the world.
Main Shinkansen Lines
Tokaido Shinkansen: Tokyo, Nagoya, Kyoto and Shin-Osaka.
Sanyo Shinkansen: Shin-Osaka to Okayama, Hiroshima, Hakata and western Japan.
Kyushu Shinkansen: Hakata to Kumamoto and Kagoshima-Chuo.
Tohoku Shinkansen: Tokyo to Sendai, Morioka, Aomori and northern Honshu.
Hokuriku Shinkansen: Tokyo to Nagano, Toyama, Kanazawa, Fukui and Tsuruga.
Joetsu Shinkansen: Tokyo to Niigata.
Shinkansen trains are smooth, frequent and easy to use. Platforms are clearly marked, seats are numbered, car positions are shown on the platform and departures are extremely punctual. Arrive a little early, line up at the correct car number and be ready to board quickly when the train arrives.
Japan Rail Pass
The Japan Rail Pass, often called the JR Pass, is a nationwide rail pass for eligible overseas visitors. It allows travel on many JR trains across Japan for a set number of consecutive days.
The national JR Pass comes in 7-day, 14-day and 21-day versions, with Ordinary Car and Green Car options. Ordinary Car is comfortable enough for most travellers. Green Car is more spacious and quieter, similar to first class or business class seating.
The JR Pass can be useful for travellers doing several long-distance train journeys in a short period, but it is no longer automatically the best choice for every itinerary. Since the price increase, many simple routes are cheaper with individual tickets.
Is the JR Pass Worth It?
The JR Pass is worth considering if your itinerary includes multiple expensive long-distance journeys within the pass period. It is less likely to pay off if you are only travelling Tokyo to Kyoto, Kyoto to Osaka, and then flying home.
JR Pass May Be Worth It If You Are Doing:
Tokyo to Kyoto, then Hiroshima, then back to Tokyo within 7 days.
Tokyo to Kanazawa, Kyoto, Hiroshima and Fukuoka in a compact route.
Several Shinkansen journeys across different regions within 7, 14 or 21 days.
Long-distance travel where you value flexibility more than the lowest cost.
JR Pass May Not Be Worth It If You Are Doing:
Tokyo, Kyoto and Osaka only.
A slow trip staying many days in each city.
Mostly local city travel.
Routes using many private railways rather than JR lines.
Flights between distant cities instead of trains.
Before buying, compare your planned journeys with the pass cost. A rail pass calculator or manual fare check can help you avoid overspending.
Regional JR Passes
Regional JR passes can be better value than the national JR Pass if you are focusing on one part of Japan. These passes are offered by JR regional companies and cover specific areas.
Examples of Useful Regional Pass Areas
Kansai Area: Kyoto, Osaka, Nara, Kobe and Himeji.
Kansai-Hiroshima Area: Osaka, Kyoto, Himeji, Okayama, Hiroshima and Miyajima.
Hokuriku Area: Kanazawa, Toyama, Fukui and nearby routes.
Kyushu: Fukuoka, Nagasaki, Kumamoto, Beppu, Kagoshima and other Kyushu destinations.
Hokkaido: Sapporo, Hakodate, Asahikawa, Furano and other northern routes.
Tohoku: Sendai, Aomori, Akita, Morioka and northern Honshu.
Regional passes are often the smarter choice for travellers who want to explore deeply rather than rush across the whole country.
IC Cards: Suica, PASMO and ICOCA
IC cards are rechargeable transport cards used for local trains, subways, buses, convenience stores, lockers and vending machines. The best-known cards are Suica, PASMO and ICOCA.
For most visitors, an IC card is essential for city travel. Instead of buying a paper ticket for every subway or local train ride, you tap in and tap out at the gates. The correct fare is deducted automatically.
IC cards are not a replacement for long-distance Shinkansen tickets, but they make everyday travel much easier in cities such as Tokyo, Kyoto, Osaka, Hiroshima, Fukuoka, Sapporo and Nagoya.
Reserved and Non-Reserved Seats
Many long-distance trains in Japan have reserved and non-reserved seating. Reserved seats give you a specific seat, car and departure time. Non-reserved seating lets you sit in designated non-reserved cars if seats are available.
For busy routes, holidays, luggage travel or long journeys, reserved seats are usually better. For short trips or flexible travel, non-reserved seats can be convenient.
Reserve Seats If You Are Travelling:
During cherry blossom season, autumn foliage season or public holidays.
On weekends between major cities.
With children or a group.
With large luggage.
On popular Shinkansen routes such as Tokyo to Kyoto or Osaka to Hiroshima.
Luggage Rules on Japanese Trains
Japan’s trains are efficient, but they are not designed for huge amounts of luggage. Travel light if possible. A medium suitcase is much easier than a very large one.
On the Tokaido, Sanyo, Kyushu and Nishi-Kyushu Shinkansen, oversized luggage with total dimensions over 160 cm generally requires a seat reservation with an oversized baggage area. Bags over 250 cm total dimensions cannot be brought onboard.
For easier travel, consider using Japan’s luggage forwarding services, often called takkyubin or luggage delivery. These services can send your suitcase from hotel to hotel, allowing you to travel with only a small overnight bag.
Best Japan Rail Routes for First-Time Visitors
Tokyo to Kyoto
The classic first-time route. Take the Tokaido Shinkansen from Tokyo or Shinagawa to Kyoto. Sit on the right-hand side when travelling from Tokyo to Kyoto for a chance of seeing Mount Fuji in clear weather.
Kyoto to Osaka
This is a short and easy journey. Depending on where you are staying, local JR trains, private railways or the Shinkansen may all be possible. Do not assume the Shinkansen is always the most convenient option for this short route.
Osaka to Hiroshima
The Sanyo Shinkansen makes Hiroshima easy to reach from Osaka. This route works well for visiting Hiroshima Peace Memorial Park and Miyajima.
Tokyo to Kanazawa
The Hokuriku Shinkansen connects Tokyo with Kanazawa, making the city’s gardens, samurai district, geisha streets and seafood market easy to add to an itinerary.
Tokyo to Nagano
Nagano is useful for mountain scenery, Zenko-ji Temple, snow monkeys, ski resorts and access to the Japanese Alps region.
Kyushu Rail Travel
Kyushu is excellent by train, with routes connecting Fukuoka, Nagasaki, Kumamoto, Beppu, Yufuin, Kagoshima and other regional destinations.
Simple Japan Rail Itinerary
Classic 14-Day Japan Rail Route
Days 1–4: Tokyo, including Shinjuku, Asakusa, Shibuya, Ueno and day trips.
Day 5: Shinkansen from Tokyo to Kanazawa.
Days 5–6: Kanazawa for Kenrokuen Garden, Higashi Chaya and Omicho Market.
Day 7: Travel from Kanazawa to Kyoto via Tsuruga.
Days 7–10: Kyoto, Nara and Osaka.
Day 11: Shinkansen to Hiroshima.
Days 11–12: Hiroshima and Miyajima.
Day 13: Return toward Osaka or Tokyo.
Day 14: Final city day and departure.
Simple Golden Route Without a JR Pass
Days 1–5: Tokyo.
Day 6: Buy an individual Shinkansen ticket from Tokyo to Kyoto.
Days 6–10: Kyoto, Nara and Osaka using local tickets or IC card.
Day 11: Depart from Osaka or return to Tokyo by individual ticket.
For many first-time travellers doing only Tokyo, Kyoto and Osaka, individual tickets plus an IC card may be simpler and cheaper than a national JR Pass.
How to Buy Train Tickets
Train tickets can be bought at station ticket machines, JR ticket offices, official railway websites, travel apps and reservation services. For long-distance Shinkansen journeys, it is useful to book ahead during busy seasons.
Buying at a Station
Major stations have ticket machines with English language options. Staffed ticket offices can help with more complicated routes, seat reservations and passes.
Buying Online
Online booking is convenient for reserved seats and busy routes. Different JR regions use different booking systems, so the best platform depends on your route.
Using a JR Pass
If you buy a national JR Pass through the official website, you can make some seat reservations online. If you buy through other channels, check exactly how reservations are handled before travel.
Station and Platform Tips
Japanese stations can be huge, especially Tokyo, Shinjuku, Shin-Osaka, Kyoto, Nagoya and Hakata. Give yourself extra time for transfers, especially when changing between Shinkansen, local JR lines, subways and private railways.
Useful Station Habits
Check your train number, departure time and destination.
Look for platform numbers on departure boards.
Line up at the car number shown on your ticket.
Keep tickets or IC card handy for gates.
Do not block escalators, ticket gates or platform doors.
Use station lockers for luggage during day trips.
Buy snacks or ekiben before boarding long-distance trains.
Practical Rail Travel Tips
Use Google Maps or a Japan Train App
Navigation apps are very useful for platform numbers, route options, departure times and transfer guidance. Always double-check the train type and destination before boarding.
Travel Light
A small or medium suitcase is much easier than a large one. Use luggage forwarding for multi-city trips if you want smoother travel days.
Book Busy Trains Early
Reserve seats early during cherry blossom season, autumn foliage season, New Year, Golden Week and Obon.
Do Not Rely Only on the JR Pass
Japan has many private railway and subway systems. The JR Pass does not cover everything, especially many city subways, private railways and some mountain or tourist lines.
Keep Your Ticket Until the End
For paper tickets, you usually need the ticket to exit at your destination. Do not throw it away after boarding.
Know the Difference Between Stations
Some cities have multiple major stations. For example, Shin-Osaka is the Shinkansen station, while Osaka Station is a major local and regional hub. In Tokyo, Shinkansen trains may depart from Tokyo Station, Shinagawa or Ueno depending on the line.
Use Coin Lockers
Coin lockers are available at many stations and are very useful for day trips. Large lockers can fill quickly in tourist areas, so arrive early or use luggage storage counters where available.
Try an Ekiben
Ekiben are station lunch boxes sold at major train stations. They are one of the joys of Japanese rail travel, especially on long-distance Shinkansen routes.
Be Quiet on Trains
Japanese trains are generally quiet. Keep phone calls off the train, speak softly and use headphones if listening to audio.
Stand in the Correct Place
Car numbers are marked on platforms. Reserved-seat tickets show your car and seat number, so line up at the correct spot before the train arrives.
FAQs About Japan Rail Travel
Is train travel the best way to get around Japan?
Yes, for most visitors, trains are the best way to travel between major cities and many regional destinations. They are fast, reliable and convenient.
Do I need a Japan Rail Pass?
Not always. The JR Pass can be good value for long-distance, multi-city travel, but many simple itineraries are cheaper with individual tickets and an IC card.
Is the Shinkansen included in the JR Pass?
Many Shinkansen services are covered by the JR Pass, but some fastest services such as Nozomi and Mizuho require special rules or additional tickets. Always check the current pass conditions before boarding.
What is the difference between Ordinary and Green Car?
Ordinary Car is standard class and is comfortable for most travellers. Green Car is more spacious, quieter and more expensive.
Should I reserve seats on Japanese trains?
For long-distance Shinkansen trips, busy seasons, groups or large luggage, reserved seats are recommended. For short local trips, reservations are usually unnecessary.
Can I bring luggage on the Shinkansen?
Yes, but very large luggage may require an oversized baggage reservation on certain Shinkansen routes. Travel with smaller luggage where possible.
What is an IC card?
An IC card is a rechargeable transport card such as Suica, PASMO or ICOCA. It is used for local trains, subways, buses, convenience stores and vending machines.
Can I use a JR Pass on Tokyo subway lines?
No. The JR Pass covers JR lines, not Tokyo Metro or Toei Subway. In Tokyo, you will often use a mix of JR lines and subway lines.
What side of the train should I sit on to see Mount Fuji?
When travelling from Tokyo toward Kyoto or Osaka on the Tokaido Shinkansen, sit on the right-hand side for the best chance of seeing Mount Fuji in clear weather.
Is it hard to use trains in Japan if I do not speak Japanese?
No. Major stations and trains have English signs, route numbers and announcements. Navigation apps also make travel much easier.
Final Thoughts
Japan rail travel is one of the most enjoyable parts of visiting the country. The trains are fast, comfortable and reliable, and the network makes it easy to connect modern cities, historic towns, mountain regions, coastal areas and hot spring resorts.
For the best experience, plan your long-distance route before deciding on a JR Pass, use an IC card for local travel, reserve seats during busy periods and travel with manageable luggage. Whether you are riding the Shinkansen from Tokyo to Kyoto, exploring Kanazawa on the Hokuriku route or taking local trains through the countryside, Japan’s rail system turns travel days into part of the adventure.
Sponsored Popular Items
Quick take: Musement.com offers a worldwide selection of tours and attractions
Singapore: City cards Singapore Book the most popular City cards in Singapore. Best price and money back guarantee! Read the reviews of your fellow travelers
Japan: 7, 14 or 21-Day Japan Rail Pass Best deals for Japan: 7, 14 or 21-Day Japan Rail Pass. Discover the whole of Japan by rail with unlimited freedom thanks to the Japan Rail Pass. Choose from a 7, 14, or 21-day pass to suit your needs and potentially upgrade to first class. Available from getyourguide.com.