Dotonbori night views are one of the most iconic experiences in Osaka, Japan. This lively entertainment district in Minami comes alive after dark with glowing billboards, canal reflections, giant food signs, crowds on Ebisu Bridge, street-food smells, river cruises, restaurants, shopping streets and the famous Glico Running Man sign.
If Kyoto is about temples and quiet lanes, Dotonbori is Osaka turned up loud: bright, busy, funny, hungry and full of movement. It is the place to see the city’s playful side, take classic Osaka photos, try takoyaki and okonomiyaki, walk beside the Dotonbori Canal and feel the night-time energy that makes Osaka one of Japan’s best food cities.
Dotonbori is easy to visit independently, especially from Namba Station, Shinsaibashi or Nipponbashi. The best time to go is from early evening into the night, when the signs are fully lit and the canal reflects the colours of the city.
Quick take: Musement.com offers a worldwide selection of tours and attractions
Osaka: Dotonbori River Cruise with Glico Sign & Neon Views Best deals for Osaka: Dotonbori River Cruise with Glico Sign & Neon Views. The ultimate way to explore Osaka! A relaxing cruise along the Dotonbori River. Hop on a 20-minute cruise and enjoy iconic views of Osaka’s Minami area from the water—including the famous Glico sign. Available from getyourguide.com.
Why Visit Dotonbori at Night?
Dotonbori is worth visiting at night because this is when the area looks and feels most like the Osaka you see in travel photos. The neon signs turn on, the Glico Man glows above the canal, restaurant signs light up, riverboats pass beneath bridges, and the water reflects red, blue, yellow and pink lights from the surrounding buildings.
It is also one of the easiest places in Osaka to enjoy the city’s food culture. You can snack your way through takoyaki, okonomiyaki, kushikatsu, ramen, gyoza, melonpan ice cream, crab dishes and sweet treats without needing a formal plan.
Dotonbori night views are best for:
First-time visitors to Osaka
Night photography and neon city scenes
Street food and casual Osaka dining
Couples wanting a lively evening walk
Families who want an easy, colourful night outing
Travellers staying in Namba or Shinsaibashi
Shopping, arcades, karaoke and late-night exploring
Visitors wanting the classic Glico Man photo
Where Is Dotonbori?
Dotonbori is in Osaka’s Minami district, close to Namba, Shinsaibashi and Nipponbashi. It runs along the Dotonbori Canal and is surrounded by restaurants, theatres, shopping arcades, bars, entertainment venues and hotels.
Location Detail
Traveller Notes
Destination
Dotonbori / Dōtonbori / 道頓堀
City
Osaka, Japan
Area
Minami / Namba district
Main landmark
Glico Running Man sign near Ebisu Bridge
Main waterway
Dotonbori Canal
Closest major stations
Namba, Osaka-Namba, Shinsaibashi and Nipponbashi
Best visit style
Evening walk, food crawl, night photography, river cruise or guided Osaka food tour
The most classic night-view area is around Ebisu Bridge, where crowds gather to photograph the Glico sign and the illuminated canal. From there, you can walk along the Tonbori River Walk, explore the restaurant streets, continue north into Shinsaibashi-suji shopping arcade or wander toward Hozenji Yokocho for a quieter old-Osaka atmosphere.
What to Expect at Dotonbori at Night
Expect crowds, colour, noise, food smells and constant movement. Dotonbori is not a peaceful night walk. It is a high-energy entertainment district with tourists, locals, street-food queues, photo groups, restaurant touts, giant signs, boat cruises and late-night shopping.
The main appeal is the atmosphere. Even if you do not eat much or book an activity, simply walking from the canal to the main food streets gives you the feeling of Osaka’s famous “kuidaore” culture, often translated as eating until you drop.
What you may find
Neon signs and LED billboards
The famous Glico Running Man
Ebisu Bridge photo crowds
Giant crab, octopus, pufferfish and ramen signs
Dotonbori Canal reflections
River cruises passing under bridges
Takoyaki and okonomiyaki shops
Karaoke, arcades and nightlife venues
Shinsaibashi-suji shopping arcade nearby
Hozenji Yokocho’s quieter lantern-lit alley
What not to expect
Do not expect a quiet hidden local area; Dotonbori is very popular.
Do not expect every restaurant to be cheap just because it is casual.
Do not expect the best photos from the busiest spot only.
Do not stop suddenly in the middle of pedestrian flows.
Do not leave bags or phones unsecured in crowds.
Do not expect every food queue to mean the food is the best in Osaka.
Do not spend the whole night only at Ebisu Bridge; explore side streets too.
Best Dotonbori Night View Photo Spots
Dotonbori is one of Osaka’s best night photography areas because the light is strong, colourful and reflected in the canal. The best photos usually combine people, signs, water, bridges and food culture rather than focusing on one billboard only.
1. Ebisu Bridge
Ebisu Bridge is the classic viewpoint for the Glico Man sign. It is crowded, but it is the essential first photo stop for most visitors.
2. Tonbori River Walk
The Tonbori River Walk gives lower, canal-level views of the signs and reflections. It is especially good for photos of boats passing beneath bridges.
3. Tazaemonbashi Bridge
Tazaemonbashi Bridge is useful for canal views and is close to the Tombori River Cruise boarding area.
4. Aiaibashi Bridge
Aiaibashi Bridge can give a slightly different angle on the canal and is useful if Ebisu Bridge is too crowded.
5. In front of the Kani-Doraku crab sign
The moving giant crab sign is one of Dotonbori’s most recognisable street-level photo spots.
6. Hozenji Yokocho
Hozenji Yokocho offers a very different night mood: lanterns, stone paving, narrow alleys and old-Osaka charm.
7. Don Quijote Dotonbori area
The Don Quijote building and its oval Ferris wheel structure add another bold landmark to the canal-side night scene.
8. Restaurant-sign street level
Photograph the giant food signs close up: crab, octopus, ramen bowls, pufferfish and theatrical shopfronts.
9. River cruise perspective
A short river cruise lets you photograph Dotonbori from the water, looking up at the signs and bridges.
10. Side streets off the main canal
Some of the best shots come from stepping away from the most crowded bridge and capturing smaller alleys, lanterns and food stalls.
Glico Man and Ebisu Bridge
The Glico Running Man is Dotonbori’s most famous sign and one of Osaka’s most recognisable symbols. The athlete running with arms raised has become the classic photo pose for visitors standing on Ebisu Bridge.
Ebisu Bridge itself is one of the busiest gathering points in Osaka at night. It connects the Dotonbori area with the Shinsaibashi-suji shopping arcade and gives the best-known view across the canal toward the Glico sign.
Glico Man photo tips
Go after sunset when the sign is fully lit.
Try the classic arms-raised pose from Ebisu Bridge.
Use portrait mode or night mode on your phone.
Step to the side of the bridge if the central area is too crowded.
Take a second photo from the canal-level walkway for reflections.
Visit later at night for slightly thinner crowds.
Be patient; people move constantly through the shot.
Dotonbori Canal and Tonbori River Walk
The Dotonbori Canal is what turns the neon signs into a true night-view experience. Reflections ripple across the water, riverboats pass below the bridges, and the lights make the area feel larger than it is.
The Tonbori River Walk lets visitors walk along the canal edge, below street level in some sections. It is one of the best places for a slower view of Dotonbori after taking the standard bridge photos.
Best canal experiences
Walk both sides of the canal between Ebisu Bridge and Tazaemonbashi.
Watch the lights reflect in the water after dark.
Photograph riverboats as they pass beneath the signs.
Use the canal-level path to escape some of the street crowds.
Look for quieter bridge angles away from the main Glico photo spot.
Take a short cruise if you want to see the signs from the water.
Tombori River Cruise
The Tombori River Cruise is a short sightseeing cruise along the Dotonbori Canal. It is ideal if you want a quick, easy way to see the neon signs, bridges and riverfront from the water without committing to a long boat tour.
The cruise is especially fun at night because the signs feel huge from the boat, and the canal reflections add to the atmosphere. It is a simple activity, but it gives a different perspective from walking.
Why take the river cruise?
It gives water-level views of the neon signs.
It is short and easy to fit into an evening plan.
It works well before or after dinner.
It is good for families and first-time visitors.
It helps you see the canal without pushing through crowds.
River cruise tips
Check the current operating schedule before going.
Buy tickets early on busy nights if possible.
Night cruises are more atmospheric than daytime cruises.
Sit where you can turn easily for photos.
Bring a light jacket in cooler months.
Secure your phone over the water.
Street Food and Osaka Specialties
Dotonbori is one of the easiest places to taste Osaka’s most famous foods in one night. Some places are touristy, but that does not make the experience less fun. The key is to snack slowly, share dishes and explore side streets as well as the most obvious shopfronts.
Foods to try in Dotonbori
Takoyaki: hot octopus balls with sauce, mayo, bonito flakes and seaweed powder.
Okonomiyaki: Osaka-style savoury pancake with cabbage, sauce and toppings.
Kushikatsu: deep-fried skewers, often associated with Osaka comfort food.
Ramen: rich noodle bowls, with many late-night options nearby.
Gyoza: pan-fried dumplings, good for sharing.
Crab dishes: popular around the famous Kani-Doraku crab sign.
Taiyaki: fish-shaped cake filled with red bean, custard or other fillings.
Cheesecake and sweets: Osaka has several famous dessert shops nearby.
Japanese convenience-store snacks: useful for a cheap late-night bite.
Food tips
Share several dishes instead of filling up at one restaurant.
Watch for long queues, but do not assume the longest queue is always best.
Step into side streets for less crowded food options.
Carry small cash, although many places now accept cards or digital payments.
Eat hot takoyaki carefully; the inside can be extremely hot.
Check whether restaurants have seating or are takeaway only.
Respect local rules about eating while walking if signs request it.
Best Things to Do in Dotonbori at Night
1. Take the classic Glico Man photo
Start at Ebisu Bridge and take the famous arms-raised Glico pose. It is touristy, but it is part of the fun.
2. Walk the canal
Use the Tonbori River Walk to see the neon reflections from a lower, calmer angle.
3. Try takoyaki from a busy stand
Takoyaki is one of the essential Osaka foods, and Dotonbori has plenty of easy places to try it.
4. Take the Tombori River Cruise
A short canal cruise gives you a different view of the signs, bridges and crowds.
5. Photograph the giant food signs
Look for the giant crab, octopus, ramen bowls and other theatrical restaurant fronts.
6. Explore Hozenji Yokocho
Just a short walk away, Hozenji Yokocho feels quieter and more atmospheric, with lanterns, stone paving and small restaurants.
7. Shop at Don Quijote
The Dotonbori Don Quijote is popular for souvenirs, snacks, beauty products and late-night shopping.
8. Walk to Shinsaibashi-suji
Shinsaibashi-suji shopping arcade connects easily with the Dotonbori area and is good for fashion, cosmetics, snacks and gifts.
9. Add karaoke or an arcade
Osaka nights do not have to end after dinner. Karaoke, game centres and claw-machine arcades are easy to find around Namba.
10. Join a guided food tour
A guided tour can help you avoid random tourist traps and learn more about Osaka food culture, especially if it is your first night in the city.
Nearby Places to Visit
Namba
Namba is the wider transport, shopping and entertainment hub around Dotonbori. It is the best area to stay if you want nightlife and easy access to the district.
Shinsaibashi-suji Shopping Street
Shinsaibashi-suji is a covered shopping arcade running north from the Dotonbori area. It is great for fashion, cosmetics, snacks and rainy-night wandering.
Hozenji Yokocho
Hozenji Yokocho is a narrow lantern-lit alley near Dotonbori with a quieter, traditional feel. It is perfect after the bright chaos of the canal.
Kuromon Ichiba Market
Kuromon Ichiba Market is a famous food market near Nipponbashi. It is better during the day or early evening than late at night.
Amerikamura
Amerikamura, or Amemura, is a youth-fashion and street-culture area west of Shinsaibashi, useful for second-hand shops, murals, cafés and nightlife.
Namba Yasaka Shrine
Namba Yasaka Shrine is known for its huge lion-head stage. It is best visited during daylight, but it pairs well with a Namba stay.
Shinsekai
Shinsekai is another Osaka nightlife and food district, famous for Tsutenkaku Tower and kushikatsu. It has a different, retro atmosphere from Dotonbori.
Osaka Castle
Osaka Castle is not in Dotonbori, but it is one of the city’s top daytime sightseeing stops and can be paired with a Dotonbori evening.
Best Time to Visit Dotonbori Night Views
Dotonbori can be visited year-round, but the best night-view experience starts after sunset when the signs are fully lit. Early evening is good for food and first photos, while later at night can be better for slightly thinner crowds and stronger reflections.
Time / Season
What to Expect
Advice
Early evening
Lights come on, restaurants fill and the area feels lively
Best for dinner and first-time visitors.
8:00pm to 10:00pm
Peak night atmosphere and strong neon views
Best for classic photos, but expect crowds.
Late night
Some crowds thin, but many signs and venues remain active
Good for photography if you are comfortable staying out later.
Spring
Comfortable weather and busy travel periods
Excellent for walking, especially during cherry blossom season in Osaka.
Summer
Hot, humid and lively
Dress lightly and hydrate.
Autumn
Comfortable temperatures and good evening walking weather
One of the best seasons for Osaka nights.
Winter
Cooler air, clear nights and festive lighting in parts of the city
Bring a jacket and enjoy warming food.
Rainy nights
Wet streets create extra reflections and cinematic photos
Bring an umbrella and protect your camera.
Suggested Dotonbori Night Itinerary Ideas
Option 1: Simple First-Time Dotonbori Night Walk
6:00pm: Arrive at Namba Station and walk toward Dotonbori.
6:30pm: Take photos at Ebisu Bridge and the Glico Man sign.
7:00pm: Try takoyaki or okonomiyaki.
8:00pm: Walk the Tonbori River Walk for canal reflections.
8:30pm: Continue to Hozenji Yokocho for a quieter lantern-lit contrast.
9:00pm: Return through Dotonbori for dessert or late-night shopping.
Option 2: Dotonbori Food Crawl
Start: Share takoyaki near the main canal area.
Next: Try okonomiyaki or kushikatsu in a sit-down restaurant.
Walk: Photograph giant crab and octopus signs between food stops.
Dessert: Try melonpan ice cream, cheesecake or taiyaki.
Finish: Take one final canal photo from Ebisu Bridge.
Option 3: Dotonbori Night Photography Route
Blue hour: Arrive before full darkness and photograph the canal as lights switch on.
Classic shot: Capture Glico Man from Ebisu Bridge.
Low angle: Move down to the Tonbori River Walk for reflections.
Boat shot: Wait for a river cruise to pass under the signs.
Side streets: Photograph food signs and lantern alleys.
Rain option: Use wet pavement for extra reflections.
Option 4: Family-Friendly Dotonbori Evening
Early evening: Arrive before the biggest late-night crowds.
First stop: Take the Glico Man photo.
Dinner: Choose a restaurant with seating rather than eating only on the street.
Activity: Take a short river cruise if children are interested.
Finish: Visit an arcade or dessert shop, then return to the hotel before it gets too late.
Option 5: Osaka Nightlife Combo
Late afternoon: Visit Kuromon Ichiba or Namba Yasaka Shrine.
Evening: Dinner and photos in Dotonbori.
Night: Walk to Shinsaibashi-suji or Amerikamura.
Late night: Karaoke, arcade games or a relaxed bar in Namba.
Where to Stay Near Dotonbori
Area
Best For
Traveller Notes
Namba
First-time visitors, nightlife and transport
Best overall base for Dotonbori night views.
Dotonbori / Soemoncho
Staying right in the action
Very convenient, but can be noisy at night.
Shinsaibashi
Shopping, restaurants and stylish hotels
Good balance of nightlife and convenience.
Nipponbashi
Kuromon Market, anime shops and access to Dotonbori
Practical and often slightly calmer than the canal area.
Umeda
Transport, shopping and modern city hotels
Excellent city base, but less convenient for late-night Dotonbori walks.
Shinsekai / Tennoji
Retro food scene and value stays
Good for a different Osaka atmosphere, but not as central to Dotonbori.
What to check before booking
Can you walk safely back from Dotonbori at night?
Is the hotel near Namba, Shinsaibashi or Nipponbashi Station?
Is the room quiet despite the nightlife area?
Is breakfast included or are there cafés nearby?
Does the hotel have luggage storage?
Is there easy access to Kansai Airport trains?
Are family rooms or twin rooms available?
Useful Booking Resources for Dotonbori Night Views and Osaka Activities
Dotonbori is easy to explore independently, but booking platforms are useful for Osaka food tours, guided night walks, river cruises, cooking classes, Namba experiences, Osaka Castle combinations, day trips to Kyoto or Nara, airport transfers and wider Japan travel planning. Skimlinks may automatically convert these merchant links into affiliate links if the merchant is active in your Skimlinks account.
GetYourGuide – offers Osaka food tours, Dotonbori night walks, cooking classes, bar-hopping experiences, city tours, Kyoto and Nara day trips, and Japan activity bookings.
Viator – offers Dotonbori and Namba food tours, Osaka private guides, night photography walks, street-food tours, airport transfers and customisable Kansai itineraries.
Klook – offers Osaka attractions, transport passes, eSIMs, Universal Studios Japan tickets, Kansai airport transfers, Dotonbori experiences and local food activities.
KKday – offers Japan tours, Osaka food experiences, transport products, attraction tickets, day trips and local cultural activities around Kansai.
Tiqets – offers mobile-friendly attraction tickets, museums and cultural experiences useful for travellers combining Osaka with Kyoto, Tokyo or other Japan stops.
Musement – offers Japan tours, attraction tickets, cultural activities, local experiences and city sightseeing products for Osaka and wider travel planning.
G Adventures – offers small-group and multi-day Japan tours that may suit travellers planning a broader route including Osaka, Kyoto, Hiroshima or Tokyo.
Go City – offers bundled attraction passes in selected destinations, useful for readers comparing multi-attraction sightseeing before or after Japan.
CityPASS – offers bundled attraction passes mainly for selected North American cities. It is not a main Osaka booking option, but may suit readers planning wider international travel.
Booking tip: Before booking a Dotonbori food tour or night walk, check the meeting point, group size, food inclusions, drink inclusions, vegetarian or allergy options, guide language, walking distance, cancellation policy and whether the route includes Dotonbori, Hozenji Yokocho, Shinsekai, Kuromon Market or other Osaka food areas.
Dotonbori Night View Travel Tips
Visit after sunset
Dotonbori is best after dark, when the signs are lit and the canal reflects the city lights.
Start at Ebisu Bridge, then move on
Take the classic Glico photo, but do not spend the whole night there. The side streets and canal walk are just as interesting.
Protect your belongings
Dotonbori is generally safe, but it is crowded. Keep phones, wallets and bags secure.
Do not block foot traffic for photos
Ebisu Bridge and the main streets can get very busy. Step aside before stopping for long photo sessions.
Try more than one food stop
Osaka is a city for grazing. Share small dishes so you can try takoyaki, okonomiyaki, kushikatsu and dessert.
Explore Hozenji Yokocho
When the neon feels overwhelming, Hozenji Yokocho gives you a quieter, lantern-lit contrast just a short walk away.
Check river cruise times
The Tombori River Cruise is short and popular. Check current times and ticket availability before planning your evening around it.
Use public transport
Namba, Shinsaibashi and Nipponbashi stations make Dotonbori easy to reach. Avoid driving if you only plan to explore the nightlife area.
Stay nearby if you want a relaxed night
A Namba or Shinsaibashi hotel makes it easy to enjoy Dotonbori without worrying about a long late-night train ride.
Bring a small umbrella in rainy season
Rain can make the neon reflections even better, but you will enjoy it more with proper rain gear.
Are Dotonbori Night Views Worth Seeing?
Yes, Dotonbori night views are absolutely worth seeing, especially for first-time visitors to Osaka. The mix of neon signs, canal reflections, street food, crowds and giant restaurant displays captures the city’s playful, food-loving personality better than almost anywhere else.
It may not suit travellers looking for a quiet or hidden local experience. Dotonbori is busy, touristy and commercial. But that is also why it is so memorable. It is Osaka’s bright, noisy, delicious postcard brought to life.
The best way to enjoy Dotonbori at night is to arrive after sunset, take the Glico Man photo, walk the canal, try several small dishes, explore Hozenji Yokocho for contrast, and consider a short river cruise if you want to see the neon from the water.
FAQs About Dotonbori Night Views
Where is Dotonbori?
Dotonbori is in Osaka’s Minami district, close to Namba, Shinsaibashi and Nipponbashi stations.
What is Dotonbori famous for?
Dotonbori is famous for neon signs, the Glico Running Man, Ebisu Bridge, the Dotonbori Canal, giant restaurant signs, street food, nightlife and Osaka’s energetic food culture.
When is the best time to see Dotonbori night views?
The best time is after sunset, especially from early evening to around 10:00pm when the signs are bright and the area is lively.
Where is the best place to photograph the Glico Man?
Ebisu Bridge is the classic photo spot for the Glico Man sign. The canal-level Tonbori River Walk also gives good reflection shots.
Is Dotonbori safe at night?
Dotonbori is generally safe and busy at night, but visitors should keep belongings secure, avoid blocking crowds and use normal big-city awareness.
Yes. The Tombori River Cruise offers a short canal cruise that gives views of Dotonbori’s signs, bridges and nightlife from the water.
How long do you need in Dotonbori at night?
Allow at least two hours for photos, food and a canal walk. Allow three to four hours if you want dinner, a river cruise, shopping and Hozenji Yokocho.
Is Dotonbori good for families?
Yes, Dotonbori can be fun for families in the early evening, especially for food, lights, river cruises and arcades. Later at night it becomes more crowded and nightlife-focused.
Are Dotonbori night views worth seeing?
Yes. Dotonbori night views are one of Osaka’s classic experiences, combining neon lights, canal reflections, street food and the famous Glico Man sign.
Sponsored Popular Items
Quick take: Musement.com offers a worldwide selection of tours and attractions
Osaka: Dotonbori River Cruise with Glico Sign & Neon Views Best deals for Osaka: Dotonbori River Cruise with Glico Sign & Neon Views. The ultimate way to explore Osaka! A relaxing cruise along the Dotonbori River. Hop on a 20-minute cruise and enjoy iconic views of Osaka’s Minami area from the water—including the famous Glico sign. Available from getyourguide.com.
Nagoya: Sakae Neon & City Lights Night Walk Best deals for Nagoya: Sakae Neon & City Lights Night Walk. Explore Nagoya after dark through Sakae’s futuristic landmarks, neon streets, and local nightlife areas. Discover Oasis 21, city lights, hidden corners, and a different side of central Nagoya. Available from getyourguide.com.
Tokyo: Private Shibuya Neon Lights Photo Tour Best deals for Tokyo: Private Shibuya Neon Lights Photo Tour. Capture the authentic side of Shibuya with a local photographer. Natural, cinematic shots in famous spots and hidden alleys in the cultural heart of Tokyo. Photos + pro retouch delivered free. Available from getyourguide.com.
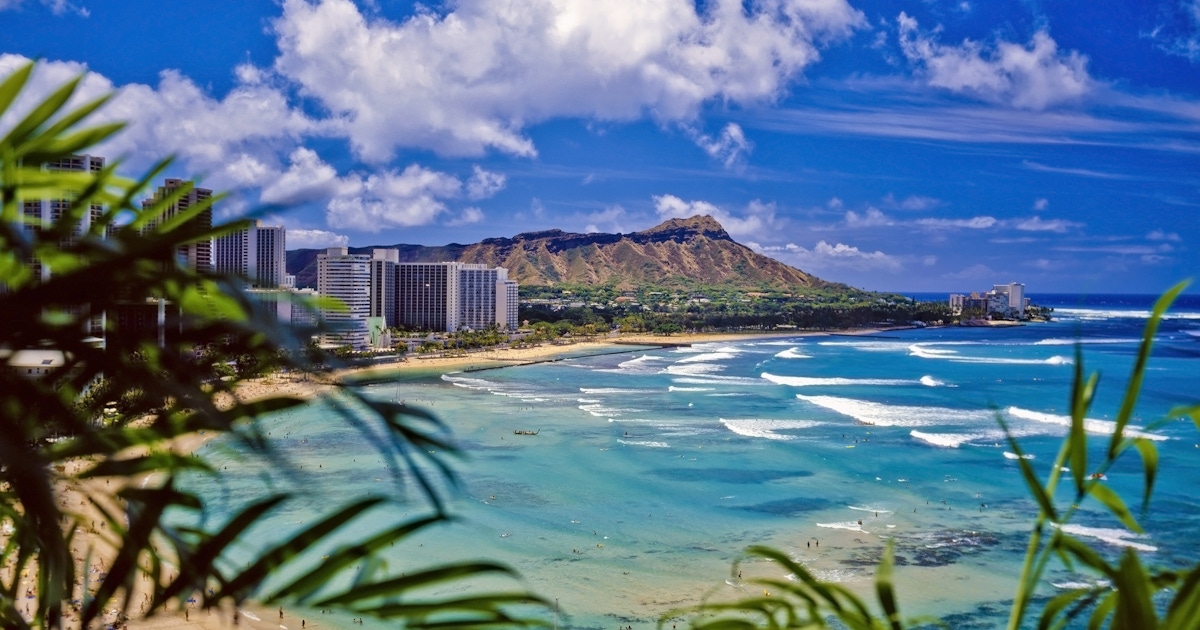
Oahu’s Waikiki Coast is one of the most famous beach destinations in the world, blending golden sand, warm Pacific water, surf culture, high-rise hotels, sunset catamarans, Hawaiian music, restaurants, shopping and the unmistakable outline of Diamond Head. Set on the south shore of Honolulu, Waikiki is the classic first stop for many travellers visiting Hawaiʻi.
Waikiki is not a remote tropical hideaway. It is lively, busy, polished and easy to enjoy. The beach is backed by hotels, resorts, shops, surf schools, beach bars, cafés, restaurants and walking paths. That convenience is part of its appeal. You can take a surf lesson in the morning, walk to lunch, shop on Kalākaua Avenue, swim in the afternoon, cruise on a catamaran at sunset and finish the evening with live music or a beachfront dinner.
The Waikiki Coast is also a practical base for exploring Oʻahu. From here, you can visit Diamond Head, Pearl Harbor, Hanauma Bay, ʻIolani Palace, Ala Moana, Kakaʻako, Mānoa Falls, the North Shore, Kailua, Lanikai and many other island highlights.
Quick take: Musement.com offers a worldwide selection of tours and attractions
Waikiki Honolulu – Guided Tours & Visitor Guide United States A listing may offer admission, a guided visit, transport, a combination package or premium access. Check current availability, inclusions and booking details before you go.
Why Visit Oahu’s Waikiki Coast?
Waikiki is worth visiting because it is one of the easiest places in Hawaiʻi to combine beach time, culture, food, shopping, beginner-friendly water activities and island day trips. It is ideal for travellers who want the beach at their doorstep without giving up restaurants, transport, tours and nightlife.
The coast is also deeply tied to Hawaiian surfing history. Duke Kahanamoku, the legendary Hawaiian swimmer and surfer, helped popularise surfing internationally, and his statue on Kūhiō Beach is one of Waikiki’s best-known landmarks.
Oahu’s Waikiki Coast is best for:
First-time visitors to Hawaiʻi
Beach holidays with easy hotel access
Beginner surf lessons and outrigger canoe rides
Couples wanting sunset catamaran cruises
Families wanting calm swimming areas and walkable restaurants
Travellers who prefer convenience over isolation
Shopping, dining, nightlife and resort-style stays
Visitors using Waikiki as a base for Pearl Harbor, Diamond Head and island tours
Where Is Waikiki?
Waikiki is a beachfront neighbourhood in Honolulu on the south shore of Oʻahu, Hawaiʻi. It sits east of downtown Honolulu and Ala Moana, with Diamond Head rising at the eastern end of the coastline.
Location Detail
Traveller Notes
Destination
Waikiki / Waikīkī Coast
Island
Oʻahu, Hawaiʻi, USA
City
Honolulu
Main landmark
Diamond Head / Lēʻahi
Main beach area
Waikiki Beach, Kūhiō Beach, Queen’s Beach, Fort DeRussy Beach and Kaimana Beach
Main streets
Kalākaua Avenue and Kūhiō Avenue
Best trip style
Beach stay, surf holiday, family base, resort break, honeymoon stop or Oʻahu sightseeing hub
Waikiki is compact and walkable, but it is also busy. Staying here gives you easy access to the beach, tours and restaurants, but parking can be expensive and traffic can be slow.
What to Expect on the Waikiki Coast
Expect a vibrant beach-resort district rather than a quiet deserted shoreline. Waikiki is famous because it combines gentle surf, warm water, historic hotels, oceanfront promenades, beach boys, catamarans, palm trees, luxury shopping and constant energy.
The beach is not one single uniform stretch. Different sections have different moods: some are better for beginner surfing, some for families, some for sunset views, and some for quieter swimming.
What you may find
Beachfront hotels and resort towers
Beginner surf breaks and surf schools
Outrigger canoe rides
Catamaran cruises leaving from the beach
Protected swimming areas in some sections
Beach rentals, umbrellas and chairs
Luxury shops and casual surf stores
Restaurants, cafés, bars and live music
Diamond Head views from the sand and water
Busy sidewalks, beach crowds and strong tourist energy
What not to expect
Do not expect an isolated beach escape.
Do not expect cheap parking at most hotels.
Do not expect every beach section to be ideal for swimming.
Do not leave valuables unattended on the sand.
Do not assume the ocean is always calm, even in Waikiki.
Do not expect Diamond Head entry without a reservation if you are a non-resident.
Do not expect the North Shore, Pearl Harbor and Hanauma Bay to be within walking distance.
Waikiki Beach and Its Main Sections
Waikiki Beach is often spoken of as one beach, but the coast includes several named sections. Each has a slightly different feel, so it is worth exploring beyond the sand directly in front of your hotel.
Duke Kahanamoku Beach
Duke Kahanamoku Beach, near the western end of Waikiki and close to Hilton Hawaiian Village, is popular with families and visitors wanting a wider beachfront area. The nearby lagoon can be useful for calmer water experiences.
Fort DeRussy Beach
Fort DeRussy Beach has a more open feel than central Waikiki and is close to green park space, beachfront hotels and sunset views.
Royal Hawaiian Beach
Royal Hawaiian Beach is the classic central Waikiki postcard area, backed by famous hotels such as the Royal Hawaiian and Moana Surfrider. It is convenient, iconic and often very busy.
Kūhiō Beach
Kūhiō Beach is near the Duke Kahanamoku Statue and has protected areas that can be good for families and casual swimming when conditions are suitable.
Queen’s Beach
Queen’s Beach sits toward the eastern end of Waikiki, near Kapiʻolani Park and the Honolulu Zoo. It is popular for swimming, bodyboarding in suitable conditions and sunset walks.
Kaimana Beach
Kaimana Beach, also called Sans Souci Beach, is slightly beyond the main Waikiki strip and often feels more local and relaxed. It is a good choice if you want a calmer end of the Waikiki Coast.
Surfing, Canoe Rides and Waikiki Beach Culture
Waikiki is one of the world’s great beginner surf destinations. The long, rolling waves are ideal for first lessons when conditions are right, and surf schools line the beachfront. It is also a historic home of Hawaiian beachboy culture, where surfing, canoe riding, hospitality and ocean knowledge shaped the visitor experience.
Best water activities
Beginner surf lesson: ideal for first-time surfers.
Outrigger canoe ride: a classic Waikiki experience, especially for families.
Stand-up paddleboarding: best in calmer conditions.
Beach swimming: choose lifeguarded or protected areas when possible.
Snorkelling: limited compared with Hanauma Bay, but possible in some clearer areas.
Bodyboarding: suitable only where conditions and local rules allow.
Sunset swim: beautiful, but stay aware of currents and visibility.
Surf lesson tips
Book with a licensed, reputable surf school.
Choose a lesson time with suitable tide and wave conditions.
Wear reef-safe behaviour and a rash guard for sun protection.
Listen carefully to surf etiquette and safety instructions.
Do not paddle into crowded surf breaks without knowing the rules.
Beginners should stay with instructors rather than renting a board alone.
Diamond Head State Monument
Diamond Head, known in Hawaiian as Lēʻahi, is the volcanic landmark that frames the eastern end of Waikiki. The hike to the summit is one of Oʻahu’s most popular short walks, with views over Waikiki, Honolulu and the Pacific.
Non-residents need reservations for entry and parking, and the trail can be hot, exposed and busy. It is best done early in the morning, both for cooler temperatures and better light.
Why visit Diamond Head?
Classic view over Waikiki Beach
Short but rewarding hike
Historic military and volcanic landscape
Excellent sunrise or morning photo opportunity
Easy to combine with Waikiki, Kapiʻolani Park and Kaimana Beach
Diamond Head tips
Reserve entry and parking ahead if required.
Go early to avoid heat and crowds.
Bring water, hat and sunscreen.
Wear proper shoes, not beach sandals.
Expect stairs, tunnels and exposed sections.
Do not underestimate the heat inside the crater.
Allow time to return to Waikiki for breakfast or a swim.
Waikiki Catamaran Cruises and Sunset Sailing
A Waikiki catamaran cruise is one of the best ways to see the coast from the water. Boats often depart directly from the beach or nearby harbour areas and sail along the Waikiki shoreline with views of Diamond Head, hotels, surfers and the Honolulu skyline.
Sunset cruises are especially popular. The light turns soft, the coast glows, and Waikiki looks completely different from offshore.
Popular cruise types
Cruise Type
Best For
Traveller Notes
Daytime catamaran sail
Coastal views and relaxed sailing
Good for first-time visitors and families.
Sunset cruise
Couples, photos and evening atmosphere
Book early in peak travel periods.
Snorkel sail
Water-focused travellers
Check exact snorkelling location; Waikiki is not always the main snorkel area.
Friday fireworks cruise
Night views and special occasions
Schedules depend on fireworks operations and operator availability.
Private charter
Groups and celebrations
More expensive but flexible and memorable.
Catamaran tips
Expect to get splashed on beach-loading boats.
Bring a light layer for wind after sunset.
Use a waterproof pouch for your phone.
Check whether drinks, snacks or snorkel gear are included.
Choose barefoot or easy footwear if boarding from the sand.
Take motion sickness tablets if you are sensitive.
Best Things to Do Along Oahu’s Waikiki Coast
1. Swim and relax on Waikiki Beach
Start with the classic Waikiki experience: warm water, soft sand, Diamond Head views and easy access to food and shops.
2. Take a beginner surf lesson
Waikiki is one of the best places in the world to try surfing for the first time, especially with a proper instructor.
3. Visit the Duke Kahanamoku Statue
The Duke statue at Kūhiō Beach is an iconic Waikiki landmark and a tribute to the Hawaiian athlete who helped share surfing with the world.
4. Hike Diamond Head
Book ahead, start early and enjoy the summit view over Waikiki and the south shore.
5. Take a sunset catamaran cruise
Seeing Waikiki from offshore at sunset is one of the most memorable evening experiences on Oʻahu.
6. Walk Kalākaua Avenue
Kalākaua Avenue is Waikiki’s main beachfront shopping and dining strip, with luxury stores, surf shops, cafés and street energy.
7. Visit Kapiʻolani Park
Kapiʻolani Park sits near the eastern end of Waikiki, close to the Honolulu Zoo, Queen’s Beach and Diamond Head views.
8. Watch a hula or live music performance
Look for free or ticketed Hawaiian music and hula performances in Waikiki’s hotels, shopping centres and public areas.
9. Explore Ala Moana and Magic Island
Ala Moana Beach Park and Magic Island sit just west of Waikiki and are great for sunset, walking, picnics and calmer swimming areas.
10. Use Waikiki as an Oʻahu sightseeing base
From Waikiki, you can book tours to Pearl Harbor, the North Shore, Hanauma Bay, Kailua, Kualoa Ranch and island-circle routes.
Nearby Oʻahu Places to Visit from Waikiki
Pearl Harbor National Memorial
Pearl Harbor National Memorial is one of Oʻahu’s most important historic sites. The visitor centre grounds and museums are free, but reservations are recommended for the USS Arizona Memorial program.
Hanauma Bay Nature Preserve
Hanauma Bay is a famous snorkelling area east of Waikiki. It requires advance planning, has limited reservations and is closed on Mondays and Tuesdays.
ʻIolani Palace
ʻIolani Palace in downtown Honolulu is the former royal residence of the Hawaiian Kingdom and one of the most important cultural sites on Oʻahu.
Ala Moana Center
Ala Moana Center is one of the largest open-air shopping centres in the world and is a short ride or longer walk from western Waikiki.
Kakaʻako
Kakaʻako is known for murals, breweries, cafés, shops and a more urban Honolulu feel.
Mānoa Falls
Mānoa Falls offers a rainforest walk not far from Waikiki, though trail conditions can be muddy and weather-dependent.
Kailua and Lanikai
Kailua and Lanikai on Oʻahu’s windward side are famous for white sand, turquoise water and views toward the Mokulua Islands.
North Shore
The North Shore is famous for winter surf, Haleʻiwa town, food trucks, beaches and a slower atmosphere than Waikiki.
Kualoa Ranch
Kualoa Ranch offers movie-site tours, ATV-style adventures, horseback riding and dramatic green mountain scenery on the windward side.
Best Time to Visit Waikiki
Waikiki can be visited year-round. Oʻahu has warm weather in every season, but crowd levels, surf conditions and prices vary.
Season
What to Expect
Advice
December to March
Popular winter season, higher prices and bigger surf on some Oʻahu shores
Good for escaping cold weather, but book early.
April to May
Warm weather and shoulder-season conditions
Excellent balance of weather and manageable crowds.
June to August
Summer holidays, warm water and busy family travel
Good for beach time, but expect crowds.
September to November
Warm weather and slightly softer crowd levels outside holiday periods
One of the best periods for value and pleasant conditions.
Sunset
Beautiful beach light, catamaran cruises and evening walks
Plan at least one evening on the sand or water.
For lower crowds and good weather, spring and autumn are often excellent. For families, summer works well if you book accommodation and tours ahead.
Suggested Waikiki Itinerary Ideas
Option 1: Classic 2-Day Waikiki First Visit
Day 1 morning: Walk Waikiki Beach and visit the Duke Kahanamoku Statue.
Day 1 afternoon: Take a beginner surf lesson or outrigger canoe ride.
Day 1 evening: Enjoy a sunset catamaran cruise or beachfront dinner.
Day 2 morning: Hike Diamond Head with a reservation.
Day 2 afternoon: Relax at Kaimana Beach or Queen’s Beach.
Day 2 evening: Shop and dine along Kalākaua Avenue.
Option 2: Family-Friendly Waikiki Plan
Morning: Swim in a calmer beach section near Kūhiō Beach if conditions are suitable.
Late morning: Visit the Honolulu Zoo or Kapiʻolani Park.
Afternoon: Rest at the hotel pool or beach.
Evening: Have an easy dinner at Waikiki Beach Walk or Royal Hawaiian Center.
Next day: Take a short island tour, Pearl Harbor visit or catamaran cruise.
Option 3: Active Waikiki and Diamond Head Day
Early morning: Hike Diamond Head before the heat builds.
Late morning: Breakfast back in Waikiki.
Midday: Surf lesson or stand-up paddleboard session.
Afternoon: Beach swim and rest.
Evening: Sunset walk from Fort DeRussy to Queen’s Beach.
Option 4: Waikiki and Pearl Harbor Combination
Morning: Visit Pearl Harbor National Memorial with reservations where needed.
Afternoon: Return to Waikiki for lunch and beach time.
Evening: Take a sunset sail or enjoy live Hawaiian music.
Option 5: 5-Day Waikiki Base for Oʻahu
Day 1: Waikiki Beach, Duke statue, Kalākaua Avenue and sunset.
Day 2: Diamond Head, Kapiʻolani Park and catamaran cruise.
Day 3: Pearl Harbor and downtown Honolulu.
Day 4: Hanauma Bay, Kailua or windward Oʻahu with advance planning.
Day 5: North Shore or Kualoa Ranch day trip.
Where to Stay Along the Waikiki Coast
Area
Best For
Traveller Notes
Central Waikiki / Royal Hawaiian area
First-time visitors, shopping, beach access and classic atmosphere
Most iconic and convenient, but busy and often expensive.
Kūhiō Beach area
Families, casual swimming and Duke statue access
Good for beach convenience and walkability.
Fort DeRussy / western Waikiki
Wider beach areas, sunsets and Ala Moana access
Good balance of Waikiki energy and open space.
Diamond Head / Kaimana area
Quieter stays, park access and local-feeling beaches
Less central for shopping, but calmer.
Ala Moana
Shopping, beach park access and better value options
Close to Waikiki but not in the centre of the resort strip.
Downtown Honolulu
Business, history and cultural sites
Less beach-focused, better for museums and city access.
What to check before booking
Is the hotel truly beachfront or a few blocks inland?
Are resort fees charged?
How much is parking?
Is breakfast included?
Does the room have an ocean, Diamond Head or city view?
Is there a pool?
Can you walk safely to the beach and restaurants?
Does the hotel provide beach chairs, towels or surfboard storage?
Food, Shopping and Nightlife
Waikiki is one of the easiest places on Oʻahu for dining because you can walk to everything from casual plate lunches to luxury restaurants. It also has major shopping centres, hotel bars, live music venues and beachside cafés.
Food and drink ideas
Poke bowls: fresh, casual and ideal after beach time.
Plate lunch: local-style comfort food with rice, macaroni salad and meat or seafood.
Garlic shrimp: popular across Oʻahu, especially on North Shore trips.
Shave ice: refreshing in the afternoon heat.
Malasadas: Portuguese-style doughnuts popular in Hawaiʻi.
Fresh pineapple and tropical fruit: easy snack options.
Hawaiian-style breakfast: eggs, rice, Portuguese sausage or local café dishes.
Sunset cocktails: best enjoyed responsibly with ocean views.
Shopping areas
Royal Hawaiian Center
International Market Place
Waikiki Beach Walk
Luxury Row
Ala Moana Center
Local surf shops and souvenir stores along Kalākaua Avenue
Evening ideas
Sunset beach walk
Catamaran cruise
Live Hawaiian music
Hotel luau or cultural dinner show
Rooftop drinks
Shopping and dessert along Kalākaua Avenue
Ocean Safety and Travel Tips
Waikiki may look gentle, but it is still the ocean. Conditions can change, reefs can be shallow, surf breaks can be crowded, and currents can surprise visitors. Check with lifeguards before entering the water, especially if you are swimming with children or trying a new activity.
Ocean safety tips
Swim near lifeguarded areas when possible.
Ask lifeguards about current conditions.
Read and obey posted warning signs.
Do not turn your back on waves.
Do not stand on coral or reef.
Wear reef-safe behaviour and avoid damaging marine life.
Use a rash guard and hat for sun protection.
Do not paddle into surf breaks without knowing surf etiquette.
Use life jackets for children and non-confident swimmers.
If in doubt, do not go out.
Practical Waikiki travel tips
Leave valuables in your hotel safe before going to the beach.
Use a waterproof pouch only for essentials.
Expect resort fees and high parking charges.
Book Diamond Head, Pearl Harbor programs and Hanauma Bay ahead where required.
Use rideshare, buses, shuttles or tours instead of renting a car for every day.
Walk early in the morning for quieter streets and cooler weather.
Bring reusable water bottles and reduce plastic waste.
Respect Hawaiian culture, place names and local communities.
Do not trespass on private hotel or residential areas.
Tip fairly for guided tours, surf lessons and service staff.
Useful Booking Resources for Waikiki Coast Tours and Oʻahu Activities
Waikiki is easy to explore independently, but booking platforms are useful for surf lessons, catamaran cruises, Diamond Head transfers, Pearl Harbor tours, luaus, island-circle tours, Hanauma Bay alternatives, Kualoa Ranch trips, North Shore tours, airport transfers and Oʻahu activity planning. Skimlinks may automatically convert these merchant links into affiliate links if the merchant is active in your Skimlinks account.
GetYourGuide – offers Waikiki surf lessons, catamaran cruises, Pearl Harbor tours, Diamond Head trips, luaus, North Shore tours, Kualoa Ranch experiences and Oʻahu island activities.
Klook – offers Oʻahu activities, attraction tickets, airport transfers, eSIM options, Waikiki experiences, Pearl Harbor tours and island transport products depending on availability.
KKday – offers Hawaiʻi tours, attraction tickets, transport services, local experiences and Oʻahu travel products useful for comparing Waikiki activities.
Tiqets – offers mobile-friendly attraction tickets, museums and cultural experiences useful for travellers combining Honolulu with other US destinations.
Musement – offers Hawaiʻi and US tours, attraction tickets, cultural activities, cruises and local experiences.
G Adventures – offers small-group and multi-day US or Hawaiʻi-style itineraries that may suit travellers planning a broader Pacific or North America trip.
Go City – offers bundled attraction passes in selected destinations, useful for readers comparing multi-attraction sightseeing before or after Hawaiʻi.
CityPASS – offers bundled attraction passes mainly for selected North American cities. It is not a main Waikiki booking option, but may suit readers planning wider US travel.
Booking tip: Before booking a Waikiki activity, check whether the price includes hotel pickup, equipment, instruction, reef-safe guidance, food or drinks, child pricing, cancellation rules, weather policy, exact meeting point and whether the tour is suitable for your swimming ability. For Diamond Head, Hanauma Bay and Pearl Harbor, always check official reservation requirements separately before finalising your day.
Is Oahu’s Waikiki Coast Worth Visiting?
Yes, Oahu’s Waikiki Coast is absolutely worth visiting, especially for first-time Hawaiʻi travellers who want beach access, surf culture, restaurants, shopping, nightlife and easy tours in one walkable area. It is famous for a reason: the water is beautiful, the Diamond Head backdrop is unforgettable, and the convenience is hard to beat.
It may not suit travellers looking for silence, isolation or untouched nature. Waikiki is busy and commercial. But if you treat it as a lively beach base rather than a hidden island village, it can be one of the most enjoyable and practical places to stay on Oʻahu.
The best way to enjoy Waikiki is to mix classic beach time with local respect: surf with a proper instructor, walk the coast at sunrise, book Diamond Head early, take one sunset sail, eat beyond the hotel strip, learn a little Hawaiian history, and use Waikiki as your base for exploring the rest of Oʻahu.
FAQs About Oahu’s Waikiki Coast
Where is Waikiki?
Waikiki is a beachfront neighbourhood in Honolulu on the south shore of Oʻahu, Hawaiʻi.
What is Waikiki famous for?
Waikiki is famous for Waikiki Beach, Diamond Head views, surfing, outrigger canoe rides, beachfront hotels, catamaran cruises, shopping, restaurants and Hawaiian beach culture.
Is Waikiki good for first-time visitors to Hawaiʻi?
Yes. Waikiki is one of the easiest places for first-time visitors because it has beach access, hotels, restaurants, tours, transport and activities in one compact area.
Can beginners surf in Waikiki?
Yes. Waikiki is one of the best-known beginner surf destinations in the world, especially when conditions are suitable and you take a lesson with a reputable instructor.
Do you need a car in Waikiki?
You do not need a car for Waikiki itself. A car, shuttle, rideshare or organised tour is useful for exploring Pearl Harbor, the North Shore, Kailua, Kualoa Ranch and other parts of Oʻahu.
Is Diamond Head near Waikiki?
Yes. Diamond Head is close to the eastern end of Waikiki, but non-residents need reservations for entry and parking.
Is Waikiki good for families?
Yes. Waikiki can be very good for families because it has walkable hotels, calmer beach sections, surf lessons, canoe rides, restaurants, shopping, parks and easy tour pickup.
When is the best time to visit Waikiki?
Waikiki is warm year-round. Spring and autumn often offer a good balance of weather, value and manageable crowds, while winter and summer are popular peak periods.
Is Waikiki too touristy?
Waikiki is very touristy, but that is also why it is convenient. Travellers wanting quiet nature should explore other parts of Oʻahu as well.
Is Oahu’s Waikiki Coast worth visiting?
Yes. Oahu’s Waikiki Coast is worth visiting for its beach, surf culture, Diamond Head views, catamaran cruises, shopping, food, nightlife and easy access to Honolulu and wider Oʻahu attractions.
Sponsored Popular Items
Quick take: Musement.com offers a worldwide selection of tours and attractions
Waikiki Honolulu – Guided Tours & Visitor Guide United States A listing may offer admission, a guided visit, transport, a combination package or premium access. Check current availability, inclusions and booking details before you go.
Oahu: Waikiki Trolley Hop-on Hop-off All-Line Pass United States See the best of Honolulu with this 1, 4 or 7-day all-line pass. Explore Diamond Head, Sea Life Park, Waikiki, and more from open-air trolleys and double-deckers. Check current availability, inclusions and booking conditions.
Oahu: Waikiki Friday Fireworks Cruise with Snacks and Drinks United States Enjoy a stunning sunset and fireworks display over Waikiki Beach on this unforgettable cruise. Sip a drink and watch the sky light up as you sail towards Diamond Head and Oahu’s scenic… Check current availability, inclusions and booking conditions.
Bacalar Lagoon of Seven Colors Guide: Sailing, Cenotes, Stromatolites and Eco Travel Tips
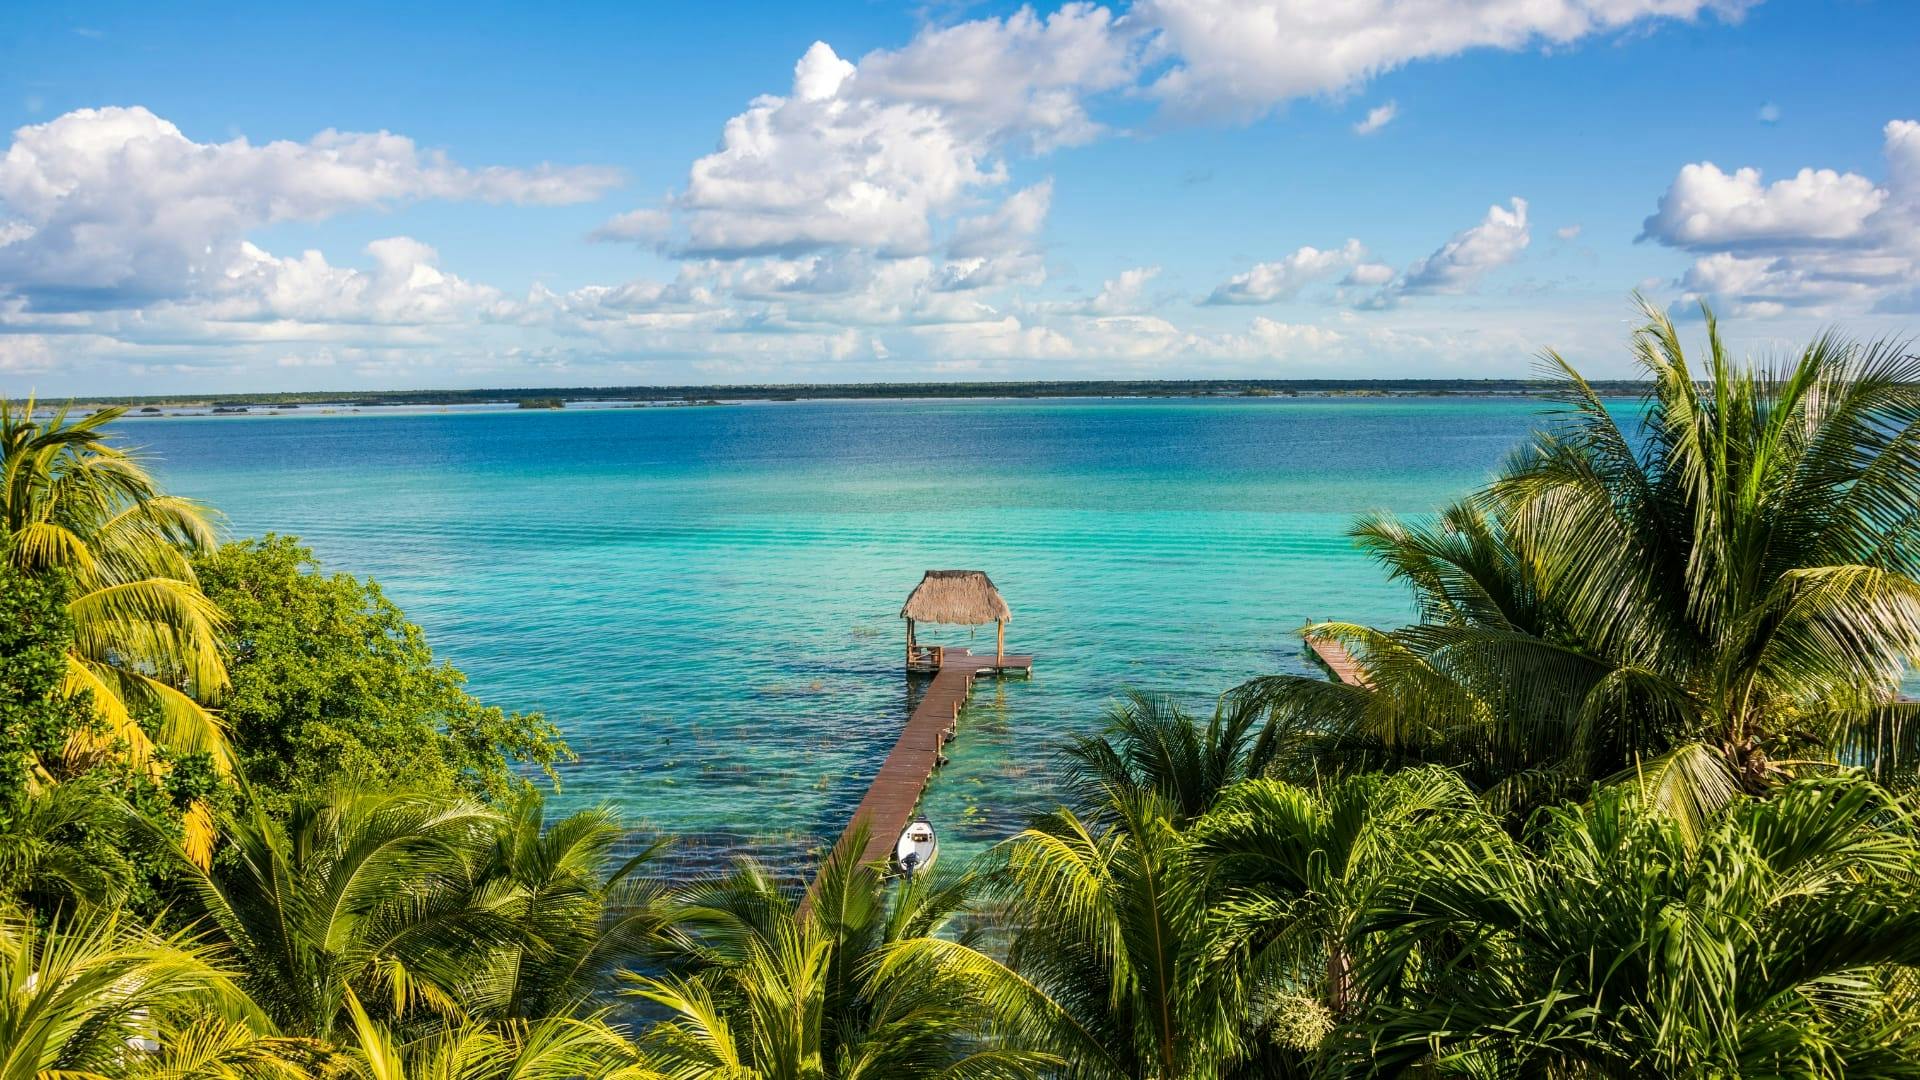
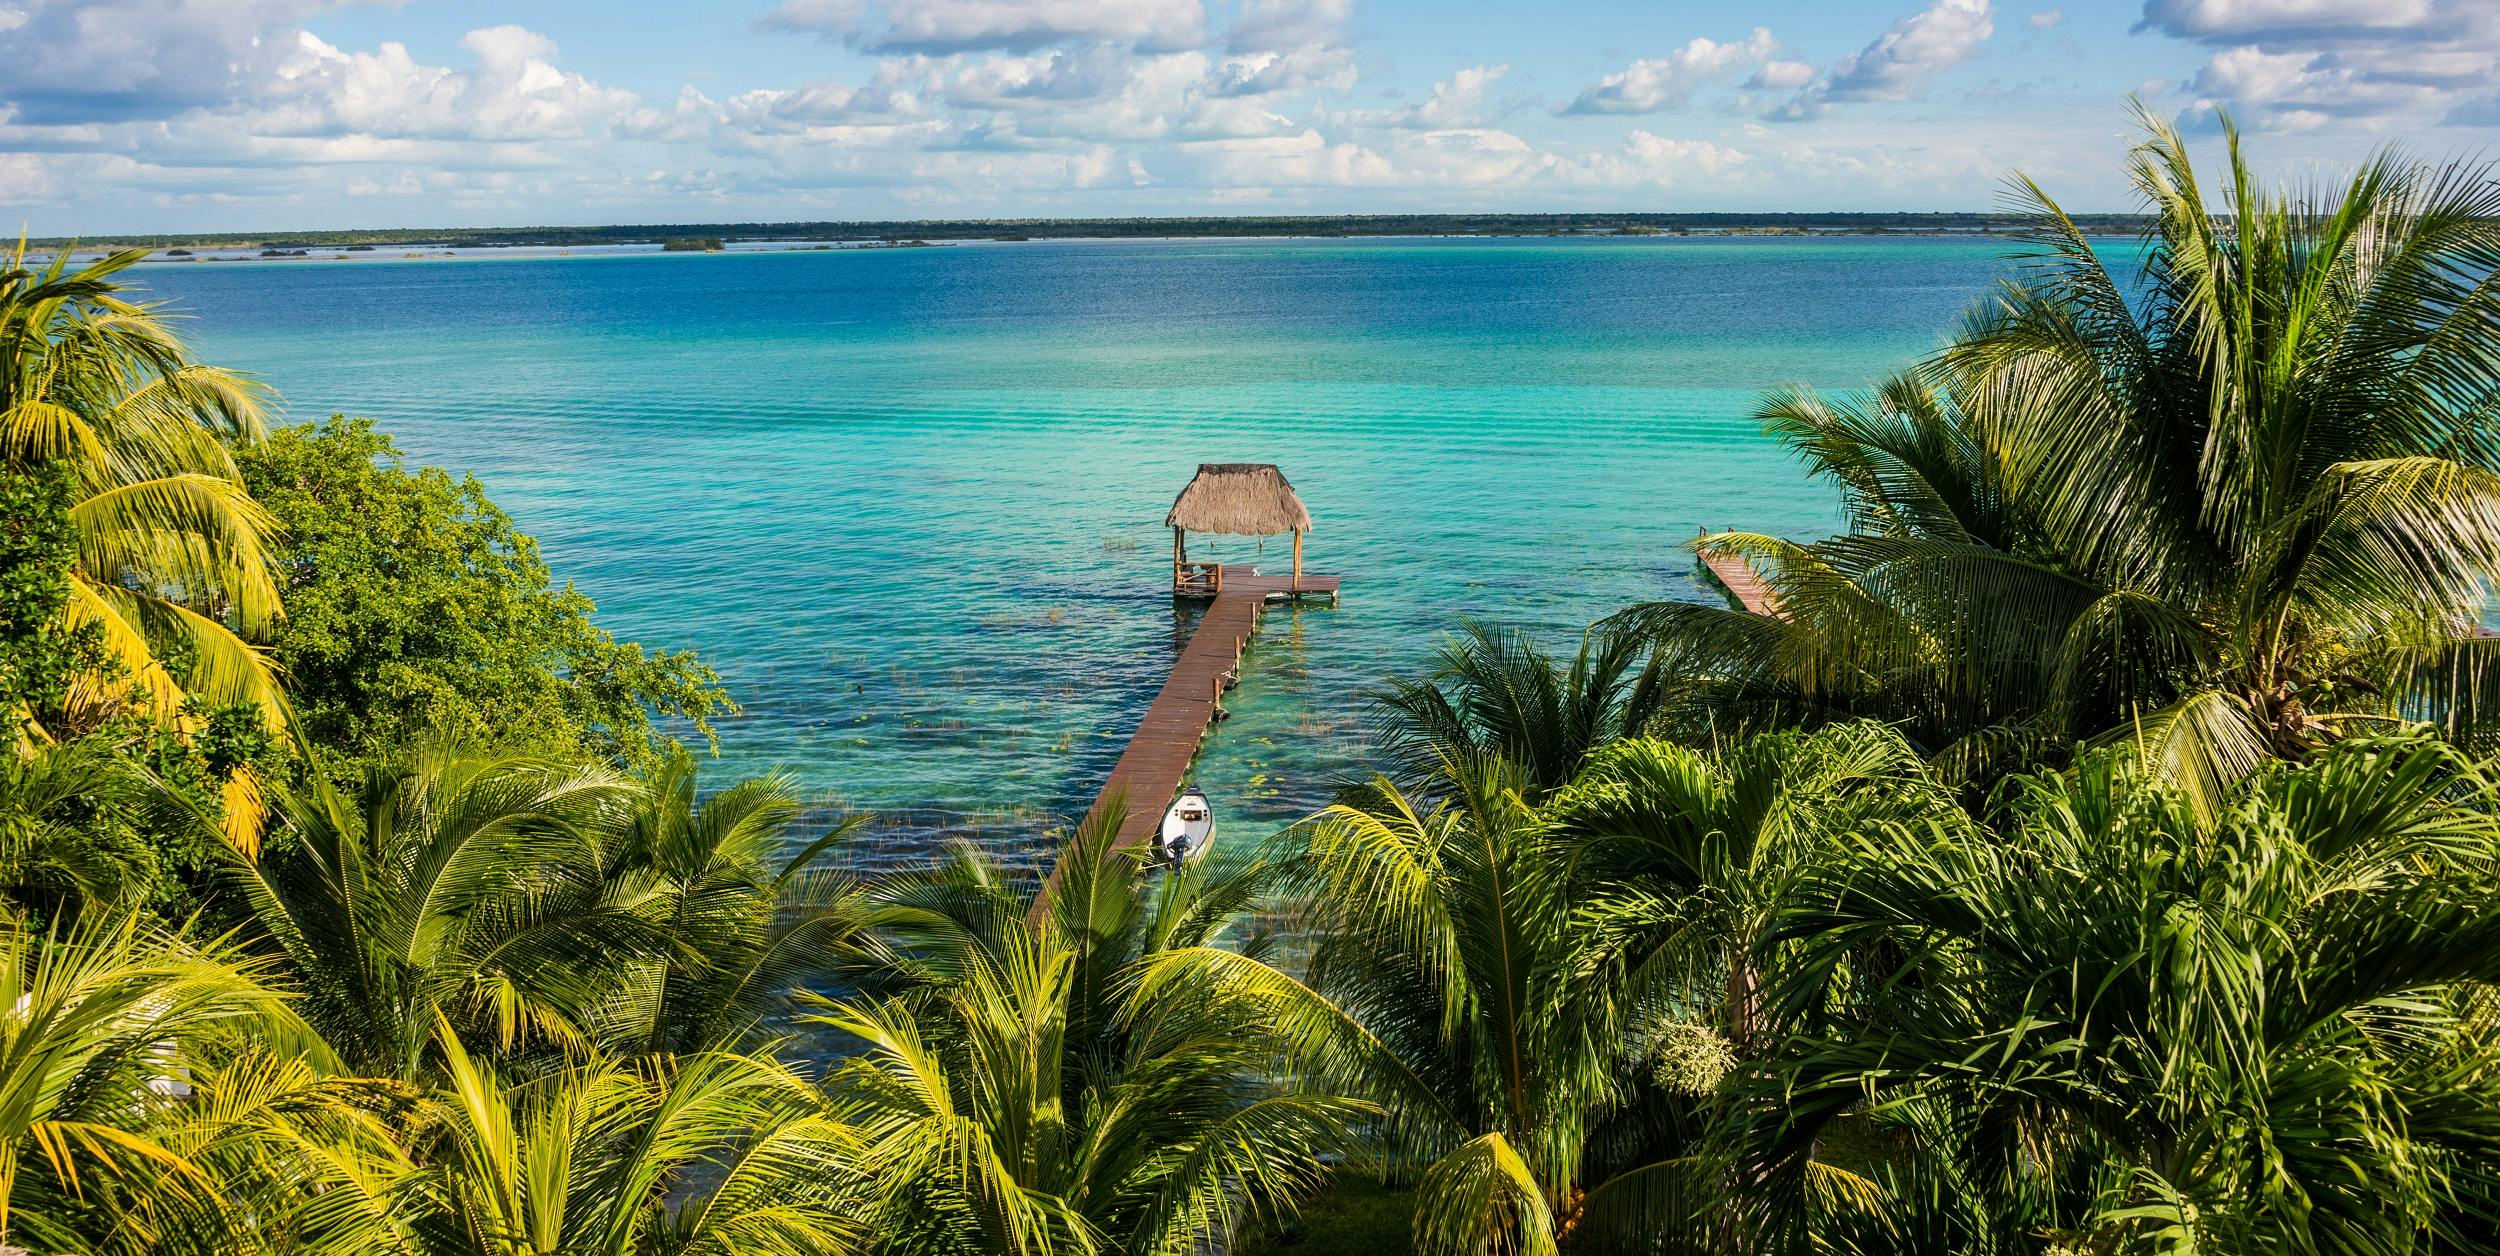
Bacalar Lagoon of Seven Colors, also known as Laguna de los Siete Colores, is one of the most beautiful freshwater destinations in Mexico’s Caribbean region. Located beside the town of Bacalar in southern Quintana Roo, the lagoon is famous for its shifting shades of turquoise, aquamarine, pale blue, deep blue and emerald, created by changes in depth, sunlight, limestone bottom and clear freshwater.
Bacalar is not a beach resort like Cancún, Playa del Carmen or Tulum. It is quieter, slower and more lagoon-focused. Travellers come for sailing, kayaking, paddleboarding, swimming, cenotes, eco-lodges, hammocks over the water, sunrise views, the Pirate Channel, Fort San Felipe and the peaceful feeling of floating in clear blue freshwater.
The lagoon is stunning, but it is also fragile. Bacalar’s colours depend on a delicate ecosystem, including ancient stromatolites, clean water, wetlands and careful tourism. The best way to visit is slowly and responsibly: choose low-impact tours, avoid harmful sunscreen in the water, never touch or stand on stromatolites, and respect the lagoon as a living environment rather than a swimming pool.
Quick take: Musement.com offers a worldwide selection of tours and attractions
Bacalar Lagoon of Seven Colours – Travel Experience Mexico This trip packs in lots of activities surrounded by dazzling scenery as you explore cenotes, islets, beaches and forts. Check current availability, inclusions and booking details before you go.
Why Visit Bacalar Lagoon of Seven Colors?
Bacalar Lagoon is worth visiting because it offers a peaceful, nature-based alternative to Mexico’s busier Caribbean beach destinations. Instead of ocean waves and beach clubs, Bacalar gives you calm freshwater, long lagoon views, small boats, jungle-edged shores, cenotes, soft sunsets and quiet mornings on the water.
The lagoon is especially beautiful from a sailboat or kayak. As you move across the water, the colour changes constantly: pale turquoise in shallow sandy areas, darker blue over cenotes, and bright aquamarine where the sun hits the limestone bottom.
Bacalar Lagoon is best for:
Travellers wanting a calm alternative to Cancún and Tulum
Sailing, kayaking and paddleboarding
Couples looking for a romantic lagoon escape
Families who enjoy gentle water activities
Eco-conscious travellers interested in fragile freshwater ecosystems
Photographers chasing turquoise water and sunrise reflections
Backpackers and slow travellers moving through southern Quintana Roo
Visitors combining Bacalar with Mahahual, Chetumal, Calakmul or Belize
Where Is Bacalar Lagoon?
Bacalar Lagoon is in southern Quintana Roo, Mexico, close to the town of Bacalar and north of Chetumal. It sits inland from the Caribbean Sea, near the Mexico-Belize border region.
Location Detail
Traveller Notes
Destination
Bacalar Lagoon of Seven Colors / Laguna de los Siete Colores
Town
Bacalar
State
Quintana Roo, Mexico
Nearest major city
Chetumal
Popular nearby coast
Mahahual and Costa Maya
Best access style
Bus, rental car, private transfer or organised tour
Best visit length
Two to three nights for a relaxed lagoon stay
Bacalar is often visited as part of a wider Yucatán Peninsula or Quintana Roo route. It works well after Tulum, Mahahual, Chetumal, Valladolid or Belize, but it is far enough from Cancún that a same-day trip can feel long and tiring.
What to Expect at Bacalar Lagoon
Expect a relaxed freshwater lagoon town rather than a large resort city. Bacalar has boutique hotels, guesthouses, eco-lodges, lagoon clubs, small restaurants, tour operators, public access points and a central town area around Fort San Felipe.
The main attraction is the lagoon itself. You will spend most of your time on or beside the water: sailing, kayaking, swimming, floating, watching sunrise, visiting cenotes or relaxing at a waterside hotel.
What you may find
Clear freshwater in different shades of blue
Sailing tours and pontoon-style lagoon trips
Kayak and paddleboard rentals
Pirate Channel swim stops
Cenote Azul and other deep lagoon cenotes
Stromatolite areas that must be protected
Lagoon-front hotels, docks and hammocks
Fort San Felipe and Bacalar town centre
Quiet sunrise and sunset viewpoints
Eco-lodges and low-impact accommodation options
What not to expect
Do not expect an ocean beach; Bacalar is a freshwater lagoon.
Do not expect big nightlife like Cancún or Playa del Carmen.
Do not expect every hotel to have direct lagoon access.
Do not expect the lagoon colours to look perfect in heavy rain or cloud.
Do not expect to use sunscreen freely in the water without consequences for the ecosystem.
Do not touch or stand on stromatolites.
Do not expect all tours to follow the same environmental standards.
Why Is It Called the Lagoon of Seven Colors?
Bacalar is called the Lagoon of Seven Colors because the water appears in multiple shades of blue and green. The effect comes from the lagoon’s varying depths, limestone floor, clear freshwater, sunlight and deep cenotes that create darker blue areas.
The colours are best seen in bright daylight, especially from a boat, kayak, drone-style viewpoint where permitted, or elevated lagoonfront terrace. On cloudy or stormy days, the water can look flatter and less vivid, while after heavy rain the lagoon may appear less clear.
Best ways to see the colours
Take a sailboat tour on a sunny day.
Kayak at sunrise when the water is calm.
Visit shallow sandbar-style areas such as the Pirate Channel.
Look down into deeper cenote zones for darker blue water.
Stay at a lagoonfront hotel with open views.
Visit outside heavy rain periods if clear colour is your priority.
Best Things to Do in Bacalar
1. Take a sailing tour on the lagoon
A sailing tour is one of the best ways to experience Bacalar because it is quieter, slower and more eco-friendly than noisy motorised options. You can see the colour changes, swim in clear water and visit popular lagoon stops.
2. Visit the Pirate Channel
The Canal de los Piratas, or Pirate Channel, is a shallow, sandy-bottomed channel linked with Bacalar’s colonial-era pirate history. Today it is a popular stop for floating, swimming and photos.
3. Swim at Cenote Azul
Cenote Azul is a large open cenote near the lagoon, known for deep blue water and a jungle-edged setting. It is good for swimming, snorkelling and relaxing beside cooler water.
4. Kayak at sunrise
Sunrise kayaking is one of Bacalar’s most peaceful experiences. The lagoon is often calmer early in the morning, with soft light and fewer boats.
5. Try stand-up paddleboarding
Paddleboarding is a gentle way to enjoy the lagoon if the wind is low. It is best early in the morning before boat traffic and breezes increase.
6. Visit Fort San Felipe
Fort San Felipe overlooks the lagoon from Bacalar town and helps explain the region’s history, piracy and strategic position.
7. Relax at a lagoon club or balneario
Public and private lagoon access points make it easy to swim, rent kayaks, rest in hammocks and enjoy a lazy day by the water.
8. Visit Cenote Negro
Cenote Negro, also called Cenote de la Bruja, is a deep dark-blue sinkhole connected with the lagoon. Many boat tours pass or stop nearby.
9. See Bird Island from the water
Isla de los Pájaros, or Bird Island, is often included on lagoon tours. It is usually viewed from a respectful distance to avoid disturbing wildlife.
10. Slow down
Bacalar is best when you do less. Read by the water, watch the light change, swim gently, eat well and avoid overloading the day with too many tours.
Sailing, Kayaking and Paddleboarding
Bacalar’s calm freshwater makes it ideal for non-motorised activities. Sailing, kayaking and paddleboarding allow you to enjoy the lagoon without creating as much noise, wake or pollution as fast motorboats.
Best lagoon activity choices
Activity
Best For
Traveller Notes
Sailing tour
First-time visitors and eco-conscious travellers
Relaxed, scenic and usually the best overall lagoon experience.
Kayaking
Quiet mornings and independent exploring
Best at sunrise or when the wind is low.
Stand-up paddleboarding
Calm-water exercise and photos
Choose early morning for the easiest conditions.
Pontoon tour
Families, groups and relaxed swimmers
Comfortable, but choose responsible operators.
Private lagoon tour
Couples, families and flexible travellers
More expensive but easier to control pace and stops.
Water activity tips
Choose low-impact operators where possible.
Avoid sunscreen before entering the lagoon, or use protective clothing instead.
Do not anchor near stromatolites or sensitive areas.
Do not leave rubbish on boats or docks.
Wear a life jacket if you are not a strong swimmer.
Check wind conditions before kayaking or paddleboarding.
Pirate Channel
The Pirate Channel, or Canal de los Piratas, is one of the most famous stops in Bacalar. It is a shallow channel with brilliant turquoise water and a sandy bottom, often visited on boat and sailing tours.
The name comes from the historic route associated with pirates and colonial-era movement between waterways. Today, visitors come to float, swim and enjoy the surreal pale-blue water.
What to know before visiting
It is usually visited by boat, kayak or paddleboard.
The water is shallow and bright in sunny weather.
It can become crowded during peak times.
Do not use mud or sand as a skin treatment.
Do not leave rubbish or disturb vegetation.
Choose operators who respect protected zones and lagoon rules.
Cenote Azul, Cenote Negro and Other Lagoon Cenotes
Bacalar’s lagoon system includes cenotes, which are natural sinkholes connected to the region’s limestone geology. These deeper areas create darker blue patches in the lagoon and add to the famous seven-colour effect.
Cenote Azul
Cenote Azul is a large open cenote near Bacalar, known for its deep blue water and jungle surroundings. It is separate from the main lagoon experience and is often visited for swimming, snorkelling and a relaxed meal nearby.
Cenote Negro
Cenote Negro, also known as Cenote de la Bruja, sits within the lagoon system. Its depth creates a dramatic dark-blue contrast against the surrounding turquoise water.
Cenote Esmeralda and Cenote Cocalitos
Some lagoon tours also pass areas known as Cenote Esmeralda and Cocalitos. Cocalitos is especially associated with stromatolites, so visitors must be careful not to touch or damage them.
Cenote safety tips
Respect depth changes and do not assume every area is shallow.
Use a life jacket if you are not a confident swimmer.
Do not jump where it is not permitted.
Do not touch rock formations, stromatolites or aquatic life.
Follow local signs and guide instructions.
Stromatolites and Eco Rules
One of the most important things to understand about Bacalar is that the lagoon contains stromatolites, ancient living rock-like formations created by microbial communities. They are extremely slow-growing and ecologically important. They can be damaged by touching, standing, sunscreen chemicals, boat wake, anchors and careless tourism.
They may look like ordinary rocks, but they are living structures. Treat them as protected natural heritage.
How to protect Bacalar’s stromatolites
Never stand on stromatolites.
Never touch or sit on stromatolites.
Do not anchor boats near stromatolite areas.
Avoid sunscreen, lotions, oils and insect repellent before entering the water.
Wear a rash guard, hat and sun shirt instead of relying on chemicals.
Do not stir up sediment around sensitive areas.
Choose guides who explain lagoon rules clearly.
Do not support operators who allow people to walk on stromatolites.
Take all rubbish with you.
Respect protected zones and signs.
Bacalar’s beauty depends on responsible visitors. If tourism damages the lagoon, the famous colours and clear water that people travel to see will be harder to protect.
Fort San Felipe
Fort San Felipe, or Fuerte de San Felipe, is Bacalar’s main historic landmark. It sits near the town centre overlooking the lagoon and was built to protect the settlement during periods of conflict and pirate activity.
Today, the fort houses a museum-style experience where visitors can learn about Bacalar’s history, piracy, colonial trade routes and the strategic importance of the lagoon.
Why visit Fort San Felipe?
It gives context to the Pirate Channel and Bacalar’s history.
It has strong views over the lagoon.
It is easy to visit from the town centre.
It adds culture and history to a mostly water-focused trip.
It is a good activity when the weather is cloudy or windy.
Fort San Felipe tips
Check current opening hours before going.
Visit early or late for cooler temperatures.
Combine it with lunch or dinner in Bacalar town.
Bring small cash in case card payment is not available.
Use it as a viewpoint for the lagoon colours.
Nearby Places to Visit
Chetumal
Chetumal is the nearest major city and is useful for transport, museums, shopping and onward travel toward Belize.
Mahahual
Mahahual is a relaxed Caribbean beach town on the Costa Maya, often combined with Bacalar for travellers who want both lagoon and ocean.
Los Rápidos Bacalar
Los Rápidos is a narrow, flowing section of the lagoon system known for bright water and stromatolite areas. It is beautiful but environmentally sensitive, so visitors should be especially careful and avoid standing on formations.
Ichkabal Archaeological Zone
Ichkabal is a major Maya archaeological site near Bacalar that has attracted attention as a developing cultural attraction. Check current opening status before planning a visit.
Calakmul
Calakmul is one of Mexico’s great Maya archaeological sites and biosphere reserves, located deeper inland in Campeche. It is a serious travel extension rather than a quick Bacalar stop.
Belize
Bacalar is often used as a stop before or after travelling to Belize, especially for routes toward Chetumal, Corozal, Belize City or the islands.
Tulum
Tulum is north of Bacalar and is much busier. Travellers often pair Tulum’s beaches and ruins with Bacalar’s quieter lagoon atmosphere.
Best Time to Visit Bacalar Lagoon
Bacalar can be visited year-round, but weather affects the lagoon colours, water clarity and comfort. Sunny, calm days are best for seeing the full seven-colour effect.
Season
What to Expect
Advice
December to April
Drier weather, comfortable temperatures and strong travel demand
Best all-round season, but book accommodation early.
May to June
Warmer weather and fewer crowds before peak summer
Good for lagoon time, but heat increases.
July to August
Hot, humid and popular with summer travellers
Plan water activities early in the day.
September to October
Rainier period with greater storm risk
Can be quiet, but weather may affect colour and tours.
November
Transition into drier conditions
Good shoulder-season option if weather cooperates.
For the best colours, choose a sunny day and get out on the water between late morning and early afternoon. For peace and photos, sunrise kayaking can be magical.
Suggested Bacalar Itinerary Ideas
Option 1: Simple 2-Day Bacalar Lagoon Escape
Day 1 morning: Arrive in Bacalar and check into your hotel.
Day 1 afternoon: Visit Fort San Felipe and walk around the town centre.
Day 1 evening: Have dinner near the lagoon.
Day 2 morning: Take a sailing tour to the Pirate Channel and lagoon cenotes.
Day 2 afternoon: Relax at a balneario or lagoon club.
Option 2: Eco-Friendly Bacalar Weekend
Day 1: Choose an eco-conscious lagoonfront stay and avoid chemical sunscreen in the water.
Day 2 sunrise: Kayak or paddleboard quietly before boats start moving.
Day 2 midday: Join a responsible sailing tour with clear lagoon-protection rules.
Day 2 evening: Eat in town and visit Fort San Felipe.
Day 3: Swim at Cenote Azul or relax before departure.
Option 3: Bacalar and Mahahual Combination
Day 1: Arrive in Bacalar and explore the town.
Day 2: Lagoon sailing tour and Pirate Channel.
Day 3: Transfer to Mahahual for Caribbean beach time.
Day 4: Snorkelling, beach walk or Costa Maya relaxation.
Option 4: Family-Friendly Bacalar Plan
Morning: Choose a calm pontoon or sailing tour with life jackets.
Midday: Swim in safe shallow areas and avoid sensitive stromatolite zones.
Afternoon: Rest at the hotel or a lagoon club.
Evening: Visit the fort and eat in the town centre.
Option 5: Slow 4-Day Bacalar Stay
Day 1: Arrive, settle in and watch sunset by the lagoon.
Day 2: Sailing tour, Pirate Channel and lagoon cenotes.
Day 3: Sunrise kayak, Cenote Azul and Fort San Felipe.
Day 4: Relax, read, swim gently and enjoy a final lagoonfront meal.
Where to Stay in Bacalar
Area
Best For
Traveller Notes
Lagoonfront hotels
Views, swimming access and relaxed stays
Best if your budget allows; check dock and water access.
Bacalar town centre
Restaurants, fort, shops and value stays
Practical, walkable and usually cheaper than lagoonfront.
North lagoon area
Quiet eco-lodges and nature stays
Peaceful, but you may need transport to town.
South toward Cenote Azul
Cenote access and quieter lagoon stays
Good for travellers with a car or bike.
Chetumal
Transport, business hotels and onward travel
Not as scenic, but practical for flights, buses and Belize connections.
What to check before booking
Does the hotel have direct lagoon access?
Is breakfast included?
Does it offer kayaks, paddleboards or tours?
Does it have wastewater treatment or eco policies?
Is the room air-conditioned?
Is it walkable to town?
Is there parking?
Are quiet hours enforced?
Food and Local Experiences
Bacalar’s food scene is relaxed and traveller-friendly, with lagoonfront restaurants, cafés, Mexican kitchens, seafood, vegetarian options, tacos, breakfast spots and small bars. It is not as polished as Tulum, but that is part of the charm.
Food and drink ideas
Fresh fish: simple grilled or fried fish is common in lagoon and coastal areas.
Tacos: easy, casual and budget-friendly.
Ceviche: refreshing after a hot lagoon day.
Mexican breakfasts: chilaquiles, eggs, fruit and coffee.
Marquesitas: a Yucatán-style sweet street snack.
Fresh juices: ideal in the tropical heat.
Lagoonfront cocktails: best enjoyed responsibly at sunset.
Vegetarian and vegan cafés: increasingly common in Bacalar.
Local experiences to add
Sunrise kayak
Sailing tour with a local guide
Fort San Felipe visit
Cenote Azul swim
Lagoonfront breakfast
Bike ride around town
Day trip to Mahahual
Eco-lodge stay
Useful Booking Resources for Bacalar Lagoon Tours and Mexico Activities
Bacalar can be explored independently, but booking platforms are useful for sailing tours, pontoon trips, kayak rentals, Cenote Azul visits, Pirate Channel tours, private transfers, day trips from Tulum or Cancún, and wider Mexico itinerary planning. Skimlinks may automatically convert these merchant links into affiliate links if the merchant is active in your Skimlinks account.
GetYourGuide – offers Bacalar Lagoon sailing tours, pontoon trips, Pirate Channel experiences, Cenote Azul visits, day trips from Tulum or Cancún, private transfers and Mexico activities.
Viator – offers Bacalar day tours, lagoon cruises, Cenote Azul and Pirate Channel packages, private transfers, Mexico sightseeing and customisable Quintana Roo itineraries.
Klook – offers Mexico tours, transport products, eSIM options, attraction tickets and selected Bacalar or Quintana Roo activities depending on availability.
KKday – offers Mexico travel products, local tours, attraction tickets and transport services useful for comparing Bacalar and Riviera Maya experiences.
Tiqets – offers mobile-friendly attraction tickets, museums and cultural experiences useful for travellers combining Bacalar with Cancún, Tulum, Mexico City or other destinations.
Musement – offers Mexico tours, attraction tickets, cultural activities, day trips and local experiences across the Yucatán Peninsula and wider Mexico.
G Adventures – offers small-group and multi-day Mexico tours that may suit travellers planning a broader Yucatán, Belize or Central America itinerary.
Go City – offers bundled attraction passes in selected destinations, useful for readers comparing multi-attraction sightseeing before or after Mexico.
CityPASS – offers bundled attraction passes mainly for selected North American cities. It is not a main Bacalar booking option, but may suit readers planning wider international travel.
Booking tip: Before booking a Bacalar tour, check whether the price includes hotel pickup, lagoon entry fees, life jackets, guide language, sailing or motorboat type, Cenote Azul access, Pirate Channel stop, snacks, drinks, cancellation rules, weather policy and the operator’s environmental rules around stromatolites and sunscreen.
Bacalar Lagoon Travel Tips
Choose sailing over fast motorboats where possible
Sailing is quieter, more relaxing and generally lower impact than fast motorised lagoon tours.
Protect the stromatolites
Never stand, sit or walk on stromatolites. They are living formations and can be permanently damaged.
Avoid sunscreen in the water
Use rash guards, hats and shade instead. If sunscreen is necessary, apply it well before swimming and choose the least harmful option available.
Plan for sunny weather
The lagoon colours look strongest in bright sunlight. Heavy cloud or rain can make the water look less vivid.
Stay more than one night
A rushed day trip from Cancún or Tulum is long. Two or three nights lets you enjoy Bacalar properly.
Wake up for sunrise
Sunrise over the lagoon can be one of the most peaceful moments of the trip.
Check hotel lagoon access
Not all Bacalar accommodation is directly on the water. If swimming from your hotel matters, confirm before booking.
Bring water shoes
Some entry points are rocky, muddy or slippery. Water shoes help protect your feet.
Use a dry bag
Kayaking, sailing and dock swimming can easily soak phones, wallets and towels.
Respect quiet hours
Bacalar’s appeal is its calm atmosphere. Keep noise low around lagoonfront hotels and eco-lodges.
Is Bacalar Lagoon of Seven Colors Worth Visiting?
Yes, Bacalar Lagoon of Seven Colors is absolutely worth visiting if you enjoy calm water, natural beauty, sailing, kayaking, cenotes and slow travel. It is one of the most memorable freshwater destinations in Mexico and a beautiful contrast to the busier Caribbean beach towns farther north.
It may not suit travellers looking for big nightlife, ocean surf, all-inclusive resort energy or a quick beach-club scene. Bacalar is better for travellers who want peaceful water, eco-conscious activities and a slower pace.
The best way to enjoy Bacalar is to stay at least two nights, take a responsible sailing tour, kayak at sunrise, visit Fort San Felipe, swim carefully at Cenote Azul, avoid touching stromatolites and treat the lagoon as a fragile natural wonder.
FAQs About Bacalar Lagoon of Seven Colors
Where is Bacalar Lagoon of Seven Colors?
Bacalar Lagoon is beside the town of Bacalar in southern Quintana Roo, Mexico, north of Chetumal and near the Belize border region.
Why is Bacalar called the Lagoon of Seven Colors?
It is called the Lagoon of Seven Colors because the water appears in many shades of blue and green due to changing depths, clear freshwater, sunlight, limestone bottom and deep cenotes.
Can you swim in Bacalar Lagoon?
Yes, you can swim in many parts of Bacalar Lagoon, but you should follow local rules, avoid sensitive areas, never touch stromatolites and avoid using harmful products in the water.
What are stromatolites in Bacalar?
Stromatolites are ancient living rock-like formations created by microbial communities. They are ecologically important and must not be touched, stood on or damaged.
What is the Pirate Channel in Bacalar?
The Pirate Channel, or Canal de los Piratas, is a shallow turquoise channel linked with Bacalar’s pirate-era history. It is now a popular swimming and floating stop on lagoon tours.
Is Bacalar better than Tulum?
Bacalar is better for calm freshwater, sailing, kayaking and quiet relaxation. Tulum is better for beaches, nightlife, ruins, restaurants and a bigger tourism scene.
How many days do you need in Bacalar?
Two nights is a good minimum. Three or four nights is better if you want sailing, kayaking, Cenote Azul, Fort San Felipe and slow lagoon time.
When is the best time to visit Bacalar?
December to April is generally the driest and most comfortable period. Sunny days are best for seeing the lagoon’s strongest colours.
Can you visit Bacalar as a day trip from Cancún or Tulum?
It is possible, but the travel time is long. Bacalar is much better as an overnight or multi-night stay.
Is Bacalar Lagoon of Seven Colors worth visiting?
Yes. Bacalar Lagoon is worth visiting for its turquoise freshwater, sailing, kayaking, cenotes, peaceful town atmosphere, Pirate Channel, Fort San Felipe and unique natural beauty.
Sponsored Popular Items
Quick take: Musement.com offers a worldwide selection of tours and attractions
Bacalar Lagoon of Seven Colours – Travel Experience Mexico This trip packs in lots of activities surrounded by dazzling scenery as you explore cenotes, islets, beaches and forts. Check current availability, inclusions and booking details before you go.
Bacalar Lunch and Lagoon Guided Tour - Food & Drink Experience Mexico Bacalar lunch and lagoon guided tour explores the destination through flavour, regional customs and the stories connected with food or drink. Check current availability, inclusions and booking details before you go.
The Cliffs of Moher are one of Ireland’s most famous natural landmarks, rising dramatically above the Atlantic Ocean on the west coast of County Clare. With dark layered cliffs, crashing waves, seabirds, sea stacks, grassy cliff-top paths and far-reaching views toward the Aran Islands, Galway Bay and the Burren, this is one of the great scenic stops on Ireland’s Wild Atlantic Way.
For many visitors, the classic Cliffs of Moher experience includes walking the safe paved paths near the official visitor centre, climbing or viewing O’Brien’s Tower, photographing the cliffs from the north and south viewing platforms, learning about the geology and wildlife inside the visitor centre, and, if time allows, seeing the cliffs from below on a boat trip from Doolin.
The cliffs are beautiful, but they are also exposed, windy and dangerous if visitors ignore barriers. The safest and best way to enjoy them is to use official paths, obey closures, keep away from cliff edges and plan around weather conditions.
Quick take: Musement.com offers a worldwide selection of tours and attractions
Clare: Cliffs of Moher Guided Walk with a Local Farmer Best deals for Clare: Cliffs of Moher Guided Walk with a Local Farmer. Join a local farmer, historian, and walking enthusiast on this guided walk along the Cliffs of Moher. Enjoy views of the Dingle Peninsula and Aran Islands. Available from getyourguide.com.
Why Visit the Cliffs of Moher?
The Cliffs of Moher are worth visiting because they combine scale, atmosphere and classic Irish coastal scenery. The cliffs stretch for kilometres along the Atlantic, with sheer rock faces, green headlands, seabird colonies, sea stacks and wide ocean views.
They are not just a quick photo stop. The experience changes with the weather: sunlight can turn the cliffs golden, mist can make them moody and dramatic, and strong Atlantic winds remind you that this is a wild coastal landscape. On clear days, the views can reach toward the Aran Islands, Galway Bay, Loop Head and the mountains of Connemara.
The Cliffs of Moher are best for:
First-time visitors to Ireland
Wild Atlantic Way road trips
Photography and dramatic coastal views
Couples wanting a memorable scenic stop
Families using the official visitor area and paved paths
Birdwatching, especially during nesting season
Geology lovers exploring the Burren and Cliffs of Moher Geopark
Travellers combining Doolin, the Burren, Aran Islands and Galway
Where Are the Cliffs of Moher?
The Cliffs of Moher are in County Clare on Ireland’s west coast, between the villages of Doolin and Liscannor. They are part of the Burren and Cliffs of Moher UNESCO Global Geopark and are one of the signature stops on the Wild Atlantic Way.
Location Detail
Traveller Notes
Destination
Cliffs of Moher
County
County Clare, Ireland
Nearest villages
Doolin and Liscannor
Nearby town
Lahinch
Main visitor area
Cliffs of Moher Experience and Visitor Centre
Famous tower
O’Brien’s Tower
Best trip style
Scenic road trip, coastal walk, visitor centre stop, Doolin boat cruise or Burren day tour
The most common bases are Doolin, Lahinch, Ennistymon, Lisdoonvarna, Galway and Limerick. Galway is popular for organised day tours, while Doolin is the best base if you want boat trips, traditional music and easy access to the Aran Islands.
What to Expect at the Cliffs of Moher
Expect a dramatic Atlantic cliff-top attraction with a managed visitor centre area, paved viewing paths, parking, toilets, café facilities, exhibition space and access to viewpoints near O’Brien’s Tower. The official visitor area is the safest and easiest way to enjoy the cliffs, especially for first-time visitors, families and anyone visiting in windy or wet weather.
Outside the main visitor zone, some coastal walking routes may be restricted, rerouted or closed for safety. Always check current official advice before planning a long walk from Doolin, Hag’s Head or Liscannor.
What you may see
High Atlantic sea cliffs
O’Brien’s Tower
Aran Islands views on clear days
Galway Bay and Connemara views in good visibility
Sea stacks, including Branaunmore
Seabirds nesting on ledges
Layered shale and sandstone cliff faces
Wildflowers and coastal grasses in season
Sunset light over the Atlantic
Powerful waves at the base of the cliffs
What not to expect
Do not expect calm weather every day.
Do not expect every coastal walking section to be open.
Do not expect barriers to mean the cliffs are safe beyond them.
Do not expect clear views in fog, heavy rain or low cloud.
Do not expect to fly drones without checking rules and permissions.
Do not expect cliff-edge photos to be worth the risk.
Do not expect the experience to be quiet during peak summer or public holidays.
O’Brien’s Tower
O’Brien’s Tower is the most recognisable built landmark at the Cliffs of Moher. It stands near one of the highest and most popular viewing points, giving visitors classic views along the cliff line and out toward the Atlantic.
The tower was built in the 19th century and has long been associated with sightseeing at the cliffs. Even if you do not go inside, the tower makes a strong photo subject and helps frame the scale of the cliffs around it.
Why visit O’Brien’s Tower?
It is the classic landmark photo at the Cliffs of Moher.
It sits close to the main visitor area.
It offers excellent views north and south along the cliff line.
It is a good orientation point for first-time visitors.
It adds history and structure to the cliff-top landscape.
O’Brien’s Tower tips
Check whether tower access is included with your ticket or requires a supplement.
Expect wind around the viewing area.
Use the official pathways around the tower.
Visit early or late for fewer crowds.
In poor visibility, the tower may still be interesting even if long-distance views are limited.
Cliffs of Moher Visitor Centre
The Cliffs of Moher Visitor Centre is built into the hillside near the main viewing area. It provides ticketing, toilets, food, gift shopping, interpretive displays and a sheltered place to learn about the cliffs’ geology, wildlife, history and conservation.
The visitor centre is especially useful in bad weather. If fog, wind or rain makes outdoor viewing uncomfortable, the exhibition helps explain what you are seeing and why the cliffs are geologically important.
Visitor centre highlights
Interpretive displays about geology and wildlife
Information about the Burren and Cliffs of Moher Geopark
Café and indoor rest area
Gift shop and local products
Toilet facilities
Access to paved cliff paths
Parking and visitor services
Audio guide or app options, depending on current availability
Who should use the visitor centre?
Families with children
First-time visitors
Travellers visiting in bad weather
Visitors wanting toilets, food and indoor facilities
People interested in geology, birds and local history
Anyone who wants the safest and most accessible cliff experience
Cliffs of Moher Coastal Walk
The Cliffs of Moher Coastal Walk has long been one of the most famous cliff walks in Ireland, linking sections around Doolin, the visitor centre, Hag’s Head and Liscannor. However, coastal cliff routes can be dangerous and may be partially closed or restricted due to safety concerns.
Before planning any long walk, check the current official Cliffs of Moher walking guidance. Do not rely on old blog posts, old maps or informal paths close to the cliff edge. The safest approach is to use designated paths only and turn back where instructed.
Important walking safety rules
Stay on designated paths at all times.
Do not go beyond walls, fences or barriers.
Do not use unofficial tracks near the cliff edge.
Do not walk closed sections.
Do not walk in high winds, thick fog or stormy weather.
Keep children close and away from edges.
Wear proper walking shoes.
Do not stop on roads or hazardous sections for photos.
Respect local land, fencing and warning signs.
Short walk option
For most visitors, the best option is a short, safe walk from the visitor centre to nearby official viewpoints and O’Brien’s Tower. This gives superb views without needing to commit to a long or exposed coastal route.
Long walk option
Longer walks may be possible only on open sections and in suitable weather. Check the latest official status before setting out, and be prepared to turn back. The cliffs are not a place to improvise.
Cliffs of Moher Boat Trips from Doolin
Seeing the Cliffs of Moher from the sea gives a completely different perspective. From the cliff-top, you see the vast Atlantic horizon. From below, you understand the height, geology and power of the cliffs as they rise directly from the water.
Boat trips usually depart from Doolin Pier. Some are dedicated Cliffs of Moher cruises, while others combine the cliffs with the Aran Islands, especially Inis Oírr, Inis Meáin or Inis Mór.
Why take a boat trip?
You see the cliffs from sea level.
You can appreciate the full height of the rock faces.
You may see seabirds and sea stacks from below.
You can combine the cruise with an Aran Islands trip.
It gives a strong contrast to the cliff-top visitor experience.
Boat trip tips
Check sailing times and weather conditions before travelling.
Book ahead in summer and on weekends.
Bring a warm jacket even on sunny days.
Take seasickness tablets if needed.
Expect cancellations or route changes in rough seas.
Combine with Inis Oírr if you want a full day from Doolin.
Bring waterproof protection for your phone or camera.
Wildlife, Birds and Geology
The Cliffs of Moher are not only scenic; they are also an important habitat and geological landscape. The cliffs are made of layered shale and sandstone, formed hundreds of millions of years ago, while the wider region connects with the Burren’s limestone karst landscape.
The cliffs are especially famous for seabirds. During nesting season, ledges and sea stacks become busy with birds, including species such as puffins, guillemots, razorbills, kittiwakes and fulmars.
Birds you may see
Atlantic puffins
Guillemots
Razorbills
Kittiwakes
Fulmars
Gulls
Shags and cormorants
Choughs
Geology highlights
Layered shale and sandstone cliffs
Sea stacks shaped by erosion
Atlantic wave action at the cliff base
Connections with the Burren and Cliffs of Moher UNESCO Global Geopark
Evidence of ancient marine environments preserved in the rock layers
Bring binoculars if birdwatching matters to you. Never climb barriers or go close to cliff edges for bird photos.
Nearby Places to Visit
Doolin
Doolin is one of the best bases for visiting the Cliffs of Moher. It is known for traditional Irish music, pubs, ferry departures to the Aran Islands, cave visits and a relaxed coastal village atmosphere.
Lahinch
Lahinch is a seaside town south of the cliffs, known for surfing, beach walks, cafés and a lively holiday feel.
Liscannor
Liscannor is a small coastal village close to the southern end of the cliffs and is useful for seafood, accommodation and access to nearby routes.
The Burren
The Burren is a remarkable limestone landscape with caves, ancient tombs, wildflowers, stone walls and walking routes. It pairs naturally with the Cliffs of Moher.
Doolin Cave
Doolin Cave is famous for its large stalactite and is a good inland activity near Doolin, especially in poor weather.
Aran Islands
The Aran Islands are accessible by ferry from Doolin and can be combined with a Cliffs of Moher sea cruise. Inis Oírr is the closest and easiest for a shorter island day.
Poulnabrone Dolmen
Poulnabrone Dolmen is one of Ireland’s most famous prehistoric monuments, located in the Burren.
Galway
Galway is a popular city base for Cliffs of Moher tours. It is best if you want nightlife, restaurants and a broader west-coast itinerary.
Ennistymon
Ennistymon is a charming town near Lahinch with shops, cafés and a useful base for exploring County Clare.
Best Time to Visit the Cliffs of Moher
The Cliffs of Moher can be visited year-round, but the experience depends heavily on weather, daylight, crowds and visibility. The cliffs can be spectacular in all seasons, but they can also be hidden by fog or battered by strong wind.
Season
What to Expect
Advice
Spring
Fresh green scenery, improving daylight and nesting birds beginning to return
Good balance of scenery and manageable crowds.
Summer
Longest days, busiest visitor period and best chance of extended touring
Book ahead and visit early or late to avoid peak crowds.
Autumn
Moody skies, fewer crowds and beautiful coastal light
Excellent for photography, but weather can change quickly.
Winter
Wild seas, fewer visitors, cold wind and shorter days
Atmospheric, but dress warmly and avoid dangerous weather.
Sunset
Golden light over the Atlantic, especially in good weather
Beautiful, but stay on safe paths and bring layers.
For most travellers, late spring to early autumn is the easiest period. For photographers, shoulder seasons can be better because the light is softer and crowds are lower.
Suggested Cliffs of Moher Itinerary Ideas
Option 1: Simple Half-Day Cliffs Visit
Morning or afternoon: Arrive at the Cliffs of Moher Visitor Centre.
Start: Visit the exhibition and use the facilities.
Walk: Follow the paved paths to the main viewpoints.
Highlight: Visit O’Brien’s Tower or photograph it from nearby paths.
Finish: Have coffee or lunch at the visitor centre before continuing your journey.
Option 2: Cliffs of Moher and Doolin Day
Morning: Visit the Cliffs of Moher Experience.
Midday: Drive or transfer to Doolin.
Afternoon: Take a Cliffs of Moher boat cruise from Doolin if weather allows.
Evening: Enjoy dinner and traditional music in a Doolin pub.
Option 3: Galway to Cliffs of Moher Day Trip
Morning: Depart Galway by organised tour or car.
Route: Travel through the Burren or County Clare countryside.
Main stop: Visit the Cliffs of Moher and O’Brien’s Tower.
Optional: Stop at Doolin, Poulnabrone Dolmen or Lahinch depending on route.
Evening: Return to Galway for dinner.
Option 4: Cliffs, Burren and Aran Islands Route
Day 1: Visit the Cliffs of Moher and stay overnight in Doolin.
Day 2: Take a ferry to Inis Oírr or another Aran Island.
Return: Add a Cliffs of Moher cruise if available with your ferry ticket.
Evening: Return to Doolin for food and music.
Option 5: County Clare Slow Travel Plan
Day 1: Lahinch beach, Ennistymon and Liscannor.
Day 2: Cliffs of Moher visitor centre, O’Brien’s Tower and Doolin.
Day 3: The Burren, Poulnabrone Dolmen, Doolin Cave and Ballyvaughan.
Where to Stay Near the Cliffs of Moher
Area
Best For
Traveller Notes
Doolin
Traditional music, ferries, pubs and coastal atmosphere
Best base for combining cliffs, Aran Islands and boat trips.
Lahinch
Beach, surfing, cafés and family holidays
Good if you want a seaside town with more activity.
Liscannor
Quiet coastal stay close to the cliffs
Practical for seafood, short drives and calmer evenings.
Ennistymon
Character, local shops and access to Lahinch and the Burren
Good small-town base with charm.
Lisdoonvarna
Burren access and traditional spa-town history
Useful for exploring both Doolin and the Burren.
Galway
City base, nightlife and day tours
Best for visitors without a car who want organised tours.
Limerick
Broader west-Ireland road trip base
Useful if combining Clare with Shannon Airport or southern Ireland.
Food and Local Experiences
County Clare is excellent for seafood, pub meals, local cheese, smoked fish, traditional music and slow coastal dining. Doolin is especially famous for music pubs, while Lahinch and Ennistymon offer cafés and casual restaurants.
Food and drink ideas
Seafood chowder: warming and common in coastal pubs.
Smoked salmon: often linked with Burren and Clare food producers.
Fish and chips: perfect after a windy cliff walk.
Irish stew: hearty option in cooler weather.
Brown bread: often served with soups and seafood.
Local cheeses: especially from Burren and Clare producers.
Traditional music pub night: a must in Doolin if you stay overnight.
Irish coffee: ideal after a cold Atlantic day.
Local experiences to add
Doolin traditional music session
Aran Islands ferry trip
Burren guided walk
Doolin Cave visit
Lahinch surf lesson
Cliffs of Moher boat cruise
Burren food trail or local producer stop
Useful Booking Resources for Cliffs of Moher Tours and Ireland Activities
The Cliffs of Moher can be visited independently, but booking platforms are useful for Galway day tours, Dublin day trips, Doolin boat cruises, Aran Islands combinations, Burren guided walks, private drivers and Ireland-wide itinerary planning. Skimlinks may automatically convert these merchant links into affiliate links if the merchant is active in your Skimlinks account.
GetYourGuide – offers Cliffs of Moher day tours from Dublin and Galway, Burren combinations, Doolin stops, Aran Islands options, private tours and Ireland sightseeing activities.
Viator – offers Cliffs of Moher tours, Galway and Dublin day trips, private driver-guided experiences, Burren routes, Aran Islands combinations and customisable Ireland itineraries.
Klook – offers Ireland tours, transport products, eSIM options, attraction tickets and selected Cliffs of Moher or Wild Atlantic Way experiences depending on availability.
KKday – offers Ireland travel products, local tours, attraction tickets and transport services useful for comparing west-coast experiences.
Tiqets – offers mobile-friendly attraction tickets, museums and cultural experiences useful for travellers combining County Clare with Dublin, Galway or other European destinations.
Musement – offers Ireland tours, attraction tickets, cultural activities, day trips and local experiences across Dublin, Galway and the west coast.
G Adventures – offers small-group and multi-day Ireland tours that may include the Wild Atlantic Way, Galway, County Clare or west-coast highlights.
Go City – offers bundled attraction passes in selected destinations, useful for readers comparing multi-attraction sightseeing before or after Ireland.
CityPASS – offers bundled attraction passes mainly for selected North American cities. It is not a main Cliffs of Moher booking option, but may suit readers planning wider international travel.
Booking tip: Before booking a Cliffs of Moher tour, check whether the price includes visitor centre admission, hotel pickup, time at the cliffs, Burren stops, Doolin, boat cruise, Aran Islands ferry, guide commentary, weather policy, cancellation rules and the exact return time. For self-drive visitors, check current parking, opening hours and coastal walk closures before travelling.
Cliffs of Moher Travel Tips
Check the weather before you go
Fog, heavy rain and strong wind can affect visibility and safety. The cliffs are still atmospheric in poor weather, but clear days are best for views.
Stay on official paths
Do not climb fences, walls or barriers. The cliff edges are unstable and the drops are fatal.
Check current coastal walk closures
Sections of the Cliffs of Moher Coastal Walk may be closed or restricted. Always check official updates before planning a long walk.
Bring layers
The cliffs are exposed to Atlantic wind. Even in summer, bring a jacket or windproof layer.
Wear proper shoes
Use comfortable shoes with grip, especially if paths are wet or muddy.
Visit early or late
Morning and late afternoon are usually better for fewer crowds and softer light.
Do not rely on drones
Drone use may be restricted and can disturb birds and visitors. Check rules before bringing one.
Combine land and sea views
If conditions allow, see the cliffs from the official visitor area and from a Doolin boat cruise. The two perspectives are very different.
Keep children close
Hold children’s hands near paths and barriers. Do not allow running or climbing near cliff areas.
Stay overnight nearby if you can
Staying in Doolin, Lahinch or Liscannor lets you enjoy the cliffs without rushing and gives you flexibility for weather.
Are the Cliffs of Moher Worth Visiting?
Yes, the Cliffs of Moher are absolutely worth visiting. They are one of Ireland’s most powerful coastal landscapes, combining dramatic cliffs, Atlantic views, seabirds, geology, walking routes, O’Brien’s Tower and easy access to the Burren, Doolin and the Aran Islands.
They may not suit travellers who expect guaranteed clear weather or a quiet hidden gem. The cliffs are popular, exposed and weather-dependent. However, the scale and atmosphere make them memorable even when conditions are moody.
The best way to enjoy the Cliffs of Moher is to use the official visitor area, stay on safe paths, check current walking conditions, allow enough time for O’Brien’s Tower and the viewpoints, and consider adding a boat trip from Doolin if the sea conditions are suitable.
FAQs About the Cliffs of Moher
Where are the Cliffs of Moher?
The Cliffs of Moher are in County Clare on Ireland’s west coast, between Doolin and Liscannor.
What are the Cliffs of Moher famous for?
The Cliffs of Moher are famous for dramatic Atlantic sea cliffs, O’Brien’s Tower, seabirds, coastal views, the Wild Atlantic Way and their location within the Burren and Cliffs of Moher UNESCO Global Geopark.
How high are the Cliffs of Moher?
The cliffs rise up to about 214 metres above the Atlantic Ocean at their highest point.
How long are the Cliffs of Moher?
The cliffs stretch for about 14 kilometres along the County Clare coast.
Can you walk along the Cliffs of Moher?
Short walks are available around the official visitor area and viewpoints. Longer coastal walk sections may be closed, restricted or rerouted, so always check current official guidance before walking.
Is the Cliffs of Moher Coastal Walk safe?
It is safe only when using open, designated paths and following official guidance. Do not use unofficial cliff-edge tracks or cross barriers.
Can you see the Cliffs of Moher by boat?
Yes. Boat cruises usually depart from Doolin and give sea-level views of the cliffs. Some ferries combine the cliffs with the Aran Islands.
When is the best time to visit the Cliffs of Moher?
Late spring to early autumn is the easiest period for daylight and touring, while early morning, late afternoon and shoulder seasons are often better for photography and fewer crowds.
Where should I stay near the Cliffs of Moher?
Doolin is best for traditional music, ferries and boat trips. Lahinch is best for beach and surf atmosphere. Liscannor is a quiet nearby coastal option, while Galway is a good city base for organised tours.
Are the Cliffs of Moher worth visiting?
Yes. The Cliffs of Moher are one of Ireland’s most iconic natural attractions and are worth visiting for Atlantic views, O’Brien’s Tower, seabirds, geology, coastal scenery and Wild Atlantic Way travel.
Sponsored Popular Items
Quick take: Musement.com offers a worldwide selection of tours and attractions
Clare: Cliffs of Moher Guided Walk with a Local Farmer Best deals for Clare: Cliffs of Moher Guided Walk with a Local Farmer. Join a local farmer, historian, and walking enthusiast on this guided walk along the Cliffs of Moher. Enjoy views of the Dingle Peninsula and Aran Islands. Available from getyourguide.com.
County Clare: Inis Cealtra Guided eBike Tour with Boat Trip Best deals for County Clare: Inis Cealtra Guided eBike Tour with Boat Trip. Cycle along the shores of Lough Derg and set sail on Lough Derg to explore the ancient monastic settlement of Inis Cealtra on this guided eBike tour. 3 routes available to suit your cycling ability. Available from getyourguide.com.
County Clare: Irish Chocolate Making Guided Workshop Best deals for County Clare: Irish Chocolate Making Guided Workshop. Craft two personalized chocolate bars and enjoy an artisan hot chocolate in Ireland's Hidden Heartlands. Guided, hands-on workshop—create, customize, taste, and take home. Min:6 Max:8 Available Available from getyourguide.com.
Milos Kleftiko is one of the most famous natural sights on Milos Island in Greece, known for dazzling white volcanic cliffs, sea arches, hidden caves, turquoise water and boat trips that stop for swimming and snorkelling. Set on the wild south-western coast of Milos, Kleftiko feels more like a natural sea sculpture than a normal beach.
For many travellers, a boat trip to Kleftiko Caves is the highlight of a Milos holiday. Boats anchor in the clear water, guests swim through rock arches, snorkel around caves, photograph the white cliffs and hear stories of pirates once using the area as a hideout.
Kleftiko is not a typical organised beach with umbrellas, tavernas and road access. It is best experienced by boat, usually from Adamas, Kipos, Pollonia or another Milos departure point depending on the tour. Some adventurous visitors may hike toward viewpoints in the wider area, but the classic Kleftiko experience is from the sea.
Quick take: Musement.com offers a worldwide selection of tours and attractions
Milos Hiking, Cycling & Active Tours Guide Greece Milos combines dramatic volcanic geology, colourful fishing settlements, ancient remains, mining heritage and a highly varied coastline. Check current availability, inclusions and booking details before you go.
Why Visit Milos Kleftiko?
Kleftiko is worth visiting because it shows Milos at its most dramatic. The island is famous for volcanic geology and unusual beaches, but Kleftiko is different again: huge pale cliffs rise straight from the sea, caves cut into the rock, small boats drift below arches, and the water glows in shades of blue, green and turquoise.
It is one of those places where the journey is part of the experience. A boat trip to Kleftiko usually follows the Milos coastline, passing sea caves, fishing villages, volcanic cliffs, remote coves and swim stops that are difficult or impossible to reach by road.
Milos Kleftiko is best for:
Boat trips and sailing tours around Milos
Snorkelling in clear blue water
Swimming through sea caves and rock arches
Couples wanting a scenic Greek island experience
Families with older children who are comfortable in the water
Photographers chasing white cliffs and turquoise sea
Travellers who want to see Milos from the water
Visitors combining Kleftiko with Sykia Cave, Gerontas Beach or Polyaigos
Where Is Kleftiko?
Kleftiko is on the south-western coast of Milos, a Cycladic island in Greece. It is in one of the wilder parts of the island, away from the main towns and easy beach roads.
Location Detail
Traveller Notes
Destination
Kleftiko / Kleftiko Caves / Kleftiko Beach
Island
Milos, Cyclades, Greece
Coastline
South-west Milos
Main access
Boat tour, sailing cruise, RIB, catamaran or private boat
Common departure points
Adamas, Kipos, Pollonia or other Milos harbours depending on tour
Best visit style
Boat trip with swimming, snorkelling and cave viewing
Typical nearby stops
Sykia Cave, Gerontas, Tsigrado, Firiplaka, Polyaigos or west Milos coastline
Kleftiko is often described as a beach, but this can be misleading. It is more accurately a coastal sea-cave and rock-formation area where boats anchor for swimming. There is no simple beach-town setup with cafés and sunbeds.
What to Expect at Kleftiko
Expect a boat-based nature experience rather than a normal beach day. Your boat will usually anchor in sheltered water near the cliffs, and guests will have time to swim, snorkel, photograph the rock formations and explore caves if sea conditions are suitable.
The exact route depends on the boat operator, wind direction, sea conditions and departure point. Some tours spend a long time at Kleftiko, while others include it as one stop on a larger Milos island cruise.
What you may see
White volcanic cliffs rising from the sea
Natural sea arches and rock bridges
Hidden caves and narrow passages
Turquoise and emerald water
Small swim-through openings in the rocks
Boats anchored below the cliffs
Snorkelling areas with clear visibility
Nearby caves such as Sykia on selected tours
Remote beaches and volcanic coastline along the route
What not to expect
Do not expect road access directly to the main sea-cave area.
Do not expect restaurants, toilets or shops at Kleftiko itself.
Do not expect calm water every day; boat routes depend on weather.
Do not expect complete solitude in peak summer.
Do not expect all boats to enter every cave.
Do not expect long beach lounging; most time is on the boat or in the water.
Do not touch or climb fragile rock formations.
Kleftiko Boat Tours
A Kleftiko boat tour is the classic way to visit. Tours vary widely: some are half-day speedboat trips, some are full-day sailing cruises, some focus only on south Milos, and others circle much of the island or continue toward Polyaigos.
Most tours include at least one swimming stop at Kleftiko. Better tours allow enough time for snorkelling, cave viewing and relaxing in the water rather than rushing through for photos.
Common departure points
Adamas: the main port of Milos and one of the most common departure points for full-day cruises.
Kipos: a south-coast departure point useful for shorter south-coast and Kleftiko-focused routes.
Pollonia: useful for tours that may combine Milos with Polyaigos or north/east coast scenery.
Private charters: may depart from different harbours depending on operator and weather.
What may be included on a Kleftiko tour
Boat transfer to Kleftiko
Swimming stop at Kleftiko
Snorkelling equipment
Lunch or snacks
Water, soft drinks or local drinks
Stops at Sykia Cave, Gerontas, Polyaigos or other beaches
Guide commentary about the coastline
Photos or drone footage on some premium tours
Hotel transfer on selected packages
What to check before booking
Exact departure harbour
Tour length
Boat type
Time spent at Kleftiko
Whether snorkelling gear is included
Whether lunch and drinks are included
Maximum group size
Cancellation policy for wind and sea conditions
Whether children can join
Whether the route includes Sykia Cave or Polyaigos
Snorkelling and Sea Caves at Kleftiko
Kleftiko is one of the best places on Milos for swimming and snorkelling because the water is clear, the rock formations are dramatic and the caves create interesting underwater light and shadow.
You do not need to be an expert snorkeller to enjoy Kleftiko, but you should be comfortable in deep water. Boats usually anchor away from a traditional beach, so you may be swimming from the boat rather than walking into the sea from shore.
Best water experiences
Swimming under natural sea arches
Snorkelling around cave entrances
Floating in turquoise water beneath the cliffs
Exploring calm cave areas with a guide
Photographing boats against the white rock formations
Watching sunlight reflect through the sea caves
Snorkelling safety tips
Use a flotation aid if you are not a confident swimmer.
Stay close to your boat and group.
Do not swim into tight caves without guide approval.
Watch for boat traffic around cave entrances.
Do not climb the cliffs or unstable rocks.
Wear water shoes if entering rocky shallows.
Use reef-safe behaviour and avoid disturbing marine life.
Tell the crew if you are tired, nervous or not a strong swimmer.
Pirate Hideout History
Kleftiko is often described as an old pirate hideout. The name is linked with the Greek word associated with thieves or bandits, and local storytelling connects the caves and hidden coves with pirates who used the area for shelter and ambush.
Whether you come for the history or the scenery, the pirate-hideout story adds to the atmosphere. The cliffs create natural hiding places, the caves are hard to see from a distance, and the coastline feels remote even today.
Why the story fits the landscape
The area is hidden along a remote part of the Milos coast.
Sea caves create natural shelter.
Rock arches and coves make the coastline difficult to read from afar.
The cliffs are dramatic and defensive-looking.
Approach by sea gives the strongest sense of secrecy.
Nearby Places Often Combined with Kleftiko
Sykia Cave
Sykia Cave is one of the most popular stops on Milos boat tours. It is a large sea cave with a collapsed roof that lets light into a hidden lagoon-like space. Many full-day tours combine Sykia and Kleftiko.
Gerontas Beach
Gerontas Beach is a dark volcanic beach on the south-west coast of Milos, often included on Kleftiko-focused boat routes or reached by land with effort.
Tsigrado Beach
Tsigrado is a small cove famous for its adventurous ladder-and-rope access from land. Some coastal tours pass nearby depending on the route.
Firiplaka Beach
Firiplaka is one of Milos’ most colourful and accessible south-coast beaches, with pale sand and volcanic cliffs. It pairs well with a land-based beach day before or after a Kleftiko tour.
Provatas Beach
Provatas is a more relaxed south-coast beach option, suitable for families and easier swimming when conditions are calm.
Sarakiniko Beach
Sarakiniko is Milos’ famous moon-like white rock beach on the north coast. It is not near Kleftiko, but many visitors combine both over a few days because they show Milos’ unique geology.
Polyaigos
Polyaigos is an uninhabited island near Milos, known for bright blue water and remote coves. Some longer boat tours combine Kleftiko with Polyaigos, but this makes for a longer day.
Adamas
Adamas is the main port town of Milos and a common departure point for Kleftiko cruises. It is practical for boat tours, accommodation, restaurants and ferry arrivals.
Best Tour Types for Kleftiko
Tour Type
Best For
Traveller Notes
Half-day speedboat tour
Travellers short on time
Good if you mainly want Kleftiko and a few south-coast highlights.
Full-day sailing cruise
Classic Milos experience
More relaxed, with lunch, swim stops and a slower pace.
Catamaran cruise
Comfort, space and groups
Often good for families or travellers who prefer a stable boat.
Small-group RIB tour
Adventure and faster travel
Can reach places quickly, but may feel bumpier in wind.
Private boat charter
Couples, families and special occasions
Most flexible and private, but more expensive.
Full island cruise
Travellers wanting maximum coastline
Long day; check how much time is actually spent at Kleftiko.
Kleftiko plus Sykia Cave tour
First-time visitors
One of the best combinations if weather allows both stops.
Best Time to Visit Kleftiko
The best time to visit Kleftiko is during the main Milos boating season, when sea conditions are suitable and tours are operating regularly. Late spring, summer and early autumn are the most popular times.
Season
What to Expect
Advice
May to June
Warm weather, clearer water and fewer crowds than peak summer
Excellent for boat tours if sea conditions are good.
July to August
Peak season, hot weather and busy boats
Book early and expect more tour traffic at Kleftiko.
September
Warm sea, softer crowds and good swimming conditions
One of the best months for Milos boat trips.
October
Quieter, but weather becomes less predictable
Good if tours still operate and conditions are calm.
Winter and early spring
Limited boat-tour availability and rougher seas
Not ideal for classic Kleftiko swimming tours.
Wind matters as much as sunshine. Milos can be affected by strong winds, and boat routes may change for safety. A flexible itinerary gives you the best chance of reaching Kleftiko in good conditions.
Suggested Milos Kleftiko Itinerary Ideas
Option 1: Classic Full-Day Kleftiko Sailing Tour
Morning: Depart from Adamas or another Milos harbour.
Coastal route: Cruise past fishing villages, cliffs and volcanic coastline.
Midday: Swim and snorkel at Kleftiko.
Lunch: Enjoy onboard food if included.
Afternoon: Visit Sykia Cave, Gerontas or another swim stop depending on route.
Evening: Return to port for dinner in Adamas, Pollonia or Plaka.
Option 2: Half-Day Kleftiko Boat Trip
Morning or afternoon: Depart from Kipos or a south-coast harbour if available.
Main stop: Spend focused time at Kleftiko swimming and exploring caves.
Second stop: Add Gerontas or another nearby south-coast swim stop.
Return: Use the rest of the day for Firiplaka, Tsigrado or Plaka sunset.
Option 3: Kleftiko and Sykia Cave Day
Morning: Board a boat tour that specifically includes both Kleftiko and Sykia Cave.
Sykia: View or enter the dramatic cave area if conditions allow.
Kleftiko: Swim beneath arches and snorkel around the white cliffs.
Late afternoon: Return to Milos and have a relaxed dinner by the port.
Option 4: Milos Geology Highlights Route
Day 1: Visit Sarakiniko, Papafragas and Mandrakia by land.
Day 2: Take a boat tour to Kleftiko and Sykia Cave.
Day 3: Explore Firiplaka, Tsigrado, Paleochori and the south coast.
Option 5: Romantic Kleftiko Private Charter
Morning: Book a private boat for a calmer start.
Route: Ask for Kleftiko, Sykia Cave and quiet swim stops if weather allows.
Lunch: Arrange onboard snacks, drinks or a picnic.
Afternoon: Spend extra time swimming rather than rushing between stops.
Evening: Finish with sunset drinks in Plaka or Pollonia.
Where to Stay on Milos for Kleftiko Boat Tours
Area
Best For
Traveller Notes
Adamas
Boat departures, ferry arrivals and convenience
Best practical base for first-time visitors and full-day cruises.
Pollonia
Couples, quieter dining and sea views
Good for a relaxed stay, though not every Kleftiko tour departs here.
Plaka
Sunsets, old-town atmosphere and restaurants
Beautiful evening base, but you may need transport to boat departures.
Trypiti
Views, history and quieter village stays
Good for travellers with a car or scooter.
South coast near Provatas or Kipos
Shorter access to some Kleftiko-focused boat trips
Useful if your tour departs from the south coast, but less central overall.
Klima / Skinopi-style boathouses
Scenic stays and photography
Atmospheric, but check transport and parking carefully.
Food and What to Bring on a Kleftiko Tour
Many boat tours include lunch, snacks or drinks, but inclusions vary. Some premium tours provide a full meal, while shorter tours may only include water or light snacks. Always check before boarding.
What to bring
Swimwear
Towel
Dry bag
Waterproof phone pouch
Hat and sunglasses
Reef-safe behaviour and low-impact sunscreen use
Rash guard or light cover-up
Motion sickness tablets if needed
Water bottle
Change of dry clothes
Light jacket for wind on the boat
Small cash for extras or tips
Food to enjoy after the tour
Milos cheese dishes: local cheeses and pies are worth trying.
Fresh seafood: grilled fish, octopus and calamari are common island favourites.
Pitarakia: small Milos cheese pies.
Greek salad: simple and refreshing after a boat day.
Tomato fritters: popular across the Cyclades.
Local wine: good with seafood and sunset views.
Honey and spoon sweets: traditional island-style desserts.
Useful Booking Resources for Milos Kleftiko Tours and Greece Activities
Kleftiko is best booked as a boat tour unless you are arranging a private charter with local support. Booking platforms are useful for comparing sailing cruises, small-group RIB tours, catamarans, private charters, snorkelling inclusions, cancellation policies and wider Milos or Greece activities. Skimlinks may automatically convert these merchant links into affiliate links if the merchant is active in your Skimlinks account.
GetYourGuide – offers Milos Kleftiko boat tours, sailing cruises, catamaran trips, snorkelling experiences, private charters, Greece activities and island day tours.
Klook – offers Greece activities, island tours, ferry-related travel products, eSIM options, attraction tickets and selected Milos experiences depending on availability.
KKday – offers Greece tours, transport services, attraction tickets, island activities and travel products useful for comparing Cyclades experiences.
Tiqets – offers mobile-friendly attraction tickets, museum tickets and cultural experiences useful for travellers combining Milos with Athens, Santorini or other Greek destinations.
Musement – offers Greece tours, cruises, attraction tickets, cultural activities and local experiences across islands and mainland destinations.
G Adventures – offers small-group and multi-day Greece tours that may include the Cyclades or suit travellers building a broader island-hopping itinerary.
Go City – offers bundled attraction passes in selected destinations, useful for readers comparing multi-attraction sightseeing before or after Greece.
CityPASS – offers bundled attraction passes mainly for selected North American cities. It is not a main Milos booking option, but may suit readers planning wider international travel.
Booking tip: Before booking a Milos Kleftiko tour, check the departure harbour, boat type, route, time spent at Kleftiko, whether Sykia Cave is included, lunch and drink inclusions, snorkelling gear, maximum group size, child rules, cancellation policy for wind, and whether the operator offers a route change or refund if sea conditions prevent reaching Kleftiko.
Milos Kleftiko Travel Tips
Book early in peak season
Kleftiko tours can fill quickly in July and August. Book ahead if you want a specific boat type, small-group tour or private charter.
Keep your schedule flexible
Wind can affect boat routes. If Kleftiko is a must-do, plan it early in your Milos stay so you have backup days if weather changes.
Choose the boat type carefully
A sailing boat feels relaxed and scenic. A RIB is faster and more adventurous. A catamaran may feel more stable and comfortable. A private boat gives flexibility.
Check the departure point
Not all tours depart from Adamas. Some leave from Kipos, Pollonia or other points, so check transport before booking.
Take seasickness precautions
Even calm-looking days can become choppy. Take medication before departure if you are sensitive.
Use sun protection
There is limited shade on many boats. Bring a hat, sunglasses, cover-up and sunscreen used responsibly away from the water.
Bring a waterproof pouch
Kleftiko is very photogenic, but phones are easy to drop or soak during swimming and cave exploration.
Do not climb unstable cliffs
The white rock is beautiful but can be fragile and dangerous. Enjoy the scenery from the water and approved areas.
Respect the caves
Do not carve, touch fragile formations, leave rubbish or disturb wildlife.
Do not overpack the same day
A boat tour can be tiring. Plan a relaxed dinner and sunset rather than another intense activity immediately afterwards.
Is Milos Kleftiko Worth Visiting?
Yes, Milos Kleftiko is absolutely worth visiting. It is one of the most memorable places in the Cyclades, combining white volcanic cliffs, sea caves, pirate-hideout atmosphere, turquoise water and some of the best swimming scenery on Milos.
It may not suit travellers who dislike boats, deep water, strong sun or variable sea conditions. It is also not the best choice if you want a traditional beach with cafés and facilities. Kleftiko is a boat-based nature experience.
The best way to enjoy Kleftiko is to choose a reputable boat operator, book early, keep your schedule flexible for wind conditions, bring proper swim gear and allow enough time to swim, snorkel and simply enjoy the extraordinary white cliffs from the water.
FAQs About Milos Kleftiko
Where is Kleftiko in Milos?
Kleftiko is on the south-western coast of Milos Island in the Cyclades, Greece.
What is Kleftiko famous for?
Kleftiko is famous for white volcanic cliffs, sea caves, turquoise water, natural arches, snorkelling and its former pirate-hideout story.
Can you drive to Kleftiko?
You cannot drive directly to the main Kleftiko sea-cave area. The classic way to visit is by boat. Some land routes may reach distant viewpoints or nearby areas, but they do not replace the boat experience.
Is Kleftiko only accessible by boat?
For the main swimming, cave and cliff experience, yes, Kleftiko is best accessed by boat. That is why most visitors book a sailing cruise, RIB tour, catamaran trip or private charter.
Can you swim at Kleftiko?
Yes. Swimming and snorkelling are the main activities at Kleftiko, depending on sea conditions and your boat tour’s safety rules.
Do Kleftiko tours include snorkelling gear?
Many tours include snorkelling gear, but not all. Check before booking if snorkelling is important to you.
What is the best boat tour to Kleftiko?
The best tour depends on your style. Choose a full-day sailing cruise for a relaxed classic experience, a RIB for speed and adventure, a catamaran for comfort, or a private charter for flexibility.
When is the best time to visit Kleftiko?
May, June, September and early October are excellent if tours are operating and sea conditions are good. July and August are warm and popular but much busier.
Is Kleftiko suitable for children?
Kleftiko can suit older children who are comfortable on boats and in deep water. Families should check boat safety, life jackets, shade and child age rules before booking.
Is Milos Kleftiko worth visiting?
Yes. Milos Kleftiko is one of the island’s most spectacular natural attractions and is worth visiting for boat tours, swimming, snorkelling, sea caves and dramatic white volcanic cliffs.
Sponsored Popular Items
Quick take: Musement.com offers a worldwide selection of tours and attractions
Milos Hiking, Cycling & Active Tours Guide Greece Milos combines dramatic volcanic geology, colourful fishing settlements, ancient remains, mining heritage and a highly varied coastline. Check current availability, inclusions and booking details before you go.
Milos Visitor Guide: Top Attractions, Tours & Activities Greece Milos is especially well suited to photographers, beach explorers, boat travellers and couples. Check current availability, inclusions and booking details before you go.
Ferry tour of Milos Island with transfer – Guided Sightseeing Tour Greece Ferry tour of Milos Island with transfer USD 198 adds structure, local context and purposeful sightseeing to the itinerary. Check current availability, inclusions and booking details before you go.
Gulong Gorge, also known as Gulongxia or 古龙峡, is one of Qingyuan’s most popular adventure and nature attractions. Located in Qingxin District, Qingyuan, Guangdong Province, it is famous for dramatic canyon scenery, a large waterfall group, high glass bridges, cliffside viewing platforms, forest walkways, rafting, ziplines and thrill-style activities.
For travellers staying in Guangzhou, Gulong Gorge is one of the easiest big-nature day trips. It offers a completely different atmosphere from the city: green mountains, misty waterfalls, steep cliffs, rushing water and glass skywalk experiences high above the canyon.
Quick take: Musement.com offers a worldwide selection of tours and attractions
Da Nang: 90 Min Foot Massage and Steam near Dragon Bridge Vietnam Relax with a 90-minute wellness experience at STARI Wellness Spa in Da Nang. Enjoy a private steam bath, a warm herbal foot soak, and a 60-minute foot and lower-leg massage
Gulong Gorge suits many types of visitors. Families can enjoy the waterfall walk and scenic areas, teenagers may love the glass bridge and thrill rides, couples can use it as a scenic countryside escape, and adventure travellers can plan around rafting when it is operating. It is also often combined with Dongtian Fairyland, Qingyuan hot springs or other countryside attractions.
Why Visit Gulong Gorge?
Gulong Gorge is worth visiting because it combines natural scenery with adventure-style attractions. The canyon is lush, steep and dramatic, with waterfalls, forested cliffs and mist rising from the water. At the same time, the scenic area has been developed with glass bridges, viewing platforms, rafting routes and other high-adrenaline experiences.
This makes it more than a simple nature walk. You can come for the views, the waterfalls, the glass bridge photo spots, the rafting or the thrill of standing above a deep canyon on a transparent platform.
Gulong Gorge is best for:
Day trips from Guangzhou
Families with older children and teenagers
Adventure travellers interested in rafting and glass bridges
Couples wanting a scenic Qingyuan escape
Photography lovers chasing waterfalls and canyon views
Visitors combining Qingyuan, Yingde and Dongtian Fairyland
Travellers who want a nature break without travelling far from the Pearl River Delta
Where Is Gulong Gorge?
Gulong Gorge is in Qingxin District, part of Qingyuan City in Guangdong Province. It is north of Guangzhou and is usually reached by private car, chartered driver, organised day tour or a combination of high-speed rail and local taxi.
Location Detail
Traveller Notes
Attraction name
Gulong Gorge / Gulongxia / 古龙峡
City
Qingyuan, Guangdong Province, China
District
Qingxin District
Approximate distance from Guangzhou
About 68 km, depending on starting point and route
Private car, organised tour, driver or transfer from Qingyuan
Best visit length
Half day for glass bridge and waterfalls; full day if adding rafting or another nearby attraction
If you are staying in Guangzhou, allow plenty of time for traffic. A Gulong Gorge day trip can be comfortable if you start early, but it becomes tiring if you add too many distant attractions on the same day.
What to Expect at Gulong Gorge
Gulong Gorge is a managed scenic area, not a wild hiking canyon. Expect ticketed entry, shuttle or internal transport arrangements depending on current operations, marked walkways, viewing decks, glass platforms, staff-managed activities and separate ticket categories for some attractions.
The experience can be split into three main parts: the waterfall and canyon scenery, the glass bridge / high-altitude attractions, and rafting or adventure activities when operating.
What you may find
Large waterfall group
Canyon walking routes
Glass bridge and glass skywalk-style platforms
Transparent viewing decks above cliffs and waterfalls
Rafting routes during operating season
Jungle zipline or forest ride-style activities depending on current operations
Cliff swings or thrill rides depending on ticket type and availability
Photo platforms and canyon viewpoints
Food stalls, rest areas and visitor facilities
What not to expect
Do not expect every activity to operate every day.
Do not expect rafting to run all year or all day.
Do not expect short queues on Chinese public holidays.
Do not expect the glass bridge to suit everyone with fear of heights.
Do not expect a quiet wilderness experience in peak season.
Do not expect every ticket to include all activities.
Do not assume children, seniors or shorter visitors can join every thrill ride.
Gulong Gorge Glass Bridge and Glass Platforms
The glass bridge and glass viewing platforms are among Gulong Gorge’s most famous attractions. These high-altitude walkways are built above the canyon and waterfalls, allowing visitors to look down through transparent panels to the cliffs, forest and rushing water below.
The glass bridge experience is dramatic and very photogenic. It is also not for everyone. Visitors who dislike heights may find it stressful, while confident travellers often enjoy it as the highlight of the day.
What makes the glass bridge popular?
Transparent floor sections above the canyon
Wide views over waterfalls and green cliffs
Dramatic photo opportunities
Strong “thrill attraction” appeal for teenagers and young adults
Easy to combine with the waterfall walking route
Often included in Guangzhou-to-Qingyuan day tour packages
Glass bridge tips
Check whether the glass bridge is included in your ticket.
Wear the shoe covers provided if required.
Do not run, jump or push on glass platforms.
Secure your phone and camera before taking photos.
Avoid the glass bridge if you have a strong fear of heights.
Check rules for children, seniors and visitors with medical conditions.
Expect wind and mist near cliff and waterfall viewpoints.
Gulong Gorge Waterfalls
The waterfall group is the natural heart of Gulong Gorge. Water drops through forested cliffs and rocky ledges, creating mist, sound and dramatic views from walkways and viewing platforms.
The waterfalls are especially impressive after rain, but heavy rain can also affect safety, visibility and activity operations. On sunny days, mist and sunlight may create beautiful photo conditions, especially from glass platforms and canyon viewpoints.
Best ways to enjoy the waterfalls
Walk slowly through the waterfall viewing route.
Stop at platforms where you can see multiple cascades.
Protect your camera or phone from mist.
Visit earlier in the day for fewer crowds.
Wear shoes with good grip because paths can be wet.
Bring a light rain jacket if you do not want to get damp.
Allow time for photos rather than rushing directly to the glass bridge.
Photography tips
Use a wrist strap or secure grip near railings.
Wipe your lens regularly because waterfall mist can fog photos.
Cloudy light can be good for waterfall shots.
Wide-angle photos work well from glass platforms.
Do not block walkways while posing for long periods.
Gulong Gorge Rafting
Gulong Gorge rafting is one of the most exciting activities in the scenic area. It is often described as a fast, splash-heavy canyon rafting experience, especially popular in warmer months. Rafting is usually seasonal and may operate only during specific times of day, so it should be checked carefully before planning your visit.
Rafting can be fun, but it is also the activity that requires the most preparation. You should expect to get completely wet, and you need to check age, height, health and safety restrictions before booking.
Rafting is best for:
Adventure travellers
Teenagers and adults who enjoy water rides
Groups of friends
Visitors travelling in warm weather
People who do not mind getting soaked
Rafting may not suit:
Very young children
Some seniors
People with heart, back, neck or mobility issues
Pregnant travellers
Visitors who cannot swim or panic in water
Anyone who does not want a wet, physical ride
What to bring for rafting
Change of clothes
Towel
Water shoes or secure sandals
Waterproof phone pouch
Plastic bag for wet clothes
Small amount of cash
Dry underwear and socks
Hair tie if needed
Medication if required
Rafting tips
Confirm operating times before travelling.
Check age, height and health restrictions.
Do rafting before the glass bridge if your schedule allows, so you can change afterwards.
Do not take valuables onto the raft.
Follow staff instructions strictly.
Expect rafting to be cancelled or suspended in unsafe weather or water conditions.
Other Adventure Activities at Gulong Gorge
Gulong Gorge often promotes additional adventure and photo experiences beyond the glass bridge and rafting. Availability can change, and some may require separate tickets.
Possible activities
Jungle zipline: a forest-style ride across or through green canyon scenery.
Cliff swing: a high-adrenaline swing-style experience for thrill seekers.
Mini rail or cliff ride: sometimes promoted as a fun scenic ride through the forest or along cliff areas.
Waterfall trekking area: shallow stream or water-play sections depending on season and access.
Photo platforms: dramatic viewpoints designed for social media-style photos.
Dinosaur or fantasy-themed zones: some family routes may include themed scenery or child-friendly photo areas.
Before booking, check which activities are operating on your travel date. Some high-adrenaline rides may have height, weight, age or health limits.
Is Gulong Gorge Good for Families?
Yes, Gulong Gorge can be a good family destination, especially for families with older children and teenagers. The waterfalls, glass platforms and canyon scenery are exciting and visually impressive. However, not every activity is suitable for every child.
Families with younger children or older relatives should focus on the easier scenic areas, waterfall viewpoints and safe walking paths rather than trying to do every thrill activity.
Family-friendly tips
Check height and age restrictions before promising children any activity.
Bring snacks, water and spare clothing.
Use toilets before entering long scenic routes or queues.
Hold children’s hands near railings, wet paths and crowded platforms.
Avoid forcing nervous children onto glass bridges.
Plan rest breaks because the area can involve stairs and walking.
Consider staying nearby if combining Gulong Gorge with another attraction.
For visitors over 60
Active seniors may enjoy the waterfall viewing areas and scenic routes, but high-adrenaline activities such as rafting, cliff swings or some glass attractions may have restrictions. Always check current rules and choose a comfortable pace.
Nearby Places to Visit
Dongtian Fairyland
Dongtian Fairyland, also known as Dongtian Xianjing or Cave Wonderland, is a karst cave and underground river-style attraction near Yingde. It pairs well with Gulong Gorge on a two-day Qingyuan countryside itinerary.
Qingyuan Hot Springs
Qingyuan is known for hot spring resorts. A hot spring stay can be a good way to relax after rafting, hiking or glass bridge sightseeing.
Yingxi Peak Forest Corridor
Yingxi Peak Forest is a karst countryside region near Yingde, known for limestone peaks, villages, rivers and rural views.
Lianzhou Underground River
Lianzhou Underground River is another famous cave and river attraction in northern Guangdong. It is much farther from Guangzhou and Gulong Gorge, so it is better as part of a separate overnight route.
Qingyuan City
Qingyuan City is the main urban base for the region, with hotels, restaurants, transport and access to several countryside attractions.
Guangzhou
Guangzhou is the most common starting point for international visitors. Many travellers visit Gulong Gorge as a long day trip from Guangzhou.
Yingde Tea Country
Yingde is known for tea, especially black tea. Tea gardens or tea-related stops can be added to a slower countryside trip.
Best Time to Visit Gulong Gorge
Gulong Gorge can be visited year-round, but the best time depends on whether you want rafting, waterfalls, comfortable walking weather or fewer crowds.
Season
What to Expect
Advice
Spring
Green scenery, comfortable temperatures and good waterfall flow
Good for glass bridge, waterfalls and photography.
Summer
Hot weather, rafting season energy and stronger water activity demand
Best for rafting, but expect crowds, heat and possible rain.
Autumn
More comfortable weather and clearer views
Excellent for glass bridge, waterfalls and family trips.
Winter
Cooler, quieter and less suitable for rafting
Good for scenic walking, but bring warm layers.
Chinese public holidays
Heavy crowds, traffic and long queues
Book ahead, start early or avoid peak holiday dates.
If rafting is your priority, check the current operating season and daily schedule before travelling. If photography and scenery are your priority, spring and autumn are often more comfortable.
Suggested Gulong Gorge Itinerary Ideas
Option 1: Simple Gulong Gorge Day Trip from Guangzhou
Early morning: Depart Guangzhou by private car, driver or organised tour.
Late morning: Arrive at Gulong Gorge and enter the scenic area.
Midday: Visit the waterfall group and canyon viewpoints.
Afternoon: Walk the glass bridge and glass platforms.
Late afternoon: Return to Guangzhou or Qingyuan.
Option 2: Gulong Gorge Adventure Day with Rafting
Morning: Arrive early and collect tickets.
Late morning: Explore the waterfall group and scenic walkways.
Early afternoon: Join rafting if operating and if you meet safety requirements.
After rafting: Change into dry clothes.
Late afternoon: Visit the glass bridge or other scenic platforms if time allows.
Option 3: Family-Friendly Gulong Gorge Plan
Morning: Start with the waterfall route before crowds build.
Midday: Take a rest and eat lunch inside or near the scenic area.
Afternoon: Visit the glass bridge if everyone is comfortable with heights.
Optional: Add a family-friendly ride or photo stop rather than intense rafting.
Evening: Stay in Qingyuan or return to Guangzhou.
Option 4: Gulong Gorge and Hot Spring Overnight
Day 1: Travel from Guangzhou to Gulong Gorge and enjoy the waterfalls and glass bridge.
Day 1 evening: Check into a Qingyuan hot spring hotel.
Day 2: Relax in hot springs or visit another nearby Qingyuan attraction.
Return: Drive back to Guangzhou in the afternoon.
Option 5: Gulong Gorge and Dongtian Fairyland Two-Day Route
Day 1: Visit Gulong Gorge for glass bridge, waterfalls and rafting if available.
Night: Stay in Qingyuan, Yingde or a countryside hotel.
Day 2: Visit Dongtian Fairyland and enjoy karst cave scenery.
Optional: Add Yingxi Peak Forest photo stops if time allows.
Where to Stay Near Gulong Gorge
Area
Best For
Traveller Notes
Qingyuan city area
Convenience, restaurants, hotels and transport
Good practical base for Gulong Gorge and nearby attractions.
Qingxin District
Closer access to Gulong Gorge
Useful for early starts or avoiding a long day from Guangzhou.
Qingyuan hot spring resorts
Relaxation after rafting or walking
Good for couples, families and overnight trips.
Yingde / Yingxi countryside
Combining Dongtian Fairyland and karst scenery
Better for a slower two-day countryside itinerary.
Guangzhou
Big-city base and international connections
Possible for a day trip, but expect a long travel day.
Useful Booking Resources for Gulong Gorge and Qingyuan Activities
Gulong Gorge can be visited independently with the right transport, but booking platforms are useful for tickets, private drivers, Guangzhou day trips, rafting packages, glass bridge entry, Qingyuan hot springs, Dongtian Fairyland combinations and wider Guangdong travel planning. Skimlinks may automatically convert these merchant links into affiliate links if the merchant is active in your Skimlinks account.
GetYourGuide – offers China tours, private guides, Guangzhou day trips, transfers and selected Guangdong countryside experiences depending on availability.
Viator – offers Guangzhou private tours, Qingyuan day trips, Gulong Gorge combinations, driver-guide services, rafting-style activities and customisable Guangdong itineraries.
Klook – offers Gulong Gorge tickets, Qingyuan rafting tours, glass bridge packages, Guangzhou-to-Qingyuan day tours, China attraction tickets, eSIMs and local transfers.
KKday – offers China attraction tickets, private transfers, Guangdong day trips, Qingyuan tours and transport products useful for comparing Gulong Gorge options.
Tiqets – offers mobile-friendly tickets for selected global attractions, useful for travellers combining Guangdong with other major city stopovers.
Musement – offers tours, attraction tickets, cultural activities and local experiences across selected destinations, useful for wider China and Asia travel planning.
G Adventures – offers small-group and multi-day China or Asia tours that may suit travellers planning a broader route rather than a standalone Qingyuan trip.
Go City – offers bundled attraction passes in selected destinations, useful for readers comparing multi-attraction city sightseeing before or after China.
CityPASS – offers bundled attraction passes mainly for selected North American cities. It is not a main Qingyuan booking option, but may suit readers planning wider international travel.
Booking tip: Before booking Gulong Gorge, check whether the ticket includes the glass bridge, waterfall group, rafting, shuttle transport, zipline, cliff swing or other special activities. Also confirm opening hours, rafting operation time, child and senior rules, height restrictions, weather cancellation policy, pickup location, guide language and whether you need to bring a change of clothes.
Gulong Gorge Travel Tips
Start early from Guangzhou
Traffic can make the journey longer than expected. Start early if you want time for the glass bridge, waterfalls and rafting.
Check rafting before travelling
Rafting may have limited operating times, seasonal rules or weather closures. Do not assume it will be available all day.
Wear non-slip shoes
Waterfall mist, wet paths and canyon steps can make surfaces slippery. Good shoes are important.
Bring a change of clothes for rafting
If you plan to raft, expect to get soaked. Bring a full change of clothes and a waterproof bag.
Secure your phone
Glass bridges, waterfalls and rafting are all risky places for phones. Use a wrist strap or waterproof pouch.
Check activity restrictions
Some rides may have height, age, weight or health restrictions. This matters for children, seniors and anyone with medical conditions.
Avoid peak public holidays
Chinese public holidays can bring heavy crowds, traffic and long queues. Weekdays are usually better.
Do not overpack the itinerary
Gulong Gorge, Dongtian Fairyland and Lianzhou Underground River are not all close together. Check driving times carefully before combining them.
Use a private driver for flexibility
A private driver or private tour is often the easiest way to visit from Guangzhou, especially with family or a group.
Bring snacks and water
Food is available in tourist areas, but carrying water and simple snacks makes the day easier, especially with children.
Is Gulong Gorge Worth Visiting?
Yes, Gulong Gorge is worth visiting if you enjoy waterfalls, glass bridges, canyon views and adventure-style attractions. It is one of the best-known nature and thrill destinations near Guangzhou and a strong choice for a Qingyuan day trip.
It may not suit travellers who dislike heights, crowds, wet paths or theme-park-style development in natural areas. It is also best to check current operations before travelling, especially if rafting or a particular glass attraction is your main reason for going.
The best way to enjoy Gulong Gorge is to start early, choose the right ticket package, wear practical shoes, bring spare clothes if rafting, and avoid adding too many distant attractions into the same day.
FAQs About Gulong Gorge
Where is Gulong Gorge?
Gulong Gorge is in Qingxin District, Qingyuan City, Guangdong Province, China, north of Guangzhou.
How far is Gulong Gorge from Guangzhou?
Gulong Gorge is commonly described as being about 68 km from Guangzhou, but actual travel time depends on your starting point, traffic and transport method.
What is Gulong Gorge famous for?
Gulong Gorge is famous for its waterfall group, glass bridge, canyon views, cliffside platforms, rafting and adventure-style activities.
Can you go rafting at Gulong Gorge?
Yes, rafting is one of Gulong Gorge’s best-known activities, but it is seasonal and may have limited operating hours. Check current availability before travelling.
Is the Gulong Gorge glass bridge scary?
It can be scary for visitors who dislike heights because the glass sections look down into the canyon. Confident travellers often find it exciting and photogenic.
Is Gulong Gorge suitable for children?
Gulong Gorge can be suitable for children, especially older children and teenagers, but some activities may have age, height or safety restrictions. Parents should check rules before booking.
Is Gulong Gorge suitable for seniors?
Active seniors may enjoy the scenic areas and waterfalls, but rafting, cliff swings and some high-altitude activities may not be suitable or may have restrictions.
How long do you need at Gulong Gorge?
Allow at least half a day for the waterfalls and glass bridge. Allow most of the day if you add rafting, queues, meals and transport from Guangzhou.
Can you combine Gulong Gorge with Dongtian Fairyland?
Yes, but it is more comfortable as a two-day Qingyuan and Yingde route. Doing both in one day from Guangzhou can feel rushed unless you use a well-planned private tour.
Is Gulong Gorge worth visiting?
Yes. Gulong Gorge is worth visiting for travellers who enjoy waterfalls, glass bridges, canyon scenery, rafting and adventure activities within reach of Guangzhou and Qingyuan.
Sponsored Popular Items
Quick take: Musement.com offers a worldwide selection of tours and attractions
Da Nang: 90 Min Foot Massage and Steam near Dragon Bridge Vietnam Relax with a 90-minute wellness experience at STARI Wellness Spa in Da Nang. Enjoy a private steam bath, a warm herbal foot soak, and a 60-minute foot and lower-leg massage
Rafting 5 km + Optional Zipline & ATV (Near Krabi/In Phang Nga) Thailand This package excludes hotel transfer. Travel on your own to enjoy thrilling rafting 5 km near Krabi and Phuket. Choose rafting only or combine it with ATV and zipline for an exciting adventure day
Da Nang: 90-Minute Herbal Head Spa near Dragon Bridge Vietnam Unwind with a 90-minute Vietnamese Herbal Head Spa near Dragon Bridge. Enjoy facial cleansing, herbal steam, Gua Sha massage, a warm herbal hair rinse, organic shampoo, and a soothing face mask
Dongtian Fairyland, also known as Dongtian Xianjing, Cave Wonderland, Cave Fairyland or 洞天仙境, is one of the most impressive karst attractions near Yingde in Qingyuan, Guangdong Province. Set near Jiulong Town along the wider Yingxi Peak Forest Corridor, the scenic area is known for dramatic limestone cliffs, sinkholes, cave chambers, underground river scenery, boardwalks, boat rides and a “hidden paradise” atmosphere.
This is not just a normal cave visit. Dongtian Fairyland combines open-air karst scenery with a huge cave opening, emerald water, stalactites, shafts of natural light and lush greenery growing inside the cave environment. The Chinese name gives the feeling of a “cave-heaven fairyland”, which suits the landscape: part grotto, part canyon, part river, part secret garden.
For travellers staying in Guangzhou, Qingyuan or Yingde, Dongtian Fairyland can work as a day trip or as part of a wider countryside route with Yingxi Peak Forest, Gulong Gorge, glass bridges, rafting, village scenery and rural Guangdong food.
Quick take: Musement.com offers a worldwide selection of tours and attractions
Karst and Slovenian coast day tour from Ljubljana Slovenia Plan Karst and Slovenian coast day tour from Ljubljana, a guided sightseeing experience, with practical tips on timing, inclusions and what to check before booking. Compare current availability, prices and booking conditions before you go.
Why Visit Dongtian Fairyland?
Dongtian Fairyland is worth visiting because it offers one of Guangdong’s most unusual natural sightseeing experiences. Instead of only seeing a lit cave from a walking path, visitors can experience a combination of cave, river, sinkhole, cliff, greenery and karst peak scenery in one compact attraction.
The most memorable view is the contrast between dark cave rock, green water, bright openings in the cave roof and vegetation growing inside the limestone environment. On a good day, sunlight enters through the openings above, making the cave feel more like a natural cathedral than a standard tourist cave.
Dongtian Fairyland is best for:
Travellers who enjoy caves, karst landscapes and natural scenery
Families wanting a scenic attraction with easy walking sections
Couples looking for atmospheric photos and countryside views
Visitors staying in Guangzhou who want a nature day trip
People combining Qingyuan, Yingde, Gulong Gorge and Yingxi Peak Forest
Photography lovers interested in cliffs, cave light and reflections
Travellers wanting a softer nature experience than long mountain hiking
Where Is Dongtian Fairyland?
Dongtian Fairyland is near Jiulong Town in Yingde, which is part of Qingyuan City in northern Guangdong Province, China. It is one of the main attractions associated with the Yingxi Peak Forest Corridor, a countryside karst region known for limestone hills, villages, rivers and rural scenery.
Private car, driver, organised tour or local transfer from Yingde/Qingyuan
Best visit length
About 1.5 to 3 hours for the attraction itself, longer if combined with nearby sights
Best trip style
Nature day trip, family sightseeing, cave boat ride, Qingyuan countryside route or Guangzhou side trip
The attraction is easier to visit with arranged transport. Public transport may be possible for local travellers, but for international visitors or families, a private driver or organised day tour is usually more practical.
What to Expect at Dongtian Fairyland
Expect a managed scenic area built around a natural karst cave system and surrounding valley scenery. The experience usually includes walking sections, viewing platforms, boardwalks, cave chambers, river scenery and, when operating, a sightseeing boat section through part of the cave or underground river area.
The cave is the main highlight, but the setting around it also matters. You may see limestone cliffs, green pools, cave openings, stalactites, shaded plants, wooden or metal walkways, stone steps and scenic viewing points. Some areas may use coloured lighting inside the cave, while the open sinkhole sections rely more on natural light.
What you may find
Large karst cave chamber
Sinkhole-style openings in the cave roof
Underground river or green-water cave pool scenery
Boat sightseeing route when operating
Stalactites and limestone formations
Boardwalks and cliffside paths
Glass walkway or glass platform-style viewpoints
Photo spots with cave, water and cliff scenery
Nearby rural Yingde countryside views
What not to expect
Do not expect a wild, undeveloped cave expedition.
Do not expect every activity to operate every day; boat rides and special walkways can be affected by maintenance, water levels or weather.
Do not expect English signage everywhere.
Do not expect the attraction to feel quiet during Chinese public holidays.
Do not expect to swim in the cave water.
Do not touch stalactites or rock formations.
The Cave, Sinkhole and Underground River
The core attraction of Dongtian Fairyland is its karst cave environment. Limestone landscapes form over long periods as water dissolves and shapes the rock, creating caves, underground passages, sinkholes, cliffs and unusual stone formations.
At Dongtian Fairyland, the cave is visually dramatic because it is not fully enclosed. Openings in the roof allow daylight into the chamber, while plants grow in places where moisture and light meet. This creates the “fairyland” feeling: dark cave walls, green water, shafts of light and vegetation in one space.
What makes the cave special?
It combines open sinkhole scenery with cave scenery.
The water reflections make the cave feel larger and more atmospheric.
Natural openings allow light into parts of the cave.
Vegetation grows in the sheltered limestone environment.
The cave can be viewed from both walking routes and boat sections when available.
The surrounding Yingxi karst landscape adds context to the attraction.
For photography, the best views are often where the cave roof opens above the water. A phone or camera with good low-light performance helps, because the contrast between dark rock and bright openings can be strong.
Boat Ride and Boardwalk Experience
Many visitors associate Dongtian Fairyland with the sightseeing boat route. When the boat is operating, it gives a calm way to experience the cave from the water, passing beneath limestone formations and through the shadowed cave environment.
The boat ride is usually short rather than a long river cruise, but it is memorable because of the setting. Sitting low on the water gives a better sense of the cave’s height, rock textures and reflections.
Boat ride tips
Check before booking whether the boat ride is operating.
Confirm whether your ticket includes the boat or whether it is a separate option.
Wear a life jacket if required.
Keep phones and cameras secure over water.
Expect queues during holidays and weekends.
Listen to staff instructions when boarding and disembarking.
Avoid leaning too far over the side for photos.
Boardwalk tips
Wear comfortable shoes with grip.
Hold handrails on wet or shaded sections.
Take your time on steps and cliffside paths.
Watch children closely near railings and water.
Bring a light jacket if caves feel cool or damp.
Glass Walkway and Viewpoints
Some visitor descriptions of Dongtian Fairyland mention a glass skywalk or glass walkway-style experience above the river and between steep cliffs. This can add a thrill element to the otherwise scenic cave visit.
Glass walkways in Chinese scenic areas may have separate ticketing, height or age rules, weather restrictions or maintenance closures. If the glass walkway is important to your visit, confirm current availability before travelling.
Glass walkway tips
Check whether the glass walkway is included in your ticket.
Avoid it if you dislike heights.
Wear the shoe covers provided if required.
Follow staff instructions and do not run or jump.
Do not force nervous children or older travellers to cross.
Check weather conditions; rain can affect visibility and comfort.
Best Things to Do at Dongtian Fairyland
1. Take the cave boat ride
If operating, the boat ride is the signature experience. It lets you see the cave, water and cliffs from a low, atmospheric angle.
2. Walk the cave boardwalks
The walking paths help you view the rock formations, cave walls, green water and sinkhole openings at a slower pace.
3. Photograph the cave opening
The contrast between limestone walls, daylight, water and greenery is the most photogenic part of Dongtian Fairyland.
4. Look for stalactites and rock shapes
Inside the cave, look for hanging stalactites, layered limestone textures and unusual formations created by water over time.
5. Try the glass walkway if available
The glass walkway adds a little adrenaline and gives views over the river and cliffs, depending on current access.
6. Explore the surrounding karst scenery
Do not rush straight out after the cave. The wider Jiulong and Yingxi area has classic Guangdong karst countryside views.
7. Combine with Yingxi Peak Forest
Dongtian Fairyland works especially well as part of a Yingxi Peak Forest route, with limestone hills, rural roads and village scenery.
8. Add Gulong Gorge on a longer trip
Many Guangzhou-based day tours combine Qingyuan attractions such as Gulong Gorge and Dongtian Fairyland, although it can make for a long day.
9. Enjoy local countryside food
Yingde and Qingyuan are good areas for simple countryside meals, chicken dishes, river fish, tofu, vegetables and local tea.
10. Stay overnight nearby for a slower trip
If you want less driving and more time for karst scenery, stay in Yingde, Jiulong Town or a countryside guesthouse near the Yingxi corridor.
Nearby Places to Visit
Yingxi Peak Forest Corridor
Yingxi Peak Forest Corridor is the wider karst countryside region around Jiulong and Yingde. It is known for limestone peaks, villages, rivers, fields and scenic rural roads.
Jiulong Town
Jiulong Town is the nearby town most closely associated with Dongtian Fairyland. It is useful for local food, transport and access to the scenic corridor.
Gulong Gorge
Gulong Gorge is one of Qingyuan’s most popular adventure-style attractions, known for glass bridge experiences, waterfall scenery, cliff walks and seasonal rafting or thrill activities.
Yingde Tea Country
Yingde is known for tea, especially Yingde black tea. Tea gardens or tea-related stops can be added to a slower countryside itinerary.
Fenglin Town
Fenglin Town and nearby karst areas are often included in Yingxi countryside routes, with peak forest scenery and rural photo stops.
Qingyuan City
Qingyuan is the broader city area and a major base for hot springs, rafting, gorge attractions and countryside escapes from Guangzhou.
Guangzhou
Guangzhou is the most common big-city starting point for international travellers. Dongtian Fairyland can be visited as a long day trip or overnight side trip from Guangzhou.
Lianzhou Underground River
Lianzhou Underground River is another famous cave and river attraction in Qingyuan, but it is much farther away. Combining it with Dongtian Fairyland in one day can mean heavy driving.
Best Time to Visit Dongtian Fairyland
Dongtian Fairyland can be visited year-round, but spring and autumn are usually the most comfortable for walking, photography and countryside travel. Summer can be hot, humid and rainy, while winter can be cooler and quieter.
Season
What to Expect
Advice
Spring
Green countryside, mild to warm weather and fresh scenery
Good for cave visits and Yingxi countryside routes.
Summer
Hot, humid and more rain-prone
Good for shaded cave scenery, but check weather and road conditions.
Autumn
Comfortable weather and clearer countryside views
One of the best seasons for day trips and photography.
Winter
Cooler, quieter and less humid
Good for fewer crowds, but bring a light jacket.
Chinese public holidays
High visitor numbers and queues
Book ahead, start early or avoid peak dates if possible.
Morning: Arrive at Dongtian Fairyland near Jiulong Town.
Start: Walk the scenic area boardwalks and cave paths.
Main experience: Take the cave boat ride if operating.
Photo stop: Spend time near the sinkhole opening and water reflections.
Finish: Try the glass walkway if available and included.
Lunch: Eat in Jiulong Town or nearby countryside restaurants.
Option 2: Guangzhou to Dongtian Fairyland Day Trip
Early morning: Depart Guangzhou by private car or organised tour.
Late morning: Arrive in the Yingde/Jiulong area.
Midday: Visit Dongtian Fairyland, including cave walk and boat ride if available.
Afternoon: Add a Yingxi Peak Forest photo stop or countryside drive.
Evening: Return to Guangzhou.
Option 3: Dongtian Fairyland and Yingxi Peak Forest Route
Morning: Visit Dongtian Fairyland before crowds build.
Lunch: Try local Yingde countryside food.
Afternoon: Drive through Yingxi Peak Forest Corridor, stopping for karst hill photos.
Late afternoon: Visit a village, tea stop or rural viewpoint.
Evening: Stay in Yingde or return to Qingyuan/Guangzhou.
Option 4: Qingyuan Adventure and Cave Combination
Day 1: Visit Gulong Gorge for glass bridge, waterfall or adventure activities.
Night: Stay in Qingyuan, Yingde or a countryside hotel.
Day 2: Visit Dongtian Fairyland and Yingxi Peak Forest at a slower pace.
Option 5: Family-Friendly Cave Day
Morning: Start early to avoid heat and long queues.
Visit: Focus on the boardwalk, boat ride and easy viewpoints.
Breaks: Keep snacks, water and toilet stops planned.
Afternoon: Avoid overloading the day with too many distant attractions.
Tip: Check whether the boat and glass walkway are suitable for younger children or older travellers.
Where to Stay Near Dongtian Fairyland
Area
Best For
Traveller Notes
Jiulong Town
Closest access to Dongtian Fairyland and Yingxi Peak Forest
Best for countryside stays and early starts.
Yingde
Rail access, local food and wider area exploring
Good practical base with more services than rural villages.
Qingyuan
Gorge attractions, hot springs and multi-attraction trips
Useful if combining Gulong Gorge and other Qingyuan sights.
Guangzhou
Big-city base and international connections
Possible for a day trip, but expect a long travel day.
Yingxi countryside guesthouses
Karst views, slow travel and photography
Best for travellers wanting atmosphere over convenience.
Useful Booking Resources for Dongtian Fairyland and Qingyuan Activities
Dongtian Fairyland can be visited independently with local transport, but booking platforms are useful for tickets, private drivers, Guangzhou day trips, Gulong Gorge combinations, Yingxi Peak Forest routes, translation-friendly guides and China travel products. Skimlinks may automatically convert these merchant links into affiliate links if the merchant is active in your Skimlinks account.
GetYourGuide – offers China tours, private guides, Guangzhou day trips, transfers and selected Qingyuan or Guangdong countryside experiences depending on availability.
Viator – offers Guangzhou private tours, Qingyuan day trips, Gulong Gorge combinations, cave and countryside routes, driver-guide services and customisable Guangdong itineraries.
Klook – offers Dongtian Fairyland or Cave Wonderland tickets where available, Qingyuan day tours, Gulong Gorge combinations, China attraction tickets, eSIMs, transfers and local experiences.
KKday – offers China attraction tickets, private transfers, Guangdong day trips, local tours and transport products useful for comparing Qingyuan and Guangzhou activities.
Tiqets – offers mobile-friendly tickets for selected global attractions, useful for travellers combining Guangdong with other major city stopovers.
Musement – offers tours, attraction tickets, cultural activities and local experiences across selected destinations, useful for wider China and Asia travel planning.
G Adventures – offers small-group and multi-day China or Asia tours that may suit travellers planning a broader route rather than a standalone Qingyuan trip.
Go City – offers bundled attraction passes in selected destinations, useful for readers comparing multi-attraction city sightseeing before or after China.
CityPASS – offers bundled attraction passes mainly for selected North American cities. It is not a main Qingyuan booking option, but may suit readers planning wider international travel.
Booking tip: Before booking Dongtian Fairyland, check whether your ticket includes the boat ride, whether the boat is operating, whether the glass walkway is included, opening hours, last entry time, child and senior rules, weather policy, transport pickup point, guide language, cancellation rules and whether nearby attractions are realistically close enough for the same day.
Dongtian Fairyland Travel Tips
Check whether the boat is operating
The boat ride is one of the main reasons many travellers visit. Confirm current operations before travelling, especially after heavy rain, maintenance notices or seasonal changes.
Start early
Morning visits are better for lower crowds, softer light and easier travel logistics from Guangzhou or Qingyuan.
Wear proper shoes
The attraction can include steps, wet surfaces, cave paths and boardwalks. Avoid slippery sandals.
Bring a light jacket
Caves can feel damp or cool, even when the weather outside is warm.
Protect your phone on the boat
Use a strap or secure pocket. Water reflections make great photos, but phones are easy to drop.
Use translation tools
English may be limited at ticket counters, transport points and local restaurants. A translation app is useful.
Avoid peak public holidays
Chinese public holidays can bring heavy crowds, longer queues and slower traffic. Travel on weekdays if possible.
Do not overload the day
Dongtian Fairyland, Gulong Gorge and Lianzhou Underground River are not all close together. Check driving times carefully before combining attractions.
Bring snacks and water
Food options may be simple around the attraction. Carry water, especially in summer.
Respect the cave environment
Do not touch stalactites, carve rocks, litter or leave the marked paths. Karst cave environments are fragile.
Is Dongtian Fairyland Worth Visiting?
Yes, Dongtian Fairyland is worth visiting if you enjoy caves, karst scenery, boat rides and unusual natural landscapes. It is one of the most memorable countryside attractions near Yingde and a strong choice for travellers wanting a nature-based side trip from Guangzhou or Qingyuan.
It may not suit travellers who dislike caves, steps, damp surfaces or long drives from the city. It is also best to check current operations before going, because the boat ride and special walkway experiences may not always be available.
The best way to enjoy Dongtian Fairyland is to start early, allow enough time for the cave and boat route, combine it with Yingxi Peak Forest rather than too many distant attractions, and treat it as a scenic countryside escape rather than a quick roadside stop.
FAQs About Dongtian Fairyland
Where is Dongtian Fairyland?
Dongtian Fairyland, also called Dongtian Xianjing or Cave Wonderland, is near Jiulong Town in Yingde, Qingyuan, Guangdong Province, China.
What is Dongtian Fairyland famous for?
Dongtian Fairyland is famous for karst caves, sinkhole scenery, underground river views, stalactites, boat sightseeing, boardwalks, cliff scenery and glass walkway-style viewpoints.
Is Dongtian Fairyland the same as Cave Wonderland?
Yes. Dongtian Fairyland is commonly translated or marketed as Cave Wonderland, Cave Fairyland or Dongtian Xianjing.
Can you take a boat ride at Dongtian Fairyland?
Boat rides are commonly associated with the attraction, but availability can change due to water levels, maintenance, weather or operating rules. Check current status before booking.
How long do you need at Dongtian Fairyland?
Most visitors should allow around 1.5 to 3 hours for the scenic area, depending on queues, boat ride availability, walking pace and photo stops.
Can you visit Dongtian Fairyland from Guangzhou?
Yes. It can be visited as a long day trip from Guangzhou by private car or organised tour, though staying overnight in Yingde or Qingyuan makes the trip more relaxed.
Is Dongtian Fairyland suitable for children?
Yes, it can be suitable for children with supervision, but parents should watch them carefully near water, steps, railings, boats and glass walkway areas.
Is it suitable for seniors?
It may be suitable for active seniors, but visitors should expect walking, steps, damp surfaces and possible queues. Check accessibility before travelling if mobility is limited.
What should I wear?
Wear comfortable walking shoes, light clothing, sun protection outside the cave and a light jacket if you are sensitive to cool or damp cave conditions.
Is Dongtian Fairyland worth visiting?
Yes. Dongtian Fairyland is worth visiting for travellers who enjoy dramatic karst caves, green-water reflections, sinkhole scenery, boat rides and countryside landscapes near Yingde and Qingyuan.
Sponsored Popular Items
Quick take: Musement.com offers a worldwide selection of tours and attractions
Karst and Slovenian coast day tour from Ljubljana Slovenia Plan Karst and Slovenian coast day tour from Ljubljana, a guided sightseeing experience, with practical tips on timing, inclusions and what to check before booking. Compare current availability, prices and booking conditions before you go.
Short Rammang Rammang Karst Tour from Hasanuddin Airport Indonesia Make the most of your layover in Makassar with a private tour to Rammang-Rammang Karst. Cruise along the Pute River, explore the Fireflies Cave, and visit Berua Village.
Makassar: Rammang-Rammang South Sulawesi Tour Karst & River Indonesia Explore Rammang-Rammang from Makassar, enjoy a boat ride along the Pute River between towering karst cliffs, then walk along peaceful green rice fields in a truly stunning natural landscape.
Penghu Wangyou Island, often translated as Forget-Me-Not Island or 忘憂島, is a blue-water island adventure experience in Taiwan’s Penghu archipelago. It is best known through local tour operators offering snorkelling, coral reef exploration, water activities, island scenery, beach time and, on some itineraries, overnight camping-style experiences under the stars.
The name Wangyou carries the feeling of “forgetting worries”, which suits the experience well. Travellers come for clear water, reef colours, remote-island atmosphere, sea breezes and a more adventurous side of Penghu beyond the main island of Magong.
It is important to understand that “Wangyou Island” is often used as a tourism name for a guided island and reef experience rather than a simple public beach you can easily visit on your own. Exact routes, landing points, snorkelling areas and activity inclusions can vary by operator, season, tide and sea conditions. Always confirm the exact itinerary before booking.
Quick take: Musement.com offers a worldwide selection of tours and attractions
Puerto Galera: Coral Reefs & Island Snorkeling Experience Philippines Discover the vibrant marine life and tropical beauty of Puerto Galera on a full-day island snorkeling tour. Explore colorful coral gardens, pristine beaches, and unique underwater caves
Why Visit Penghu Wangyou Island?
Penghu Wangyou Island is worth visiting if you want a more adventurous, sea-focused Penghu experience. Instead of only sightseeing around Magong or visiting easy-access beaches, a Wangyou Island trip usually takes you out into clearer water, coral reef areas and smaller island landscapes.
The attraction is the combination of blue sea, reef snorkelling, remote-island scenery and guided water activities. It is especially appealing for travellers who enjoy being on the water and want to see the marine side of Penghu.
Penghu Wangyou Island is best for:
Snorkelling and coral reef lovers
Travellers wanting a guided Penghu island adventure
Couples and friends looking for clear-water photos
Families with older children who are comfortable in the water
Visitors who want a more remote-feeling trip than Magong city sightseeing
People interested in South Penghu marine scenery
Travellers looking for SUP, water play, camping or boat-based experiences depending on tour availability
Where Is Wangyou Island?
Wangyou Island is promoted as part of the wider Penghu Islands travel scene in Taiwan. Many related tours are connected with the southern Penghu waters, reef areas and island-hopping routes. Because the name can be used differently by operators, travellers should confirm the exact island, reef zone, departure harbour and route before booking.
Location Detail
Traveller Notes
Destination name
Penghu Wangyou Island / Forget-Me-Not Island / 忘憂島
Region
Penghu Islands, Taiwan
Main travel base
Magong, Penghu
Common trip style
Guided boat trip, snorkelling tour, water activities or camping-style island experience
Nearby marine area
South Penghu waters and South Penghu Marine National Park region
Best visit style
Pre-booked tour with guide, boat transfer, safety equipment and weather backup plan
Do not assume Wangyou Island is a place you can simply drive to or visit independently. Most travellers experience it through organised boat tours that include transport, equipment and guide support.
What to Expect on a Penghu Wangyou Island Trip
A typical Wangyou Island experience is built around the sea. Depending on the operator, you may take a boat from a Penghu harbour, travel to a reef or island area, snorkel with guides, join water activities, relax on a beach, enjoy lunch or snacks, and return later in the day.
Some operators also promote overnight island camping, night snorkelling, stargazing, barbecue meals or beach-based activities. These trips are more adventurous and depend strongly on weather, sea conditions and safety arrangements.
What may be included
Boat transfer from a Penghu departure point
Snorkelling equipment
Life jacket or flotation equipment
Guide or instructor support
Coral reef viewing area
Water activities such as SUP, kayaking or floating platforms depending on tour
Lunch, seafood meal or snacks depending on package
Photos or videos, sometimes at extra cost
Camping equipment or overnight setup on selected trips
Insurance, depending on the operator and package
What may not be included
Hotel pickup in Magong
Personal towels
Waterproof phone pouch
Motion sickness medicine
Personal travel insurance
Professional underwater photos
Extra meals or drinks
Refunds for weather changes unless stated in the policy
What not to expect
Do not expect a large developed island with shops and restaurants.
Do not expect the same route every day; sea conditions affect the itinerary.
Do not expect perfect underwater visibility in all weather.
Do not expect to snorkel alone without guide rules.
Do not expect luxury facilities on remote or uninhabited island-style trips.
Do not touch coral, collect shells or disturb marine life.
Snorkelling and Coral Reefs Around Wangyou Island
Snorkelling is the main reason many travellers book a Penghu Wangyou Island tour. The wider South Penghu marine region is known for clear water, basalt island scenery and coral reef ecosystems. Some tourism descriptions refer to a colourful underwater “lavender forest” effect, linked with purple-toned coral reef scenery in South Penghu waters.
For most visitors, the snorkelling is guided. You do not need to be an expert swimmer, but you should be comfortable in the water and willing to follow instructions. A good operator should provide flotation gear, safety briefing and guide support.
What you may see while snorkelling
Clear shallow water and reef formations
Hard coral and soft coral areas
Tropical fish
Sea stars or small reef creatures, depending on location
Basalt and rocky underwater scenery
Blue-green water contrasts around the reef edge
Occasional sea turtles if lucky, though sightings are never guaranteed
Snorkelling safety tips
Wear the life jacket or flotation device provided.
Listen carefully to the guide’s safety briefing.
Do not swim away from the group.
Do not touch coral, fish, turtles or sea stars.
Do not stand on reef or kick coral with fins.
Use reef-safe behaviour and avoid chemical-heavy sunscreen in the water.
Tell the guide if you are nervous, tired or not a strong swimmer.
Do not snorkel if you feel unwell or seasick.
Best Things to Do on a Penghu Wangyou Island Tour
1. Go guided snorkelling
The highlight of most Wangyou Island trips is snorkelling over reef areas. Guided snorkelling is best because the local operator can choose safer water, explain what you are seeing and help protect the reef.
2. Enjoy the blue-water scenery
Wangyou Island tours are very visual: bright blue sea, small islands, basalt rock, reef shallows and open horizon views. Bring a waterproof camera or phone pouch if photos matter to you.
3. Try SUP or water activities
Some packages include stand-up paddleboarding, floating mats, kayaking or other water play. These extras vary by operator, so check the exact inclusions.
4. Relax on a remote beach
Depending on the route and tide, tours may include beach time or a landing on a quiet island-style shore. Facilities are usually basic, so treat it as a nature stop rather than a resort beach.
5. Join an overnight camping trip
Some Wangyou Island products promote uninhabited-island camping, barbecue meals, night sea experiences and stargazing. These trips are best for adventurous travellers who do not need hotel-style comfort.
6. Watch the stars
On overnight trips, the lack of city lights can make the sky feel dramatic. Weather and moon phase affect how good the stars appear.
7. Learn about coral protection
A responsible tour should help visitors understand reef protection, marine life and why coral should not be touched or stepped on.
8. Take a South Penghu island-hopping route
Some travellers combine Wangyou Island with other South Penghu attractions, depending on boat schedules, weather and tour routes.
9. Photograph basalt and sea landscapes
Penghu is known for basalt geology, wind-shaped coasts and sea cliffs. Even if snorkelling is the main activity, the above-water scenery is also worth enjoying.
10. Enjoy fresh seafood after the trip
Back in Magong or around Penghu’s fishing villages, finish the day with seafood, cactus ice, brown sugar cake or other local Penghu flavours.
Tour Types: Day Trip, Water Activities or Camping
Tour Type
Best For
Traveller Notes
One-day snorkelling tour
First-time visitors and casual travellers
Usually the easiest way to experience Wangyou Island-style reef scenery.
Water-activity package
Families, groups and friends
May include SUP, floating mats, kayaking or other activities.
Overnight island camping
Adventurous travellers
More rustic and weather-dependent; check safety and comfort details carefully.
Private charter
Groups and flexible travellers
More expensive but may allow a quieter experience and customised pace.
South Penghu marine tour
Nature lovers and island-hopping travellers
May focus on South Penghu Marine National Park scenery, reefs and islands.
The best choice depends on your comfort level. If you are new to Penghu or not highly adventurous, start with a guided day tour. If you love outdoor camping and simple conditions, an overnight Wangyou Island trip may be more memorable.
Nearby Penghu Places to Visit
Magong
Magong is the main city and transport base in Penghu. It has hotels, restaurants, ferry links, historic temples, old streets and tour pickup points.
Nanhai Visitor Center
The Nanhai Visitor Center is a key departure point for many southern Penghu island trips. Check your tour details because different operators may use different harbours or meeting points.
South Penghu Marine National Park
South Penghu Marine National Park includes islands, islets, rocks and surrounding waters between Wang’an and Qimei. It is known for marine ecology, basalt landscapes and coral reef scenery.
Wang’an Island
Wang’an Island is one of the southern Penghu islands and is known for green turtle conservation, quiet villages, beaches and a slower island atmosphere.
Qimei Island
Qimei Island is famous for the Double-Heart of Stacked Stones, coastal views and southern Penghu scenery. It is often included in island-hopping routes.
Dongyuping and Xiyuping
Dongyuping and Xiyuping are part of the South Penghu marine area and are associated with basalt, coral and remote island scenery.
Dongji Island
Dongji Island is one of the South Penghu islands, known for remote scenery, lighthouse views and marine landscapes.
Jibei Island
Jibei Island is in northern Penghu and is known for sand spits, water activities and beach scenery. It is a different direction from South Penghu but popular with visitors.
Penghu Great Bridge
The Penghu Great Bridge connects key western islands and is a classic sightseeing stop for travellers exploring Penghu by scooter, car or tour.
Best Time to Visit Penghu Wangyou Island
The best time for Wangyou Island-style snorkelling and boat tours is usually during warmer, calmer months when sea conditions are suitable. Penghu is windy, and boat trips depend heavily on weather, waves and seasonal schedules.
Season
What to Expect
Advice
April to June
Warmer weather, improving sea conditions and fewer peak summer crowds
Good period for snorkelling and island trips if tours are operating.
July to August
Hot, bright and popular for water activities
Best for summer energy, but book ahead and prepare for heat.
September to October
Still warm, but weather can be more changeable
Good if conditions are calm; monitor typhoon risk.
November to March
Windier, cooler and less suitable for water activities
Many sea tours may be limited or unavailable.
Typhoon periods
Possible cancellations, rough seas and ferry disruption
Keep plans flexible and follow operator guidance.
Always confirm whether your tour is operating close to your travel date. Penghu boat trips can be cancelled or changed for safety reasons, even if the weather looks fine on land.
Suggested Penghu Wangyou Island Itinerary Ideas
Option 1: Simple Wangyou Island Day Trip
Morning: Meet your tour operator in Magong or at the assigned harbour.
Boat ride: Travel to the Wangyou Island or South Penghu reef area.
Late morning: Join guided snorkelling with safety equipment.
Midday: Enjoy lunch, seafood or snacks depending on the package.
Afternoon: Try SUP, water activities or beach time if included.
Return: Head back to Magong for dinner and rest.
Option 2: Overnight Island Camping Adventure
Day 1 afternoon: Depart by boat with your camping tour group.
Day 1 evening: Settle into the island area, enjoy dinner or barbecue if included.
Night: Stargaze, relax by the beach and follow guide safety rules.
Day 2 morning: Join snorkelling, sunrise viewing or water activities depending on conditions.
Day 2 afternoon: Return to Magong.
Option 3: Penghu Marine Ecology Route
Day 1: Visit Magong old town, Tianhou Temple and local food streets.
Day 2: Take a Wangyou Island snorkelling or South Penghu marine tour.
Day 3: Visit Wang’an or Qimei for turtles, basalt, fishing-village culture and coastal scenery.
Option 4: Family-Friendly Penghu Water Trip
Before booking: Choose a tour with clear safety support, life jackets and beginner-friendly water activities.
Morning: Keep breakfast light if anyone gets seasick.
During the tour: Let children stay close to guides and use flotation gear.
Afterwards: Plan an easy dinner and early night rather than another major activity.
Option 5: Adventure and Photography Plan
Morning: Pack waterproof camera gear, dry bag and sun protection.
Daytime: Photograph blue water, reef shallows, basalt and boat scenes.
Underwater: Use reef-safe behaviour and never move marine life for photos.
Evening: Return to Magong for sunset, seafood and night-market-style snacks.
Food and What to Bring
Some Wangyou Island tours include lunch or seafood meals, while others provide only light snacks or require guests to bring their own supplies. Always check inclusions before departure because remote island-style trips may not have shops, restaurants or fresh water available.
What to bring
Swimwear
Towel
Dry bag
Waterproof phone pouch
Hat and sunglasses
Rash guard or sun shirt
Reef-safe behaviour and low-impact sunscreen use
Motion sickness medicine if needed
Reusable water bottle
Small cash
Personal medication
Light jacket for boat wind
Change of dry clothes
Penghu foods to try after the trip
Fresh seafood: fish, squid, oysters, clams and seasonal catches.
Penghu cactus ice: a bright pink local dessert made from cactus fruit.
Brown sugar cake: one of Penghu’s most popular edible souvenirs.
Seaweed snacks: common in island shops and markets.
Oyster omelette: a Taiwanese classic worth trying in Penghu.
Squid dishes: grilled, fried or served in soup depending on restaurant style.
Eco Travel and Coral Protection
Wangyou Island and South Penghu-style reef trips are beautiful because of their marine environment. That also means travellers have a responsibility to behave carefully. Coral reefs are living ecosystems and can be damaged by careless fins, touching, standing, collecting or pollution.
Responsible reef travel rules
Do not touch coral.
Do not stand on reefs.
Do not kick coral with fins.
Do not collect shells, coral, sea stars or marine life.
Do not feed fish.
Do not leave rubbish on beaches or boats.
Use a reusable bottle where possible.
Follow guide instructions in protected areas.
Choose operators that explain reef protection and safety clearly.
Take all personal rubbish back to Magong.
If your operator encourages unsafe or damaging behaviour around coral, choose another provider. A good marine tour should protect the reef, not use it as a disposable attraction.
Useful Booking Resources for Penghu Wangyou Island Tours and Taiwan Activities
Wangyou Island is best booked as a guided activity because boats, snorkelling equipment, tide planning and safety support are essential. Booking platforms are useful for comparing snorkelling trips, South Penghu island tours, camping packages, water activities, Magong transfers and wider Taiwan travel products. Skimlinks may automatically convert these merchant links into affiliate links if the merchant is active in your Skimlinks account.
GetYourGuide – offers Taiwan tours, island activities, cultural experiences, private guides and transport products depending on availability.
Viator – offers Taiwan day trips, private tours, airport transfers, island activities and customisable travel experiences where available.
Klook – offers Penghu Wangyou Island-style tours, South Penghu Marine National Park activities, snorkelling trips, Taiwan transport, attraction tickets and SIM/eSIM options.
KKday – offers Penghu island tours, Wangyou Island camping and snorkelling products, water activities, ferry-related experiences, Taiwan day trips and local travel services.
Tiqets – offers mobile-friendly attraction tickets and cultural experiences in selected destinations, useful for travellers combining Penghu with Taiwan city stopovers.
Musement – offers tours, attraction tickets, cultural activities and local experiences across selected global destinations, useful for wider Taiwan and Asia travel planning.
G Adventures – offers small-group and multi-day Asia tours that may suit travellers planning a broader regional itinerary rather than a standalone Penghu trip.
Go City – offers bundled attraction passes in selected destinations, useful for readers comparing multi-attraction sightseeing options before or after Taiwan.
CityPASS – offers bundled attraction passes mainly for selected North American cities. It is not a main Penghu booking option, but may suit readers planning wider international travel.
Booking tip: Before booking a Penghu Wangyou Island tour, check the exact departure point, boat time, snorkelling equipment, life jacket policy, guide language, minimum age, swimming ability requirements, meal inclusions, photo fees, camping conditions, toilet arrangements, weather cancellation rules, refund policy and whether the route enters protected marine areas with special rules.
Penghu Wangyou Island Travel Tips
Confirm the exact route before booking
Different operators may use Wangyou Island, Forget-Me-Not Island or South Penghu wording differently. Ask exactly where the boat goes, where you snorkel and whether you land on an island.
Check sea conditions, not just weather
A sunny day can still have rough seas. Boat tours depend on wind, tide, swell and operator safety decisions.
Take seasickness precautions
Penghu boat rides can be choppy. Take suitable motion sickness medication before departure if you are sensitive.
Wear a rash guard
A rash guard protects against sun and reduces the need for heavy sunscreen in the water.
Respect coral and marine life
Never stand on coral, touch reef animals or collect souvenirs from the sea.
Use a dry bag
Phones, wallets, passports and clothes can get wet easily on boat and beach trips.
Bring small cash
Small cash is useful for snacks, tips, taxi rides or extras not included in the tour.
Do not overpack the day
A full snorkelling or water-activity tour can be tiring. Plan a simple dinner and rest afterwards.
Book early in summer
Penghu is popular in summer, and specialised island tours can fill quickly.
Keep a backup plan
Boat trips can be cancelled. Have a Magong food day, Penghu Great Bridge route, aquarium, museum or local beach plan ready.
Is Penghu Wangyou Island Worth Visiting?
Yes, Penghu Wangyou Island is worth visiting if you want a guided blue-water adventure with snorkelling, coral reef scenery and a remote-island atmosphere. It is especially appealing for travellers who want to experience Penghu from the sea rather than only touring the main island.
It may not suit travellers who dislike boats, basic island facilities, strong sun or water-based activities. It is also not the best choice if you want a completely independent, land-based sightseeing day.
The best way to enjoy Wangyou Island is to choose a responsible operator, check the exact itinerary, prepare for sun and sea conditions, follow snorkelling safety rules and treat the reef environment with care.
FAQs About Penghu Wangyou Island
Where is Penghu Wangyou Island?
Penghu Wangyou Island, also called Forget-Me-Not Island or 忘憂島, is promoted as a guided island and reef experience in Taiwan’s Penghu archipelago. Exact locations and routes can vary by tour operator.
Is Wangyou Island a public island?
Wangyou Island is usually visited through organised tours rather than as a simple independent public beach stop. Confirm access and route details with your operator before booking.
What is Wangyou Island famous for?
Wangyou Island is known for blue-water scenery, snorkelling, coral reef viewing, water activities, remote-island atmosphere and, on some tours, camping-style experiences.
Can you snorkel at Wangyou Island?
Yes. Snorkelling is one of the main reasons travellers book Wangyou Island tours. Most snorkelling is guided and depends on weather, tide and sea conditions.
Do you need to be a strong swimmer?
You do not always need to be a strong swimmer if flotation equipment and guide support are provided, but you should be comfortable in the water. Always check the tour’s swimming requirements.
When is the best time to visit Wangyou Island?
The warmer months from around April to October are generally better for Penghu snorkelling and water activities, but tours depend on wind, tide, sea conditions and typhoon risk.
Can children join Wangyou Island tours?
Some tours may accept children, while others may have age, height or swimming restrictions. Families should check safety equipment, guide support and minimum age rules before booking.
What should I bring?
Bring swimwear, towel, dry bag, waterproof phone pouch, hat, sunglasses, rash guard, water bottle, small cash, personal medication and seasickness tablets if needed.
Is Wangyou Island good for camping?
Some operators offer overnight island camping-style packages, but conditions are usually simple and weather-dependent. Check toilet arrangements, sleeping setup, meals, safety plan and cancellation rules carefully.
Is Penghu Wangyou Island worth visiting?
Yes. Penghu Wangyou Island is worth visiting for travellers who enjoy snorkelling, coral reefs, boat trips, blue water and guided island adventure experiences in Taiwan’s Penghu archipelago.
Sponsored Popular Items
Quick take: Musement.com offers a worldwide selection of tours and attractions
Puerto Galera: Coral Reefs & Island Snorkeling Experience Philippines Discover the vibrant marine life and tropical beauty of Puerto Galera on a full-day island snorkeling tour. Explore colorful coral gardens, pristine beaches, and unique underwater caves
Cancun snorkelling tour with turtles, reefs and more – Outdoor Adventure Mexico Cancun snorkelling tour with turtles, reefs and more is for travellers who want movement, scenery and a stronger sense of adventure in their itinerary. Check current availability, inclusions and booking details before you go.
Cebu: 2-Day Wild South Odyssey – Reefs, Falls & Canyons Philippines Two days, one epic Cebu escape! Swim with whale sharks, chase waterfalls, snorkel with sardines, conquer Kawasan canyons, explore Sumilon & Pescador, and enjoy a relaxing basecamp stay
Badaguan and Qingdao Polar Ocean Park are two very different but easy-to-combine attractions in Qingdao, Shandong Province, China. Badaguan offers quiet tree-lined streets, historic villas, European-style architecture, beach views and one of Qingdao’s most photogenic walking districts. Qingdao Polar Ocean Park, also known as Qingdao Polar Ocean World or Qingdao Haichang Polar Ocean Park, is a family-focused marine attraction with aquarium exhibits, polar-themed displays, performances and indoor entertainment close to Qingdao’s eastern coastal tourism belt.
Together, they show two sides of Qingdao. Badaguan is slow, elegant and historic, ideal for walking, photography and coastal scenery. Polar Ocean Park is more structured and commercial, better for families, children and visitors wanting an indoor attraction, especially when the weather is cold, rainy or windy.
A good Qingdao sightseeing day can start with a peaceful morning walk through Badaguan, continue along the coast past beaches and seaside viewpoints, then finish with an afternoon visit to Qingdao Polar Ocean Park, Xiaomaidao Park, Shilaoren Beach or the Olympic Sailing Center.
Quick take: Musement.com offers a worldwide selection of tours and attractions
Polar Whale Safari from Tromso by Boat Norway Discover many species of the whales, the great creatures of the sea, explore the beautiful nature around Tromsø and have a unique boat experience in the Arctic. Check current availability, inclusions and booking details before you go.
Why Visit Badaguan and Qingdao Polar Ocean Park?
Badaguan is worth visiting because it is one of Qingdao’s most attractive historic neighbourhoods. The area is famous for old villas, shaded streets, seasonal leaves, coastal paths and a calm atmosphere that feels very different from the busier shopping and business districts.
Qingdao Polar Ocean Park is worth considering if you are travelling with children, want an indoor attraction, or are interested in aquariums and marine-themed shows. It is especially useful on days when beach weather is poor, because much of the experience is indoors or semi-indoors.
This combined Qingdao route is best for:
First-time visitors to Qingdao
Families travelling with children
Couples wanting scenic streets and coastal photos
Travellers interested in Qingdao’s historic villa districts
Visitors wanting a mix of outdoor walking and indoor attractions
Photography lovers visiting Badaguan in spring, autumn or golden-hour light
People staying near May Fourth Square, Olympic Sailing Center, Shilaoren or Laoshan District
Where Are Badaguan and Qingdao Polar Ocean Park?
Badaguan is in Qingdao’s historic coastal area, near Taiping Bay and the old bathing beaches. It is close to No. 2 Bathing Beach, No. 3 Bathing Beach, Huashi Lou and Zhongshan Park.
Qingdao Polar Ocean Park is farther east, in Laoshan District, at No. 60 Donghai East Road. It sits in Qingdao’s eastern coastal tourism belt, near Xiaomaidao Park, Shilaoren Beach, Sculpture Park and other modern seaside attractions.
Place
Location
Best For
Badaguan Scenic Area
Historic coastal district near Taiping Bay, Qingdao
Walking, villas, photography, beaches, old Qingdao atmosphere
Huashi Lou
Within the Badaguan coastal area
Historic architecture, sea views and classic Qingdao photos
No. 2 Bathing Beach
Beside Badaguan
Beach scenery and coastal walks
No. 3 Bathing Beach
East of Badaguan
Skyline views and seaside photography
Qingdao Polar Ocean Park
No. 60 Donghai East Road, Laoshan District
Aquarium exhibits, polar animals, shows and family activities
Xiaomaidao Park
Near Polar Ocean Park
Coastal grasslands, sea views and sunset walks
Shilaoren Beach
East of Polar Ocean Park
Wide beach, modern coastal Qingdao and scenic walks
Badaguan Scenic Area: Qingdao’s Historic Villa District
Badaguan, meaning “Eight Passes”, is one of Qingdao’s most distinctive historic districts. The name comes from roads named after famous ancient Chinese passes. Although the area now has more than eight roads, the traditional name remains.
The charm of Badaguan lies in its combination of architecture, trees and coastline. The streets are lined with different species of trees, giving each road a slightly different seasonal feel. In spring, blossoms and fresh leaves soften the villas. In autumn, golden ginkgo and coloured foliage make the area especially popular with photographers.
What makes Badaguan special?
Historic villas with European-style influences
Tree-lined roads named after ancient Chinese passes
Quiet walking streets close to the sea
Easy access to No. 2 and No. 3 Bathing Beaches
Seasonal photography, especially in spring and autumn
Popular setting for wedding photography
Strong sense of Qingdao’s older coastal character
Key places to see in Badaguan
Huashi Lou
Huashi Lou, often translated as Flower Stone Building, is one of Badaguan’s best-known villas. Its castle-like form, stone exterior and seaside position make it one of the area’s most photographed buildings.
Princess Building
The Princess Building is another well-known villa in the area, often associated with a fairy-tale style and popular photo stops.
No. 2 Bathing Beach
No. 2 Bathing Beach sits close to Badaguan and gives the district its coastal holiday mood. It is good for sea views, beach photos and short walks.
No. 3 Bathing Beach
No. 3 Bathing Beach is useful if you want a view of Qingdao’s modern skyline meeting the sea. It is also a good continuation point after walking through Badaguan.
Tree-lined roads
Badaguan’s streets are the main attraction. Walk slowly rather than rushing between buildings. The area is best enjoyed as a quiet wander through architecture, gardens, walls, gates and seasonal leaves.
Qingdao Polar Ocean Park: Aquarium, Shows and Family Attractions
Qingdao Polar Ocean Park, also called Qingdao Polar Ocean World or Qingdao Haichang Polar Ocean Park, is a large marine-themed attraction in Laoshan District. It features aquarium exhibits, polar animal displays, themed pavilions, performances, photo areas and family-oriented entertainment.
The attraction is especially popular with families and children. Visitors commonly go to see penguins, beluga whales, dolphins, jellyfish displays, underwater viewing areas, sea lion or walrus-style shows and marine-themed performances. Show schedules can vary, so it is worth checking times before entering and planning your route around the main performances.
What you may find at Qingdao Polar Ocean Park
Polar Oceanarium-style exhibits
Penguin and polar-themed animal areas
Beluga whale and dolphin displays
Jellyfish and deep-sea-style viewing areas
Underwater tunnels and large aquarium windows
Sea lion, walrus or marine animal performances depending on current schedule
Indoor family-friendly attractions
Restaurants, restrooms and visitor facilities
Photo zones and themed pavilions
Animal welfare note
Qingdao Polar Ocean Park includes captive marine mammals and animal performances. Some travellers enjoy this style of attraction, while others prefer to avoid marine animal shows for welfare reasons. If this matters to you, check current exhibits, reviews and your own travel values before booking. Families who prefer non-animal activities may choose Badaguan, beaches, Xiaomaidao Park, Qingdao museums or coastal walks instead.
Tips for visiting Polar Ocean Park
Check current opening hours before travelling.
Check show times as soon as you arrive.
Visit earlier in the day on weekends and holidays.
Bring a light jacket because indoor aquarium areas can feel cool.
Allow several hours if travelling with children.
Book tickets ahead during peak travel periods.
Keep expectations realistic: it is a family theme-park attraction, not a wild marine reserve.
How to Combine Badaguan and Polar Ocean Park in One Day
Badaguan and Qingdao Polar Ocean Park are not beside each other, but they combine well because both sit along Qingdao’s coastal sightseeing belt. The easiest plan is to visit Badaguan in the morning, then travel east by taxi, metro-plus-taxi or ride-hailing service to Polar Ocean Park in the afternoon.
Recommended order
Morning: Walk Badaguan before the streets become busy.
Late morning: Visit Huashi Lou and No. 2 Bathing Beach.
Lunch: Eat near Badaguan, May Fourth Square, Olympic Sailing Center or along the coastal route.
Afternoon: Visit Qingdao Polar Ocean Park.
Late afternoon: Walk to nearby Xiaomaidao Park or continue toward Shilaoren Beach if you still have energy.
Evening: Return to May Fourth Square, Olympic Sailing Center or your hotel area for dinner.
Who should combine both?
Families wanting history in the morning and children’s entertainment in the afternoon
Visitors with only one full sightseeing day in Qingdao
Travellers staying near Qingdao’s coastal areas
People who want both old Qingdao and modern family attractions
Who should split them across two days?
Travellers who prefer slow walking and photography
Families with young children who tire easily
Visitors planning to see all shows at Polar Ocean Park
Anyone adding May Fourth Square, Olympic Sailing Center and Shilaoren Beach to the same route
Best Things to Do Around Badaguan and Qingdao Polar Ocean Park
1. Walk Badaguan’s tree-lined streets
The best way to enjoy Badaguan is on foot. Wander slowly, look at the villas, notice the different trees, and leave time for side streets and photo stops.
2. Visit Huashi Lou
Huashi Lou is one of the most recognisable buildings in Badaguan and a key stop for architecture lovers and photographers.
3. Take photos at No. 2 Bathing Beach
No. 2 Bathing Beach adds sea views to a Badaguan walk and gives the district its relaxed coastal feeling.
4. Continue to No. 3 Bathing Beach
No. 3 Bathing Beach is useful for skyline and seaside photos, especially if you want a mix of historic and modern Qingdao views.
5. Visit Qingdao Polar Ocean Park
Polar Ocean Park is best for families, aquarium fans and visitors needing an indoor attraction. Check show schedules before planning your route inside.
6. See jellyfish and aquarium tunnels
The aquarium-style displays are among the more photogenic parts of Polar Ocean Park, especially for children and visitors who enjoy underwater viewing areas.
7. Walk Xiaomaidao Park
Xiaomaidao Park is close to Polar Ocean Park and is a good add-on for sea views, coastal grasslands and sunset walks.
8. Visit Shilaoren Beach
Shilaoren Beach is one of Qingdao’s better-known eastern beaches and pairs well with Polar Ocean Park if you are already in Laoshan District.
9. Add May Fourth Square
May Fourth Square is a key modern Qingdao landmark and works well as a dinner or evening-light stop after a coastal sightseeing day.
10. End near the Olympic Sailing Center
The Olympic Sailing Center area is good for waterfront walks, lights, restaurants and night views after visiting attractions along the coast.
Nearby Places to Visit
Zhongshan Park
Zhongshan Park is close to Badaguan and is especially popular in spring. It can be combined with a Badaguan walk if you enjoy gardens and seasonal flowers.
Qingdao No. 1 Bathing Beach
No. 1 Bathing Beach is west of Badaguan and close to Huiquan Bay. It is one of Qingdao’s classic public beaches.
May Fourth Square
May Fourth Square is a modern city landmark with open space, sea views and the red “May Wind” sculpture.
Olympic Sailing Center
The Olympic Sailing Center is a waterfront zone with marina views, night lights, restaurants and coastal walking routes.
Xiaomaidao Park
Xiaomaidao Park is a scenic coastal park near Polar Ocean Park, popular for photos, lawns, sea views and sunset.
Shilaoren Beach
Shilaoren Beach is a wide eastern beach near Laoshan District, useful for a relaxed seaside add-on after Polar Ocean Park.
Tsingtao Beer Museum
The Tsingtao Beer Museum is one of Qingdao’s most famous indoor attractions and a good option for adults interested in the city’s brewing history.
Zhanqiao Pier
Zhanqiao Pier is one of Qingdao’s classic symbols and works better as part of an old-town Qingdao itinerary rather than the eastern Polar Ocean Park route.
Laoshan Scenic Area
Laoshan is Qingdao’s famous mountain-and-sea scenic area. It deserves a separate day if you want hiking, temples, coastal roads and mountain views.
Best Time to Visit Badaguan and Polar Ocean Park
Badaguan is most beautiful in spring and autumn, when the trees, flowers and leaves add colour to the streets. Summer brings beach energy but also more crowds. Winter can be quiet and atmospheric, though cold coastal winds are common.
Qingdao Polar Ocean Park can be visited year-round because much of the experience is indoors. It is especially useful in winter, rainy weather or on family trips when children need a structured activity.
Season
Badaguan Experience
Polar Ocean Park Experience
Spring
Fresh leaves, blossoms and good walking weather
Good family activity, especially on cooler or rainy days
Summer
Beach atmosphere, greenery and more crowds
Popular with families; book ahead during holidays
Autumn
Best for golden leaves, photography and mild walks
Comfortable indoor-outdoor attraction
Winter
Quiet streets but cold sea wind
Useful indoor attraction; bring warm layers for outdoor areas
Suggested Itinerary Ideas
Option 1: Badaguan Half-Day Walking Route
Morning: Start at Zhongshan Park or a nearby metro/taxi drop-off.
Walk: Explore Badaguan’s tree-lined roads and villas.
Architecture stop: Visit Huashi Lou or photograph the exterior if short on time.
Beach stop: Walk down to No. 2 Bathing Beach.
Finish: Continue toward No. 3 Bathing Beach or return for lunch.
Option 2: Polar Ocean Park Family Afternoon
Before arrival: Check ticket types and show schedules.
Early afternoon: Enter the park and start with main aquarium areas.
Mid-afternoon: Watch selected shows if they match your travel values.
Late afternoon: Visit jellyfish, tunnel or polar-themed pavilions.
Afterwards: Walk to Xiaomaidao Park or return to your hotel for rest.
Option 3: Badaguan and Polar Ocean Park One-Day Route
Morning: Walk Badaguan and visit Huashi Lou.
Late morning: Stop at No. 2 Bathing Beach for sea views.
Lunch: Eat near May Fourth Square, Olympic Sailing Center or along the coast.
Afternoon: Visit Qingdao Polar Ocean Park.
Evening: Continue to Xiaomaidao Park or Olympic Sailing Center for sunset and dinner.
Option 4: Qingdao Coastal Photography Day
Early morning: Photograph Badaguan before crowds arrive.
Mid-morning: Visit Huashi Lou and No. 2 Bathing Beach.
Afternoon: Photograph modern coastal Qingdao around May Fourth Square or Xiaomaidao Park.
Evening: Capture skyline lights near No. 3 Bathing Beach or Olympic Sailing Center.
Option 5: Two-Day Qingdao Family Plan
Day 1: Badaguan, No. 2 Bathing Beach, May Fourth Square and Olympic Sailing Center.
Day 2: Qingdao Polar Ocean Park, Xiaomaidao Park and Shilaoren Beach.
Where to Stay for Badaguan and Qingdao Polar Ocean Park
Area
Best For
Traveller Notes
Badaguan / Huiquan Bay area
Historic atmosphere, beach walks and quiet streets
Good for travellers who prefer old Qingdao scenery.
May Fourth Square
First-time visitors, transport, restaurants and city views
One of the most practical bases for coastal sightseeing.
Olympic Sailing Center area
Waterfront dining, night views and modern Qingdao
Good for couples and visitors wanting evening walks.
Laoshan / Shilaoren area
Polar Ocean Park, Shilaoren Beach and eastern coast
Useful for families and visitors focusing on eastern Qingdao.
Old Town / Qingdao Station area
Zhanqiao Pier, churches, old streets and rail access
Better for historic Qingdao, but farther from Polar Ocean Park.
Useful Booking Resources for Badaguan, Qingdao Polar Ocean Park and Qingdao Activities
Badaguan is usually best explored independently on foot, while Qingdao Polar Ocean Park may require tickets and schedule planning. Booking platforms can also help with Qingdao private guides, family attractions, Laoshan tours, airport transfers, coastal sightseeing and China travel products. Skimlinks may automatically convert these merchant links into affiliate links if the merchant is active in your Skimlinks account.
GetYourGuide – offers China tours, Qingdao sightseeing where available, private guides, transfers, cultural experiences and coastal city activities.
Viator – offers Qingdao private tours, Laoshan excursions, city sightseeing, transfers and customisable China itineraries.
Klook – offers China attraction tickets, transport products, SIM/eSIM options, airport transfers and selected Qingdao or Shandong activities depending on availability.
KKday – offers local tours, attraction tickets, transport services and China travel products useful for comparing Qingdao activities and transfers.
Tiqets – offers mobile-friendly attraction tickets and cultural experiences in selected destinations, useful for travellers combining Qingdao with larger city stopovers.
Musement – offers tours, attraction tickets, cultural activities and local experiences across selected global destinations, useful for wider China and Asia travel planning.
G Adventures – offers small-group and multi-day China tours that may suit travellers planning a broader itinerary rather than a standalone Qingdao visit.
Go City – offers bundled attraction passes in selected destinations, useful for readers comparing multi-attraction sightseeing options before or after China.
CityPASS – offers bundled attraction passes mainly for selected North American cities. It is not a main Qingdao booking option, but may suit readers planning wider international travel.
Booking tip: Before booking Qingdao Polar Ocean Park tickets, check opening hours, show schedules, ticket inclusions, child pricing, whether all pavilions are included, refund rules, peak-day crowd levels and transport from your hotel. For Badaguan, check whether any villa interiors require separate tickets or have limited access.
Travel Tips for Badaguan and Qingdao Polar Ocean Park
Visit Badaguan early
Badaguan is best in the morning when the streets are quieter and the light is softer. It is especially beautiful before tour groups and wedding photo shoots become more active.
Wear comfortable shoes
Badaguan is a walking district, and the best parts are enjoyed slowly. Comfortable shoes are also useful if you continue to beaches or coastal parks.
Check Polar Ocean Park show times
Show schedules can affect the whole visit. Check times before entering or immediately after arrival so you do not miss the main performances you want to see.
Plan transport between the two areas
Badaguan and Polar Ocean Park are both coastal, but they are not next door. A taxi or ride-hailing service is usually the simplest way to move between them.
Bring layers
Qingdao’s sea breeze can feel cool, and indoor aquarium areas may also be cooler than expected.
Respect residential areas
Some parts of Badaguan still feel residential or semi-private. Do not enter gates, gardens or buildings unless they are clearly open to visitors.
Be realistic with young children
A full Badaguan walk plus Polar Ocean Park can be tiring. With younger children, split the attractions across two days or use taxis between stops.
Use translation apps
English may be limited at ticket counters, local restaurants and taxis. A translation app can make the day easier.
Consider animal ethics
If captive marine mammal shows are not your preference, you can still enjoy Badaguan, beaches, Xiaomaidao Park, Qingdao museums and other coastal walks instead.
Check public holiday crowds
Chinese public holidays and school breaks can make Polar Ocean Park and popular photo areas much busier. Book ahead and start early.
Are Badaguan and Qingdao Polar Ocean Park Worth Visiting?
Yes, Badaguan is definitely worth visiting if you enjoy historic streets, European-style villas, coastal walks and photography. It is one of Qingdao’s most atmospheric areas and gives a strong sense of the city’s older seaside identity.
Qingdao Polar Ocean Park is worth visiting mainly for families, children and travellers who enjoy aquarium-style attractions. It may not suit visitors who avoid captive marine animal shows, but it can be a convenient indoor activity and a practical family stop in eastern Qingdao.
The best way to enjoy both is to treat Badaguan as a slow scenic walk and Polar Ocean Park as a structured family attraction. Combine them if you have limited time, or split them across two days if you want a more relaxed Qingdao coastal itinerary.
FAQs About Badaguan and Qingdao Polar Ocean Park
Where is Badaguan?
Badaguan is a historic coastal district in Qingdao, Shandong Province, near Taiping Bay, No. 2 Bathing Beach and No. 3 Bathing Beach.
What is Badaguan famous for?
Badaguan is famous for tree-lined roads, European-style villas, historic architecture, seasonal leaves, coastal scenery and wedding photography.
Is Badaguan free to visit?
The streets of Badaguan can usually be explored on foot without a general entry ticket, but some individual villas or buildings may require separate tickets if open to visitors.
How long do you need at Badaguan?
Allow 1.5 to 3 hours for a relaxed walk through Badaguan, including Huashi Lou and nearby beach stops. Photographers may want longer.
Where is Qingdao Polar Ocean Park?
Qingdao Polar Ocean Park is at No. 60 Donghai East Road in Laoshan District, Qingdao, along the eastern coastal tourism belt.
What can you see at Qingdao Polar Ocean Park?
Visitors may see aquarium exhibits, polar animal displays, jellyfish areas, underwater viewing zones, marine-themed shows and family attractions, depending on current operations and ticket type.
Is Qingdao Polar Ocean Park good for children?
Yes, it is mainly a family-friendly attraction and is especially popular with children who enjoy aquariums, animals and indoor entertainment.
Can you visit Badaguan and Polar Ocean Park in one day?
Yes. A practical plan is to visit Badaguan in the morning, then take a taxi or ride-hailing service east to Qingdao Polar Ocean Park in the afternoon.
What is nearby Qingdao Polar Ocean Park?
Nearby attractions include Xiaomaidao Park, Shilaoren Beach, Sculpture Park, the eastern coastal promenade and parts of Laoshan District.
Are Badaguan and Qingdao Polar Ocean Park worth visiting?
Yes. Badaguan is excellent for historic Qingdao scenery and walking, while Qingdao Polar Ocean Park is a useful family attraction and indoor activity, especially for travellers with children.
Sponsored Popular Items
Quick take: Musement.com offers a worldwide selection of tours and attractions
Polar Whale Safari from Tromso by Boat Norway Discover many species of the whales, the great creatures of the sea, explore the beautiful nature around Tromsø and have a unique boat experience in the Arctic. Check current availability, inclusions and booking details before you go.
Polar Fjord with Fishing All Inclusive Cruise from Tromsø Polar fjord with fishing all inclusive cruise from Tromsø combines sightseeing with the relaxed sense of movement that comes from a boat-based experience. Check current availability, inclusions and booking details before you go.
Praia da Luz Nature, Coastal Walks & Beaches Guide Portugal Nature in Praia da Luz, Portugal Praia da Luz, in the Algarve, offers a relaxed seaside vibe with plenty of natural beauty, from dramatic cliffs to peaceful walking trails. Check current availability, inclusions and booking details before you go.
Hainan Island is China’s tropical island province, known for warm weather, palm-lined beaches, rainforest mountains, seafood, hot springs, surf bays, resort towns, Li and Miao ethnic culture, duty-free shopping and coastal road trips. Sitting in the South China Sea, Hainan offers a very different travel experience from Beijing, Shanghai or inland China. It feels more relaxed, tropical and beach-focused, with Sanya, Haikou, Lingshui, Wanning and Wuzhishan all offering different sides of the island.
For many travellers, Hainan means Sanya: beach resorts, Yalong Bay, Haitang Bay, Dadonghai, Tianya Haijiao and Wuzhizhou Island. But the island has much more than Sanya. Haikou has historic arcade streets and a local city feel. Wanning is known for surf culture, Riyue Bay and Shimei Bay. Lingshui has quieter resort coastlines such as Xiangshui Bay and Clearwater Bay. Inland Hainan brings rainforest scenery, hot springs, waterfalls, mountain roads and Li ethnic villages.
Hainan is best enjoyed slowly. A good trip combines beach time, island food, coastal scenery, rainforest exploration and at least one quieter area outside Sanya. It can work as a family resort holiday, romantic escape, surf trip, winter-sun break, cultural route or tropical road trip.
Quick take: Musement.com offers a worldwide selection of tours and attractions
Brisbane: Rainforests, Waterfalls and Glow Worm Cave Tour Australia Explore the World Heritage-listed Gondwana rainforests near Brisbane. See stunning waterfalls, a natural bridge, and tour the glow worm caves at Cedar Creek on this unforgettable… Check current availability, inclusions and booking conditions.
Why Visit Hainan Island?
Hainan Island is worth visiting because it offers a tropical version of China that many travellers do not expect. Instead of ancient capitals, mega-city skylines or mountain temples, Hainan gives you sea air, coconut palms, beach resorts, rainforest roads, seafood markets, surf beaches, hot springs and island-style local food.
The island is especially attractive for travellers who want warm weather and a softer pace. It is popular with Chinese winter travellers escaping colder northern cities, but it is also increasingly useful for international visitors looking for a China beach holiday, resort stay or tropical add-on to a wider Asia itinerary.
Hainan Island is best for:
Beach holidays and tropical resort stays
Families wanting pools, beach walks and island attractions
Couples looking for a relaxed warm-weather escape
Surfers and beach travellers heading to Wanning and Riyue Bay
Food lovers interested in Hainan chicken rice, seafood and coconut dishes
Nature travellers exploring rainforest, hot springs and inland mountains
Visitors wanting a quieter alternative to major mainland China cities
Travellers combining Sanya, Lingshui, Wanning and Haikou by high-speed rail or road
Where Is Hainan Island?
Hainan Island lies off the southern coast of China, separated from Guangdong by the Qiongzhou Strait. It is China’s southernmost island province and is surrounded by the South China Sea. The provincial capital is Haikou in the north, while Sanya in the south is the best-known resort city.
Location Detail
Traveller Notes
Destination
Hainan Island, China
Province capital
Haikou
Main resort city
Sanya
Popular coastal areas
Sanya, Lingshui, Wanning, Qionghai and Haikou
Inland highlights
Wuzhishan, Baoting, rainforest areas, hot springs and Li ethnic culture
Main airports
Haikou Meilan International Airport and Sanya Phoenix International Airport
Best visit style
Beach resort stay, island road trip, rainforest route, surf holiday or tropical China itinerary
Hainan has a useful high-speed rail loop around the island, making it possible to travel between Haikou, Wenchang, Qionghai, Wanning, Lingshui, Sanya and other coastal stops without relying only on long road transfers.
Best Areas to Visit on Hainan Island
Area
Best For
Traveller Notes
Sanya
Beach resorts, nightlife, shopping, major attractions
Best first stop for classic Hainan resort holidays.
Best for travellers wanting nature beyond the beaches.
Baoting
Hot springs, rainforest resorts and Li/Miao culture
Good for spa-style inland escapes.
Wenchang
Space-launch culture, coconut groves and quieter coastline
Good for travellers exploring beyond the main resort trail.
Sanya: Hainan’s Main Beach Resort City
Sanya is Hainan’s most famous holiday destination and the easiest place to start if you want beach resorts, tour options, international-style hotels, duty-free shopping and classic tropical views. It has several different beach zones, each with its own mood.
Best Sanya beach areas
Yalong Bay: polished resort zone with clear water, luxury hotels and family-friendly beach stays.
Haitang Bay: large resort developments, duty-free shopping and high-end hotels, but swimming conditions can be more restricted in places.
Dadonghai: convenient beach near the city, with restaurants, nightlife and a busier atmosphere.
Sanya Bay: long beach close to the airport and city, good for sunset walks and value accommodation.
Wuzhizhou Island: popular island excursion with clear water and marine activities.
West Island: island day trip with fishing-village character and sea views.
Best things to do in Sanya
Relax at Yalong Bay or Haitang Bay.
Visit Wuzhizhou Island or West Island.
Explore Nanshan Cultural Tourism Zone.
Walk around Luhuitou scenic area for views.
Shop at duty-free malls in Haitang Bay.
Eat seafood in local markets or restaurants.
Take a coastal drive between beach areas.
Haikou: Old Streets, Food and Local City Life
Haikou is Hainan’s capital and northern gateway. It is less beach-resort focused than Sanya and better for travellers who want local food, historic streets, markets, museums, parks and a more everyday city feel.
The most famous Haikou attraction is Qilou Old Street, known for its arcade-style buildings influenced by overseas Chinese and Southeast Asian trade connections. It is a good place for walking, photography, cafés, snacks and understanding Hainan’s older urban character.
Best things to do in Haikou
Walk through Qilou Old Street.
Try local snacks and Hainanese dishes.
Visit Haikou’s volcanic geological areas if time allows.
Explore local markets and night food streets.
Use Haikou as a rail or airport gateway.
Visit museums and cultural sites for a deeper island context.
Haikou is a good place to begin or end a Hainan trip, especially if flights are cheaper or more convenient than Sanya.
Wanning: Surfing, Coffee and East Coast Scenery
Wanning sits on Hainan’s east coast and has become one of the island’s most interesting areas for surfers, younger travellers, coastal cafés and scenic beach stays. It feels less polished than Sanya but often more relaxed and outdoors-focused.
Best areas in Wanning
Riyue Bay: one of Hainan’s best-known surf areas, with surf schools, beach cafés and a lively scene.
Shimei Bay: scenic resort coast with beach views and a quieter atmosphere.
Shenzhou Peninsula: resort-style coastline with beaches, hotels and sea views.
Xinglong: known for coffee culture, tropical gardens and overseas Chinese heritage.
Why visit Wanning?
Surfing and beach culture
More relaxed east-coast atmosphere
Scenic bays and resort stays
Xinglong coffee and tropical gardens
Good stop between Haikou and Sanya
Lingshui: Quieter Resorts, Islands and Family Escapes
Lingshui is one of Hainan’s best areas for travellers who want beach-resort relaxation without staying in the busiest parts of Sanya. It has a quieter coastal mood, family-friendly resorts, island excursions and beach areas such as Xiangshui Bay, Clearwater Bay and Tufu Bay.
Best places in Lingshui
Xiangshui Bay / Perfume Bay: quiet beach-resort coastline with sea-view hotels.
Clearwater Bay: large resort coast with beach stays and family facilities.
Boundary Island: popular island day trip with clear water and marine activities.
Nanwan Monkey Island: wildlife attraction known for macaques and cable car views.
Tufu Bay: quieter beach-resort area with upscale hotels.
Lingshui works very well as a slower add-on after Sanya or as a base for families who prefer resort pools, easy coastal scenery and fewer crowds.
Rainforests, Mountains and Inland Hainan
Hainan is not only a beach island. The inland mountains protect tropical rainforest, waterfalls, river valleys, hot springs and ethnic minority cultural areas. This is where the island feels greener, quieter and more adventurous.
Best inland and rainforest areas
Wuzhishan: mountain and rainforest region associated with Hainan’s highest peaks and inland scenery.
Baoting: hot springs, rainforest resorts and cultural attractions.
Yanoda Rainforest Cultural Tourism Zone: popular rainforest attraction near Sanya and Baoting.
Hainan Tropical Rainforest National Park areas: important conservation landscapes and biodiversity zones.
Binglanggu: cultural attraction focused on Li and Miao ethnic heritage.
Why add inland Hainan?
It balances beach time with nature and culture.
The climate can feel cooler in the hills.
Rainforest walks and waterfalls add variety.
Hot spring resorts are good for relaxation.
It gives a better sense of Hainan beyond resort beaches.
Best Things to Do on Hainan Island
1. Relax on Sanya’s beaches
Yalong Bay, Sanya Bay, Dadonghai and Haitang Bay are the classic beach areas for first-time Hainan visitors.
2. Visit Wuzhizhou Island or West Island
These island trips are popular from Sanya for sea views, water activities and a more offshore beach experience.
3. Explore Haikou’s Qilou Old Street
Haikou’s historic arcade streets are one of the best places to see Hainan’s older urban character and local food culture.
4. Surf or watch surfers at Riyue Bay
Riyue Bay in Wanning is one of Hainan’s best-known surf areas and a good place for a more active beach scene.
5. Stay in a quiet Lingshui resort
Lingshui is ideal for slower beach holidays, especially around Xiangshui Bay, Clearwater Bay and Tufu Bay.
6. Visit Boundary Island
Boundary Island is one of Lingshui’s most popular island excursions, often chosen for clear water and marine-style activities.
7. See Nanwan Monkey Island
This Lingshui attraction combines wildlife, scenery and a cable car approach over water and fishing areas.
8. Explore rainforest and hot springs
Add Baoting, Wuzhishan or rainforest attractions to experience Hainan beyond the coast.
9. Try Hainan local food
Food is a major reason to travel around the island. Try chicken rice, sour noodles, coconut chicken hotpot and fresh seafood.
10. Take a high-speed rail or road loop
Hainan’s rail and road network makes it possible to combine Haikou, Wanning, Lingshui and Sanya in one island route.
Best Beaches and Coastal Areas on Hainan Island
Beach / Coast
Best For
Traveller Notes
Yalong Bay
Luxury resorts, family stays and classic beach holidays
One of Sanya’s most famous resort beaches.
Haitang Bay
Large resorts and duty-free shopping
Beautiful coast, but swimming may be restricted in some areas.
Dadonghai
Convenience, restaurants and city beach access
Busier and more central than Yalong Bay.
Sanya Bay
Sunsets, airport access and long beach walks
Good for value stays and convenient transport.
Riyue Bay
Surfing and younger beach culture
Best known surf area in Wanning.
Shimei Bay
Scenery and resort relaxation
Good Wanning alternative to Sanya.
Xiangshui Bay
Quiet resort stays and beach walks
Relaxed Lingshui beach area.
Clearwater Bay
Family resorts and coastal stays
Popular Lingshui resort district.
Boao Coast
River-meets-sea scenery and quiet travel
Useful east-coast stop near Qionghai.
Hainan Food and Local Flavours
Hainan’s food is one of the best parts of visiting the island. The cuisine is tropical, seafood-heavy and influenced by island produce, coconut, chicken, rice, noodles and local herbs.
Foods to try on Hainan Island
Hainanese chicken rice: Hainan’s most famous food export, made with poached chicken, fragrant rice and dipping sauces.
Wenchang chicken: a prized Hainan chicken dish, often served simply to highlight texture and flavour.
Lingshui sour noodles: a local noodle dish with a tangy, refreshing style.
Coconut chicken hotpot: chicken cooked in coconut water, popular across the island.
Fresh seafood: fish, crab, prawns, shellfish and squid are widely available in coastal towns.
Jiaji duck: one of Hainan’s traditional “four famous dishes”.
Hele crab: another well-known Hainan specialty.
Dongshan lamb: traditional Hainan lamb dish associated with Wanning.
Qingbuliang: refreshing dessert with coconut milk, beans, fruit, jelly and other toppings.
Xinglong coffee: local coffee culture linked with Wanning’s Xinglong area.
For the best food experience, do not rely only on hotel restaurants. Try local markets, noodle shops, seafood restaurants and coffee stops where transport and language are manageable.
Best Time to Visit Hainan Island
Hainan can be visited year-round, but the most comfortable period for many travellers is during the cooler, drier months from late autumn to early spring. Summer can be hot, humid and rainier, with a greater risk of tropical storms.
Season
What to Expect
Advice
November to March
Milder weather, popular winter-sun season and lower humidity
Best all-round period for beach resorts and sightseeing.
April to May
Warmer temperatures and rising humidity
Good for beach stays if you handle heat well.
June to September
Hot, humid and wetter, with possible storm disruption
Keep plans flexible and monitor weather.
October
Transition period with improving conditions
Can be good, but public holiday travel can be busy.
Chinese New Year and public holidays
High demand, higher prices and busier attractions
Book early or avoid peak dates if you want quiet.
Suggested Hainan Island Itinerary Ideas
Option 1: Classic 4-Day Sanya Beach Break
Day 1: Arrive in Sanya, check into Yalong Bay, Haitang Bay or Dadonghai.
Day 2: Relax at the beach and visit Luhuitou or a coastal viewpoint.
Day 3: Take a day trip to Wuzhizhou Island or West Island.
Day 4: Shop, eat seafood and enjoy a final beach walk before departure.
Option 2: 7-Day Hainan Island Coastal Route
Day 1: Arrive in Haikou and explore Qilou Old Street.
Day 2: Travel to Wanning and visit Xinglong or Shimei Bay.
Day 3: Spend the day around Riyue Bay and Wanning’s coast.
Day 4: Continue to Lingshui for Xiangshui Bay or Clearwater Bay.
Day 5: Visit Boundary Island or Nanwan Monkey Island.
Day 6: Travel to Sanya and enjoy Yalong Bay or Haitang Bay.
Day 7: Visit a Sanya attraction and depart.
Option 3: Family-Friendly Hainan Resort Stay
Base: Choose Yalong Bay, Haitang Bay, Clearwater Bay or Xiangshui Bay.
Day 1: Pool, beach and easy hotel dining.
Day 2: Island day trip or aquarium-style family attraction.
Day 3: Rainforest or hot spring day trip.
Day 4: Rest day with beach walks and local food.
Option 4: Surf and East Coast Hainan
Day 1: Arrive in Haikou or Sanya and transfer to Wanning.
Day 2: Surf lesson or beach day at Riyue Bay.
Day 3: Explore Shimei Bay, Shenzhou Peninsula and Xinglong coffee.
Day 4: Continue to Lingshui or Sanya for a quieter resort finish.
Option 5: Beach and Rainforest Combination
Day 1: Arrive in Sanya and settle into a beach resort.
Day 2: Beach and island day trip.
Day 3: Travel inland to Baoting or Wuzhishan.
Day 4: Rainforest walk, hot springs or cultural attraction.
Day 5: Return to the coast for a final beach evening.
Where to Stay on Hainan Island
Area
Best For
Traveller Notes
Yalong Bay, Sanya
Luxury beach resorts and first-time visitors
Classic Hainan resort base with good beach access.
Haitang Bay, Sanya
High-end resorts and duty-free shopping
Good for resort stays, but check swimming rules.
Dadonghai, Sanya
Convenience, restaurants and nightlife
Busier and more central.
Sanya Bay
Airport access, sunsets and value stays
Good for practical shorter stays.
Xiangshui Bay / Clearwater Bay, Lingshui
Quiet resort holidays and family escapes
Good alternative to busy Sanya.
Riyue Bay / Shimei Bay, Wanning
Surfing, cafés and east-coast scenery
Best for active beach travellers.
Haikou
Old streets, food, culture and transport
Good gateway city and local-style stop.
Baoting / Wuzhishan
Rainforest, hot springs and inland scenery
Best for travellers wanting nature beyond the beach.
Useful Booking Resources for Hainan Island Tours and Activities
Hainan can be explored independently using rail, taxis, private drivers and hotel transfers, but booking platforms are useful for attraction tickets, island trips, transfers, rainforest tours, private guides, hotel packages and wider China travel planning. The suppliers below are useful places to compare travel products. Skimlinks may automatically convert these merchant links into affiliate links if the merchant is active in your Skimlinks account.
GetYourGuide – offers China and Hainan activities, private guides, transfers, attraction tickets, cultural experiences and selected beach or island tours depending on availability.
Viator – offers private China tours, Hainan activities, Sanya day trips, airport transfers, custom itineraries, island excursions and regional sightseeing where available.
Klook – offers China attraction tickets, Hainan activities, airport transfers, transport products, SIM/eSIM options, island experiences and theme-park-style tickets depending on current availability.
KKday – offers local tours, attraction tickets, transport services and China travel products useful for comparing Hainan activities, transfers and day trips.
Tiqets – offers mobile-friendly attraction tickets and cultural experiences in selected destinations, useful for travellers combining Hainan with major city stopovers.
Musement – offers tours, attraction tickets, cultural activities and local experiences across selected global destinations, useful for wider China and Asia travel planning.
G Adventures – offers small-group and multi-day China or Asia tours that may suit travellers planning a broader itinerary rather than a standalone Hainan beach stay.
Go City – offers bundled attraction passes in selected destinations, useful for readers comparing multi-attraction sightseeing options before or after China.
CityPASS – offers bundled attraction passes mainly for selected North American cities. It is not a main Hainan booking option, but may suit readers planning wider international travel.
Booking tip: Before booking Hainan tours or hotels, check airport transfer times, distance to the nearest rail station, beach access, pool facilities, breakfast, child policies, English-language support, attraction ticket requirements, weather cancellation rules, typhoon policies and whether island day trips include ferry tickets or separate transport.
Hainan Island Travel Tips
Choose your base carefully
Stay in Sanya for the easiest resort holiday, Haikou for food and culture, Wanning for surfing, Lingshui for quieter beaches, and Baoting or Wuzhishan for rainforest and hot springs.
Check visa rules before booking
Some travellers may qualify for Hainan’s visa-free policy, but eligibility and conditions depend on nationality, route and purpose of stay. Always check current official rules before travelling.
Use the high-speed rail loop
Hainan’s rail network is useful for moving between Haikou, Wanning, Lingshui and Sanya without long road transfers.
Plan around public holidays
Chinese New Year, National Day and school holidays can bring high prices and heavy crowds. Book early or travel outside peak periods for a quieter stay.
Check swimming conditions
Not every beach is safe for swimming every day. Follow hotel, lifeguard and local warning signs, especially during rough seas or stormy weather.
Prepare for tropical weather
Bring sunscreen, hat, sunglasses, light clothing, insect repellent and rain protection. The weather can change quickly.
Monitor typhoon and storm alerts
Storms can disrupt flights, ferries, island tours and beach activities. Keep plans flexible in the wetter months.
Use translation tools
English may be limited outside major hotels and tourist services. Translation apps are useful for taxis, menus and local transport.
Try local food beyond the resort
Hainan’s local food is a major part of the trip. Try chicken rice, sour noodles, seafood, qingbuliang and Xinglong coffee where possible.
Do not only stay in Sanya
Sanya is the easiest base, but adding Lingshui, Wanning, Haikou or inland rainforest areas gives a much better picture of Hainan Island.
Is Hainan Island Worth Visiting?
Yes, Hainan Island is worth visiting if you want a tropical China holiday with beaches, resorts, seafood, surfing, rainforest, hot springs and island scenery. It is especially appealing for travellers who want warm weather, coastal relaxation and a China destination that feels very different from the mainland’s big cities.
It may not suit travellers looking for ancient imperial landmarks or a compact European-style sightseeing city. Hainan is more about beach zones, resort comfort, island drives, local food and nature. The best experience comes from choosing the right base and not trying to rush the whole island in one or two days.
The best way to enjoy Hainan is to combine Sanya for classic beaches, Lingshui for quieter resort stays, Wanning for surfing and east-coast scenery, Haikou for food and old streets, and inland rainforest areas for a greener, more cultural side of the island.
FAQs About Hainan Island
Where is Hainan Island?
Hainan Island is off the southern coast of China, separated from Guangdong by the Qiongzhou Strait and surrounded by the South China Sea.
What is Hainan Island famous for?
Hainan is famous for tropical beaches, Sanya resorts, Haikou’s old streets, Wanning surfing, Lingshui beach resorts, rainforest mountains, hot springs, seafood and Hainanese chicken rice.
Is Hainan Island good for a beach holiday?
Yes. Hainan is one of China’s best beach-holiday destinations, especially around Sanya, Lingshui and Wanning.
Is Sanya the best place to stay on Hainan?
Sanya is the easiest and most popular base for first-time visitors, but Lingshui, Wanning and Haikou are also worth considering depending on your travel style.
When is the best time to visit Hainan Island?
The cooler, drier months from November to March are generally the most comfortable for beach holidays and sightseeing. Summer is hotter, wetter and more humid.
Can you surf on Hainan Island?
Yes. Wanning, especially Riyue Bay, is one of Hainan’s best-known surf areas, with surf schools and a more active beach culture.
Four days is enough for a simple Sanya beach break. Seven to ten days is better if you want to include Haikou, Wanning, Lingshui and inland rainforest areas.
Do you need a car on Hainan Island?
You do not need a car if staying mainly in one resort area and using tours or transfers. A private driver, taxi or rental car is useful for exploring beaches, rainforest areas and smaller towns.
Is Hainan Island worth visiting?
Yes. Hainan Island is worth visiting for tropical beaches, relaxed resorts, rainforest scenery, local food, surfing, hot springs and a different side of China from the major mainland cities.
Sponsored Popular Items
Quick take: Musement.com offers a worldwide selection of tours and attractions
Brisbane: Rainforests, Waterfalls and Glow Worm Cave Tour Australia Explore the World Heritage-listed Gondwana rainforests near Brisbane. See stunning waterfalls, a natural bridge, and tour the glow worm caves at Cedar Creek on this unforgettable… Check current availability, inclusions and booking conditions.
Gold Coast Hinterland Tours, Rainforests & Waterfall Day Trips Australia Compare water-based experiences in Gold Coast Hinterland Tours, Rainforests & Waterfall, with practical tips on timing, inclusions and choosing the right option. Check current availability, prices and booking conditions before you go.
Belek Visitor Guide: Golf Resorts, Beaches & Antalya Day Trips Turkey City in Belek Antalya Province of Turkey Belek itself is not a large city but rather a resort town in the Antalya Province of Turkey , known for its luxury hotels, golf courses, and sandy Mediterranean beaches . Check current availability, inclusions and booking details before you go.
Lingshui Xiangshui Bay, also known as Perfume Bay or 香水湾, is a scenic beach-resort area on the south-east coast of Hainan Island, China. Set in Lingshui Li Autonomous County, it offers a quieter alternative to busier Sanya, with long sandy beaches, blue sea views, resort hotels, coastal drives, sunrise walks, surfing conditions in some seasons and easy access to nearby Hainan highlights such as Boundary Island, Nanwan Monkey Island and Clearwater Bay.
Xiangshui Bay is best suited to travellers who want a slower Hainan beach stay rather than a packed city itinerary. It is not as nightlife-heavy as Sanya, and that is part of the appeal. The mood is more about sea breezes, resort pools, beach walks, seafood meals, family holidays, romantic escapes and day trips along the Lingshui coast.
For travellers already visiting Sanya, Xiangshui Bay can work as a quieter add-on. For travellers planning a Hainan beach holiday, it can be a good base if you prefer relaxed coastline, resort comfort and nearby nature attractions over big-city shopping and nightlife.
Quick take: Musement.com offers a worldwide selection of tours and attractions
Ireland: The Quiet Man Museum and Film Location Guided Tour Best deals for Ireland: The Quiet Man Museum and Film Location Guided Tour. Walk in the footsteps of John Wayne and Maureen O'Hara at the original movie locations. Visit an exact replica of the White O'Morn cottage. Join a guided tour of the museum to see original artifacts. Available from getyourguide.com.
Why Visit Lingshui Xiangshui Bay?
Lingshui Xiangshui Bay is worth visiting if you want a peaceful Hainan beach experience with resort comfort and fewer crowds than the busiest parts of Sanya. The coastline is broad and open, with sea views, soft sand in many areas and a relaxed atmosphere that suits slow travel.
The bay is also well positioned for exploring south-east Hainan. From Xiangshui Bay, you can plan day trips to Boundary Island for clear-water island scenery, Nanwan Monkey Island for wildlife and cable car views, Clearwater Bay for resort beaches, and Sanya for bigger shopping, dining and airport connections.
Lingshui Xiangshui Bay is best for:
Couples wanting a quieter Hainan beach escape
Families looking for resort pools, beach walks and nearby attractions
Travellers who prefer Lingshui’s slower pace over central Sanya
Beach walkers, sunrise watchers and coastal photographers
Visitors combining Sanya, Lingshui, Wanning and the east coast of Hainan
Resort travellers wanting sea views and a relaxed base
People interested in nearby Boundary Island, Nanwan Monkey Island and Clearwater Bay
Where Is Xiangshui Bay?
Xiangshui Bay is in Lingshui Li Autonomous County on Hainan Island’s south-east coast. It sits between the busier resort areas around Sanya and the surf-influenced east-coast areas toward Wanning.
Location Detail
Traveller Notes
Destination
Lingshui Xiangshui Bay / Perfume Bay / 香水湾
County
Lingshui Li Autonomous County
Province
Hainan, China
Nearest major airport
Sanya Phoenix International Airport
Useful rail access
Lingshui Railway Station
Nearby coastal areas
Clearwater Bay, Tufu Bay, Boundary Island, Wanning coast
Best visit style
Beach resort stay, family holiday, romantic escape, coastal road trip or quiet Hainan base
The area is easiest with a hotel transfer, private car, taxi or self-drive arrangement. Public transport may be possible in parts of Lingshui, but independent travellers usually find the coast easier to explore with arranged transport.
What to Expect at Lingshui Xiangshui Bay
Expect a quieter resort-coast atmosphere rather than a dense city beach. Xiangshui Bay has hotels, beachfront developments, wide coastal views and long stretches of sand, but it is not the same as staying in downtown Sanya or around Dadonghai. The pace is slower, and evenings are more resort-based.
The beach can be beautiful, but conditions change with wind, waves and season. Some sections are better for walking and photography than swimming. Always follow hotel and local safety advice before entering the water.
What you may find
Long sandy beach areas and open sea views
Beachfront resorts and holiday apartments
Sunrise and sunset photography opportunities
Resort pools, kids’ facilities and family-friendly hotel amenities
Quiet beach walks and sea-breeze relaxation
Nearby island and wildlife day trips
Less nightlife than Sanya
More space and a calmer mood than many crowded resort zones
What not to expect
Do not expect the same nightlife and shopping density as Sanya.
Do not expect every beach section to be patrolled or suitable for swimming.
Do not assume all restaurants and services are within walking distance of your hotel.
Do not rely on English being widely spoken outside major hotels.
Do not expect every hotel beach to be fully private, even if it feels quiet.
Do not visit only for one quick photo stop; Xiangshui Bay is better as a slow beach stay.
Xiangshui Bay Beach
Xiangshui Bay Beach is the main reason to visit. The coastline is broad and scenic, with a tropical Hainan feel, open water, sea breezes and resort-backed beach areas. It is especially good for morning walks, sunrise views, photography and quiet time away from busier tourist centres.
Depending on sea conditions, some travellers may swim, paddle or take part in water activities, but safety should always come first. Hainan’s beaches can have surf, currents and changing wind conditions. Swim only where local advice says it is safe.
Best beach activities
Walk the beach early in the morning.
Watch sunrise over the South China Sea.
Relax at a beachfront resort pool or terrace.
Photograph palm trees, waves and coastal light.
Try gentle beach fitness, yoga or jogging.
Ask your hotel about safe swimming areas.
Enjoy a seafood meal after a beach day.
Beach safety tips
Check hotel or local beach safety signs before swimming.
Do not swim in rough surf or strong currents.
Avoid swimming alone.
Supervise children closely near the sea.
Use sun protection; Hainan’s tropical sun is strong.
Be careful walking on rocks, shells or coral fragments.
Follow any typhoon, storm or high-wave warnings.
Best Things to Do at Lingshui Xiangshui Bay
1. Stay in a beachfront resort
Xiangshui Bay works best when you choose accommodation that takes advantage of the coast. A beachfront or sea-view resort gives easy access to pools, restaurants, beach walks and sunrise views.
2. Walk the beach at sunrise
Morning is one of the best times to enjoy the bay. The air is cooler, the beach is quieter and the light over the water can be beautiful.
3. Visit Boundary Island
Boundary Island, also known as Fenjiezhou Island, is one of Lingshui’s most popular day trips. It is known for clear water, island scenery, ferry access and marine-style activities depending on current operations.
4. Explore Nanwan Monkey Island
Nanwan Monkey Island is a well-known Lingshui wildlife attraction. Visitors commonly go for macaques, tropical scenery and the over-water cable car experience from the mainland side.
5. Spend time at Clearwater Bay
Clearwater Bay, also called Qingshui Bay, is another major Lingshui beach-resort area. It is useful for travellers who want to compare different coastal moods in the same county.
6. Take a coastal drive
The coastline around Lingshui, Xiangshui Bay, Clearwater Bay and nearby Wanning has excellent sea views. A private driver or self-drive route makes it easier to explore beaches, viewpoints and resort areas.
7. Try water activities if conditions suit
Depending on season, operator and sea conditions, travellers may find surfing, paddleboarding, kayaking or other water activities in the wider Lingshui and Hainan east-coast area. Always choose reputable operators and check safety rules.
8. Visit Sanya as a day trip
If you want shopping, larger restaurants, night markets or major tourist attractions, Sanya is within reach by road or rail connections, depending on your exact starting point.
9. Relax rather than overplan
Xiangshui Bay is best for slow travel. Leave time for the beach, pool, balcony views, spa treatments, naps and unhurried meals.
10. Combine Lingshui with Wanning or Sanya
A strong Hainan coastal itinerary can include Sanya for big-ticket sightseeing, Lingshui for quieter resort beaches, and Wanning for surfing culture and east-coast scenery.
Nearby Places to Visit from Xiangshui Bay
Boundary Island
Boundary Island is one of the most popular Lingshui attractions. It is often promoted for clear water, island views, ferry access and marine leisure activities.
Nanwan Monkey Island
Nanwan Monkey Island is famous for macaques and its scenic cable car route. Visitors should follow staff instructions carefully and avoid feeding or teasing monkeys.
Clearwater Bay
Clearwater Bay is a large beach-resort district in Lingshui. It has hotels, beaches, golf and coastal leisure facilities depending on where you stay.
Tufu Bay
Tufu Bay is another Lingshui coastal area known for luxury resorts and a quieter beach atmosphere.
Lingshui Town
Lingshui town is useful for railway access, local food, supplies and transport connections rather than resort-style sightseeing.
Wanning Riyue Bay
Riyue Bay in nearby Wanning is one of Hainan’s better-known surf areas. It suits travellers wanting a more active beach scene.
Sanya
Sanya is Hainan’s best-known resort city, with bigger shopping, nightlife, beaches and airport access. It pairs well with a quieter Lingshui stay.
Hainan Ocean Paradise
Hainan Ocean Paradise in Lingshui is a family-oriented attraction area with marine and theme-park-style experiences depending on current operations.
Hotels and Resorts at Xiangshui Bay
Accommodation is one of the main reasons travellers choose Xiangshui Bay. The area has resort-style properties with sea views, pools, family facilities, spa services and beach access. It is better suited to visitors who enjoy hotel-based relaxation rather than constant sightseeing.
What to look for when booking
Beachfront access: useful if you want daily beach walks.
Sea-view rooms: worth considering for sunrise and balcony views.
Swimming pools: important because sea swimming may not always be suitable.
Kids’ facilities: useful for families planning a resort holiday.
On-site restaurants: important if the property is not close to town dining.
Transfer options: check airport, train station and attraction transfers.
English-language support: useful for international travellers.
Recent reviews: check current maintenance, food quality and beach access feedback.
Best areas to stay
Area
Best For
Traveller Notes
Xiangshui Bay beachfront
Resort stays, beach walks and sea views
Best if you want to stay close to the bay itself.
Clearwater Bay
Families, golf, resorts and broader services
Good alternative if you want more resort infrastructure.
Tufu Bay
Luxury escapes and quiet coastal stays
Better for travellers prioritising premium hotels.
Lingshui town
Transport, local food and value stays
Less scenic, but practical for rail access and local life.
Sanya
Nightlife, shopping, airport access and major attractions
Better if you want a busier beach-city base.
Best Time to Visit Lingshui Xiangshui Bay
Hainan has a tropical climate, so the best time to visit depends on your tolerance for heat, humidity, rain and crowds. The cooler, drier months are generally more comfortable for beach holidays, while summer can be hotter, wetter and more humid.
Season
What to Expect
Advice
November to March
Milder temperatures, lower humidity and popular beach weather
Best all-round period for many visitors.
April to May
Warmer weather and increasing humidity
Good for resort stays, but prepare for heat.
June to September
Hot, humid and more rain-prone
Use flexible plans and check weather updates.
Typhoon season risk period
Possible storms, rough seas and travel disruption
Monitor forecasts and hotel/tour policies.
Chinese public holidays
Higher demand, busier hotels and higher prices
Book early or avoid peak holiday travel if you want quiet.
Suggested Lingshui Xiangshui Bay Itinerary Ideas
Option 1: Simple 2-Day Beach Escape
Day 1 morning: Arrive at Xiangshui Bay and check into your resort.
Day 1 afternoon: Walk the beach, swim in the pool and enjoy a slow dinner.
Day 2 morning: Watch sunrise and relax by the water.
Day 2 afternoon: Visit Clearwater Bay or take a short coastal drive.
Option 2: 3-Day Lingshui Coast Plan
Day 1: Xiangshui Bay beach, resort time and seafood dinner.
Day 2: Day trip to Boundary Island for island views and marine activities.
Day 3: Visit Nanwan Monkey Island and return for a quiet beach evening.
Option 3: Family-Friendly Resort Stay
Morning: Use the resort pool and beach area before the heat builds.
Midday: Rest indoors, use kids’ facilities or enjoy lunch at the hotel.
Afternoon: Take a short trip to Nanwan Monkey Island or Hainan Ocean Paradise.
Evening: Keep dinner easy with on-site or nearby restaurants.
Option 4: Hainan Coastal Route
Day 1: Arrive in Sanya and explore the city or beach areas.
Day 2: Transfer to Xiangshui Bay for a quieter resort stay.
Day 3: Visit Boundary Island or Clearwater Bay.
Day 4: Continue toward Wanning and Riyue Bay for surf culture and east-coast scenery.
Option 5: Romantic Xiangshui Bay Stay
Day 1: Check into a sea-view resort and enjoy a slow beach walk.
Day 2: Book a spa treatment, pool day or private coastal drive.
Day 3: Visit Boundary Island or stay in the resort for a relaxed final day.
Food and Local Flavours Near Xiangshui Bay
Lingshui and Hainan are good places to try tropical island flavours, seafood, coconut dishes and local-style noodles. Resort dining is convenient, but it is also worth trying local restaurants if transport allows.
Foods to look for
Hainanese chicken rice: one of Hainan’s most famous dishes.
Fresh seafood: fish, prawns, crab, shellfish and seasonal catches.
Lingshui sour noodles: a local-style noodle dish associated with Lingshui.
Coconut chicken hotpot: popular across Hainan.
Tropical fruit: mango, pineapple, papaya, coconut and dragon fruit.
Qingbuliang: a refreshing Hainan dessert with coconut milk and mixed toppings.
Wenchang chicken: another famous Hainan chicken dish, widely found around the island.
If you are staying at an isolated resort, check restaurant options before arrival. Some travellers prefer to book hotels with several dining choices or arrange transport to Lingshui town or nearby resort districts for more variety.
Useful Booking Resources for Lingshui Xiangshui Bay and Hainan Activities
Lingshui Xiangshui Bay is easy to enjoy as a resort stay, but booking platforms are useful for hotels, transfers, island tickets, private drivers, day trips, Hainan attraction tickets, Sanya extensions and wider China travel planning. The suppliers below are useful places to compare travel products. Skimlinks may automatically convert these merchant links into affiliate links if the merchant is active in your Skimlinks account.
GetYourGuide – offers China and Hainan tours, private guides, transfers, attraction tickets and selected coastal or island experiences depending on availability.
Viator – offers private China tours, Hainan activities, Sanya day trips, airport transfers, customisable itineraries and regional sightseeing where available.
Klook – offers China attraction tickets, transport products, SIM/eSIM options, airport transfers, Hainan activities and island-style day trips depending on current availability.
KKday – offers local tours, attraction tickets, transport services and China travel products useful for comparing Hainan activities and transfers.
Tiqets – offers mobile-friendly attraction tickets and cultural experiences in selected destinations, useful for travellers combining Hainan with larger city stopovers.
Musement – offers tours, attraction tickets, cultural activities and local experiences across selected global destinations, useful for wider China and Asia travel planning.
G Adventures – offers small-group and multi-day China or Asia tours that may suit travellers planning a broader itinerary rather than a standalone Hainan beach stay.
Go City – offers bundled attraction passes in selected destinations, useful for readers comparing multi-attraction sightseeing options before or after China.
CityPASS – offers bundled attraction passes mainly for selected North American cities. It is not a main Hainan booking option, but may suit readers planning wider international travel.
Booking tip: Before booking a Lingshui Xiangshui Bay hotel or tour, check airport transfer times, distance from Lingshui Station, beach access, pool facilities, breakfast, child policies, English-language support, cancellation rules, typhoon/weather policies, and whether nearby attractions such as Boundary Island or Nanwan Monkey Island require advance tickets or ferry arrangements.
Lingshui Xiangshui Bay Travel Tips
Choose your hotel carefully
Your hotel matters more here than in a city destination. Check beach access, pool quality, restaurant options, transport, recent reviews and whether the resort suits families, couples or quiet stays.
Arrange transport ahead
Transfers from Sanya Airport, Lingshui Station or nearby attractions are easiest when arranged in advance. Ask your hotel about pickup options.
Do not expect a big nightlife scene
Xiangshui Bay is better for resort relaxation than late-night entertainment. Stay in Sanya if nightlife is a priority.
Check swimming conditions daily
Wind, waves and currents can change. Ask hotel staff where and when swimming is safe.
Use strong sun protection
Hainan’s tropical sun is intense. Bring sunscreen, hat, sunglasses and lightweight clothing.
Bring translation tools
English may be limited outside major hotels. Translation apps help with taxis, restaurants and local services.
Keep public holiday dates in mind
Chinese public holidays can make hotels busier and more expensive. Book early or travel outside peak holiday periods for a quieter stay.
Allow time for nearby attractions
Boundary Island, Monkey Island and Clearwater Bay are worth planning properly rather than rushing between them all in one day.
Monitor weather in summer and typhoon season
Heavy rain, strong wind or rough seas can affect beach activities, ferry trips and transfers. Keep plans flexible.
Try local Lingshui food
Resort food is convenient, but local dishes such as sour noodles, seafood and coconut-based meals add more flavour to the trip.
Is Lingshui Xiangshui Bay Worth Visiting?
Yes, Lingshui Xiangshui Bay is worth visiting if you want a quieter Hainan beach resort stay with sea views, relaxed coastal scenery and access to nearby Lingshui attractions.
It may not suit travellers wanting nonstop nightlife, big shopping malls or a dense sightseeing schedule. It is better for slow beach holidays, resort relaxation, family time, romantic escapes and coastal day trips.
The best way to enjoy Xiangshui Bay is to choose a good beachfront resort, plan transport ahead, visit Boundary Island or Nanwan Monkey Island if time allows, and leave enough space in your itinerary for simple beach walks, pool time and tropical sea views.
FAQs About Lingshui Xiangshui Bay
Where is Lingshui Xiangshui Bay?
Lingshui Xiangshui Bay, also called Perfume Bay, is on the south-east coast of Hainan Island in Lingshui Li Autonomous County, China.
Is Xiangshui Bay the same as Perfume Bay?
Yes. Xiangshui Bay is often translated as Perfume Bay because the Chinese name 香水湾 can be rendered that way in English.
How do you get to Xiangshui Bay?
Most travellers reach Xiangshui Bay by car, taxi, hotel transfer or private driver from Sanya, Sanya Phoenix International Airport, Lingshui Railway Station or nearby Hainan resort areas.
Is Xiangshui Bay better than Sanya?
Xiangshui Bay is better for a quieter resort stay and beach relaxation. Sanya is better for nightlife, shopping, restaurants, transport and a wider choice of major tourist attractions.
Can you swim at Xiangshui Bay?
Swimming may be possible in suitable conditions, but sea conditions can change. Always follow hotel and local safety advice before entering the water.
What are the best nearby attractions?
Good nearby attractions include Boundary Island, Nanwan Monkey Island, Clearwater Bay, Tufu Bay, Lingshui town and the wider Hainan east coast.
Is Lingshui good for families?
Yes. Lingshui can be good for families, especially if staying at a resort with pools, kids’ facilities, restaurants and easy transport to attractions.
When is the best time to visit Xiangshui Bay?
The cooler and drier months from November to March are generally the most comfortable for beach holidays. Summer is hotter, more humid and more rain-prone.
Do you need a car in Xiangshui Bay?
You do not need a car if you stay mainly at a resort, but a private driver, taxi or hotel transfer is very useful for nearby attractions and airport or rail connections.
Is Lingshui Xiangshui Bay worth visiting?
Yes. Lingshui Xiangshui Bay is worth visiting for a quieter Hainan beach-resort escape, especially if you enjoy sea views, relaxed hotels, nearby island trips and a slower coastal pace.
Sponsored Popular Items
Quick take: Musement.com offers a worldwide selection of tours and attractions
Ireland: The Quiet Man Museum and Film Location Guided Tour Best deals for Ireland: The Quiet Man Museum and Film Location Guided Tour. Walk in the footsteps of John Wayne and Maureen O'Hara at the original movie locations. Visit an exact replica of the White O'Morn cottage. Join a guided tour of the museum to see original artifacts. Available from getyourguide.com.
Ginkaku-ji: The Shogun Who Invented Quiet Beauty Best deals for Ginkaku-ji: The Shogun Who Invented Quiet Beauty. Discover how a shogun's mountain retreat shaped Japanese beauty. Explore Ginkaku-ji, Higashiyama culture, Zen gardens, and the timeless ideas behind wabi-sabi with a local guide. Available from getyourguide.com.
Malang: The Quiet Side of Bromo – Private Sunset Tour Indonesia Discover Mount Bromo at sunset on a private tour from Malang. Cross the Sea of Sand, admire Mount Batok, and enjoy panoramic views of the active Mount Bromo crater.
Rio de Janeiro is one of the world’s most spectacular city destinations, famous for Christ the Redeemer, Sugarloaf Mountain, Copacabana Beach, Ipanema Beach, samba, Carnival culture, tropical mountains, rainforest, bay views and a coastline that feels made for postcards.
Rio is not just a beach city. It is a dramatic landscape where granite peaks rise from the sea, neighbourhoods wrap around bays and lagoons, rainforest climbs into the hills, and famous viewpoints reveal a city shaped by mountains, water and outdoor life.
Quick take: Musement.com offers a worldwide selection of tours and attractions
For first-time visitors, the classic Rio experience includes Christ the Redeemer on Corcovado, Sugarloaf Mountain by cable car, a walk along Copacabana and Ipanema, sunset at Arpoador, the colourful Selarón Steps, a samba night in Lapa, and time in Tijuca National Park or around Guanabara Bay.
Why Visit Rio de Janeiro?
Rio de Janeiro is worth visiting because it offers one of the strongest combinations of city, beach, mountain and culture anywhere in the world. You can start the morning at a rainforest viewpoint, spend the afternoon on Ipanema Beach, watch sunset from Arpoador, then finish the evening with samba, seafood or a rooftop drink overlooking the city lights.
Rio has an energy that is hard to copy. The beach is part of daily life, music spills into neighbourhoods, football culture is everywhere, and the scenery constantly pulls your eyes upward toward Corcovado, Sugarloaf and the surrounding hills.
Rio de Janeiro is best for:
First-time visitors to Brazil
Beach lovers wanting Copacabana, Ipanema and Leblon
Photographers chasing mountain, bay and city views
Culture lovers interested in samba, Carnival and street art
Food lovers wanting Brazilian barbecue, seafood, açaí and caipirinhas
Hikers and outdoor travellers exploring Tijuca National Park
Couples wanting dramatic sunsets and scenic viewpoints
Travellers combining Rio with Iguazu Falls, São Paulo, Búzios, Paraty or Ilha Grande
Where Is Rio de Janeiro?
Rio de Janeiro is on Brazil’s south-eastern coast, facing the Atlantic Ocean and Guanabara Bay. The city sits between beaches, lagoons, rainforest-covered mountains and coastal islands, creating the famous “mountain and sea” landscape that defines Rio.
Location Detail
Traveller Notes
Destination
Rio de Janeiro, Brazil
Region
South-east Brazil
Main landmarks
Christ the Redeemer, Sugarloaf Mountain, Copacabana Beach, Ipanema Beach
Main natural setting
Atlantic coast, Guanabara Bay, Tijuca Massif and urban rainforest
Best visit style
City break, beach stay, cultural trip, Carnival visit, hiking and viewpoint itinerary
Useful airport
Rio de Janeiro–Galeão International Airport, plus Santos Dumont for domestic flights
Christ the Redeemer and Corcovado
Christ the Redeemer, or Cristo Redentor, is Rio’s most famous landmark. The statue stands on Corcovado Mountain inside Tijuca National Park, overlooking the city, beaches, lagoon, mountains and bay.
Visiting Christ the Redeemer is one of the essential Rio experiences. The most traditional route is by the Corcovado train, which climbs through forest toward the summit. Vans and guided tours are also common, depending on where you are staying and current access arrangements.
Why visit Christ the Redeemer?
It is Rio’s most recognisable symbol.
The views over the city are extraordinary on a clear day.
The journey through Tijuca National Park adds to the experience.
It helps first-time visitors understand Rio’s landscape.
It is one of the classic photo stops in Brazil.
Christ the Redeemer tips
Go early if you want fewer crowds.
Check visibility before booking a last-minute visit; clouds can hide the view.
Book tickets or tours ahead in peak periods.
Wear comfortable shoes because there are steps and viewing areas.
Keep phones and cameras secure in crowds.
Combine it with Sugarloaf only if you have a well-planned day; both deserve time.
Sugarloaf Mountain
Sugarloaf Mountain, or Pão de Açúcar, is another Rio icon. The cable car journey rises in stages from Urca to Morro da Urca and then to Sugarloaf, giving wide views of Guanabara Bay, Botafogo, Copacabana, Christ the Redeemer and the surrounding mountains.
Sugarloaf is especially beautiful in the late afternoon, when the light softens and the city begins to glow. Sunset can be spectacular, but it is also one of the busiest times.
Best things about Sugarloaf
Classic cable car experience
Views of Guanabara Bay and Rio’s coastline
Excellent photography of Christ the Redeemer from a distance
Sunset views over the city and sea
Easy access from Urca compared with some hilltop viewpoints
Sugarloaf tips
Book ahead in busy periods.
Arrive before sunset if you want time to enjoy both cable car stages.
Bring a light layer because it can be breezy at the top.
Keep valuables secure in queues and viewing areas.
Consider visiting Urca afterwards for a relaxed waterfront drink or meal.
Copacabana, Ipanema and Rio’s Beaches
Rio’s beaches are central to the city’s identity. They are places to swim, walk, play football, drink coconut water, eat beach snacks, meet friends, exercise, watch sunsets and experience daily Carioca life.
Copacabana Beach
Copacabana is Rio’s most famous beach, known for its long curve of sand, black-and-white wave-pattern promenade, hotels, kiosks, beach sports and lively atmosphere. It is ideal for a classic first Rio beach walk.
Ipanema Beach
Ipanema is stylish, scenic and popular with both locals and visitors. It has mountain views toward Dois Irmãos, strong beach culture, sunset energy and easy access to cafés, bars and shops.
Leblon Beach
Leblon sits west of Ipanema and often feels more residential and polished. It is a good choice for travellers wanting a quieter beach base with excellent restaurants nearby.
Arpoador
Arpoador is the rocky point between Copacabana and Ipanema. It is one of the best places in Rio for sunset, especially when crowds gather to watch the sun drop behind the mountains.
Barra da Tijuca
Barra da Tijuca has a long, wide beach and a more modern feel. It is farther from classic Rio sights but good for longer stays, surfing, shopping centres and spacious beachfront hotels.
Beach safety tips
Take only what you need to the beach.
Do not leave phones, bags or cameras unattended.
Use small cash or contactless payment carefully.
Swim only where conditions are safe and follow lifeguard advice.
Be cautious with waves and currents.
Use licensed kiosks and check prices before ordering.
Avoid walking quiet beach areas late at night.
Best Neighbourhoods to Explore in Rio de Janeiro
Copacabana
Copacabana is practical, famous and energetic. It is a strong base for first-time visitors who want beach access, hotels, restaurants, metro connections and classic Rio atmosphere.
Ipanema
Ipanema is stylish and scenic, with beach culture, boutiques, restaurants and a more polished feel than some parts of Copacabana. It is one of the best areas for first-time visitors who want beach and lifestyle together.
Leblon
Leblon is upscale, residential and food-focused. It suits travellers wanting comfort, good dining and a slightly calmer beach base.
Santa Teresa
Santa Teresa is Rio’s bohemian hilltop neighbourhood, known for old mansions, art studios, views, cafés and winding streets. It is atmospheric but requires more transport planning.
Lapa
Lapa is famous for nightlife, samba, arches and the colourful Selarón Steps nearby. It is lively at night but visitors should use sensible transport and safety precautions.
Urca
Urca is a quieter neighbourhood near Sugarloaf Mountain. It is excellent for waterfront views, relaxed bars and a calmer side of Rio.
Botafogo
Botafogo has bay views, restaurants, bars, shopping and transport links. It is a useful base for travellers who want access to Sugarloaf, Flamengo, Copacabana and the city centre.
Best Things to Do in Rio de Janeiro
1. Visit Christ the Redeemer
The view from Corcovado is one of the world’s great city panoramas. Visit early or choose a clear afternoon for the best chance of strong visibility.
2. Ride the cable car to Sugarloaf Mountain
Sugarloaf gives a different perspective on Rio, with dramatic bay, beach and mountain views.
3. Walk Copacabana Beach
Copacabana is ideal for a morning or late-afternoon walk along the famous wave-pattern promenade.
4. Watch sunset from Arpoador
Arpoador is one of Rio’s classic sunset spots, with views toward Ipanema, Leblon and Dois Irmãos.
5. Explore Ipanema and Leblon
These beach neighbourhoods offer cafés, boutiques, restaurants, beach culture and some of the city’s best lifestyle atmosphere.
6. See the Selarón Steps
The Escadaria Selarón is a colourful tiled staircase between Lapa and Santa Teresa. It is one of Rio’s most photographed street-art landmarks.
7. Visit Tijuca National Park
Tijuca National Park is a major urban rainforest area with viewpoints, waterfalls, forest trails and access to Corcovado.
8. Experience samba in Lapa
Lapa is one of the best-known nightlife districts for samba, bars and music. Go with a reputable guide or use trusted transport at night.
9. Visit the Museum of Tomorrow
The Museum of Tomorrow in the Porto Maravilha area is a striking modern museum focused on science, sustainability and future questions.
10. Tour Maracanã Stadium
Football fans can visit Maracanã, one of the world’s most famous stadiums, or attend a match with appropriate local guidance.
Tijuca National Park, Lagoa and Outdoor Rio
Rio’s natural setting is one of its greatest strengths. Beyond the beaches, the city has rainforest, lagoons, mountains, viewpoints and walking routes that make it feel more outdoors-focused than many large cities.
Tijuca National Park
Tijuca National Park is a huge forested area within Rio, protecting Atlantic Forest, waterfalls, trails and mountain viewpoints. It is home to Corcovado and many scenic drives and walking routes.
Lagoa Rodrigo de Freitas
Lagoa Rodrigo de Freitas sits behind Ipanema and Leblon. It is popular for walking, cycling, paddleboats, casual food stops and views toward Christ the Redeemer.
Dois Irmãos
Dois Irmãos, the twin peaks seen from Ipanema and Leblon, is one of Rio’s most recognisable mountain silhouettes. Guided hikes are available, but visitors should choose reputable operators and check safety conditions.
Pedra Bonita
Pedra Bonita is a popular viewpoint hike with sweeping views over Rio’s coast, mountains and forest. It is also linked with hang-gliding and paragliding departures.
Guanabara Bay
Guanabara Bay shapes much of Rio’s scenery, especially from Sugarloaf, Urca, Botafogo, Niterói and boat tours.
Samba, Carnival, Food and Local Culture
Rio is deeply associated with samba, Carnival, football, beach culture and relaxed outdoor social life. Even outside Carnival season, music and dance are part of the city’s identity.
Samba and nightlife
For samba, Lapa is one of the best-known nightlife areas, while samba schools and community events can offer deeper cultural experiences. If you are new to Rio, consider going with a guided group or trusted local recommendation.
Carnival
Rio Carnival is one of the world’s most famous festivals, with samba school parades at the Sambadrome, street parties, costumes, music and huge crowds. Accommodation and tickets should be booked far ahead.
Food and drinks to try
Feijoada – a rich black bean and meat stew, often served with rice, greens and orange.
Churrasco – Brazilian barbecue, ideal for meat lovers.
Pão de queijo – chewy cheese bread, good for snacks.
Açaí – popular as a cold bowl or smoothie, especially near beaches.
Pastel – fried pastry with savoury fillings.
Moqueca – seafood stew more associated with Bahia but found in Rio restaurants.
Caipirinha – Brazil’s famous cocktail made with cachaça, lime and sugar.
Coconut water – classic beach refreshment.
Safety Tips for Rio de Janeiro
Rio is beautiful and rewarding, but visitors should take safety seriously. Crime, theft and scams can affect tourists, especially in busy areas, at beaches, at night and around transport points. A few practical precautions make the trip much smoother.
Practical safety advice
Take only essential items to the beach.
Do not display expensive jewellery, watches or cameras unnecessarily.
Use a money belt or secure bag in crowded areas.
Keep your phone out of sight when not using it.
Use registered taxis or trusted ride-hailing apps at night.
Avoid walking quiet streets or beach areas late at night.
Check prices before buying from beach vendors or street sellers.
Be careful with card machines and payment amounts.
Use ATMs in secure indoor locations where possible.
Visit favelas only with reputable local guides and only where tours are responsibly run.
Follow current government travel advice before and during your trip.
Rio is not a destination where you should be careless, but it is also not a place to avoid if you plan sensibly, stay aware and respect local advice.
Best Time to Visit Rio de Janeiro
Rio can be visited year-round, but the best time depends on your priorities. Summer is hot, lively and beach-focused, while winter is usually milder and often better for sightseeing. Carnival season is exciting but crowded and expensive.
Season
What to Expect
Advice
December to March
Hot summer weather, beach energy, higher humidity and possible rain
Good for beach life, but book ahead and expect crowds.
Carnival period
Huge celebrations, samba parades, street parties and peak demand
Book accommodation, tickets and transport far ahead.
April to June
Warm to mild weather and generally easier sightseeing
Excellent for first-time visitors wanting fewer crowds.
July to September
Milder winter conditions, often good for viewpoints and walking
Good for sightseeing, hiking and less intense heat.
October to November
Warmer spring conditions before peak summer
Good balance of beach weather and manageable crowds.
Suggested Rio de Janeiro Itinerary Ideas
Option 1: Classic 3-Day Rio First Visit
Day 1: Visit Christ the Redeemer, explore Ipanema and watch sunset at Arpoador.
Day 2: Ride the cable car to Sugarloaf, walk Urca and relax at Copacabana.
Day 3: See Selarón Steps, explore Santa Teresa, visit Lapa and enjoy samba with safe transport.
Option 2: Rio Beach and Viewpoints Plan
Morning: Walk Copacabana Beach before the heat builds.
Midday: Visit Sugarloaf Mountain and have lunch in Urca or Botafogo.
Afternoon: Relax at Ipanema or Leblon.
Sunset: Watch from Arpoador or a rooftop bar.
Option 3: Nature and Outdoor Rio
Day 1: Visit Christ the Redeemer and explore Tijuca National Park.
Day 2: Walk or cycle around Lagoa Rodrigo de Freitas.
Day 3: Book a guided hike to Pedra Bonita or another suitable viewpoint.
Option 4: Culture and Food Weekend
Day 1: Visit the Museum of Tomorrow, Porto Maravilha and the city centre.
Day 1 evening: Eat Brazilian barbecue or seafood.
Day 2: Explore Santa Teresa, Selarón Steps and Lapa.
Day 2 night: Join a samba experience or guided nightlife tour.
Option 5: 5-Day Rio and Coast Plan
Day 1: Copacabana, Ipanema and Arpoador.
Day 2: Christ the Redeemer and Tijuca National Park.
Day 3: Sugarloaf, Urca and Botafogo.
Day 4: Santa Teresa, Lapa, Selarón Steps and city-centre highlights.
Day 5: Day trip to Niterói, Prainha, Grumari or a guided coastal extension depending on conditions.
Where to Stay in Rio de Janeiro
Area
Best For
Traveller Notes
Ipanema
First-time visitors, beach style, restaurants and safety-conscious travellers
One of the best all-round bases, usually more expensive.
Leblon
Upscale stays, dining and calmer beach atmosphere
Polished and comfortable, but often pricey.
Copacabana
Classic beach hotels, value options and easy transport
Practical and iconic, but choose location carefully.
Botafogo
Views, restaurants, transport and Sugarloaf access
Good value and useful for sightseeing.
Santa Teresa
Bohemian atmosphere, boutique stays and views
Charming but less convenient for beach-focused travellers.
Barra da Tijuca
Modern hotels, long beach and spacious stays
Farther from classic Rio sights; better for repeat visitors or resort-style stays.
Useful Booking Resources for Rio de Janeiro Tours and Activities
Rio is easy to enjoy independently in parts, but guided tours can be very useful for Christ the Redeemer, Sugarloaf, Tijuca National Park, samba nights, city-centre history, favela visits, football matches, airport transfers and day trips. The suppliers below are useful places to compare tour styles, inclusions and cancellation rules. Skimlinks may automatically convert these merchant links into affiliate links if the merchant is active in your Skimlinks account.
GetYourGuide – offers Rio de Janeiro tours including Christ the Redeemer, Sugarloaf Mountain, Tijuca National Park, samba experiences, city tours, favela tours, football tickets and airport transfers.
Viator – offers private Rio tours, Christ and Sugarloaf combinations, beach sightseeing, Tijuca hikes, samba nights, food tours, football experiences and customisable Brazil itineraries.
Klook – offers Rio attraction tickets, city tours, transport products, SIM/eSIM options, airport transfers and selected Brazil activities depending on availability.
KKday – offers local tours, attraction tickets, transport services and Brazil travel products useful for comparing Rio activities.
Tiqets – offers mobile-friendly tickets for attractions, museums, viewpoints and cultural experiences useful for Rio city sightseeing.
Musement – offers Rio tours, attraction tickets, cultural activities, food experiences and Brazil travel products.
G Adventures – offers small-group and multi-day Brazil and South America tours that may include Rio de Janeiro as part of a broader itinerary.
Go City – offers bundled attraction passes in selected destinations, useful for readers comparing multi-attraction sightseeing options before or after Brazil.
CityPASS – offers bundled attraction passes mainly for selected North American cities. It is not a main Rio booking option, but may suit readers planning wider international travel.
Booking tip: Before booking a Rio tour, check whether the price includes hotel pickup, attraction entry, Corcovado train or van access, Sugarloaf cable car tickets, guide language, lunch, favela route details, safety approach, cancellation rules, group size and exact return time. For samba, football and nightlife tours, confirm transport arrangements carefully.
Rio de Janeiro Travel Tips
Plan major viewpoints around the weather
Cloud and fog can hide Christ the Redeemer or Sugarloaf views. If your schedule allows, keep some flexibility for clear weather.
Book Christ and Sugarloaf ahead in peak periods
Tickets and guided tours can be busy during holidays, Carnival and summer. Book early if you have limited time.
Use trusted transport at night
Use registered taxis, reputable ride-hailing apps or guided transfers after dark, especially when leaving nightlife areas.
Be careful with valuables at the beach
Take only what you need, keep items close and avoid leaving bags unattended while swimming.
Check beach vendor prices
Confirm prices before ordering food, drinks, chairs or umbrellas, and check card payment amounts carefully before approving.
Stay aware but not fearful
Rio rewards confident, sensible travel. Stay alert, avoid obvious displays of wealth and follow local advice.
Learn a few Portuguese phrases
English is not always widely spoken outside major tourist services. Basic Portuguese helps with taxis, restaurants and markets.
Use sunscreen and hydrate
Rio can be hot and humid, especially in summer. Carry water, sunscreen, sunglasses and a hat.
Respect local beach culture
Rio beaches are social spaces. Dress casually, keep behaviour respectful and follow lifeguard guidance.
Check current entry requirements
Visa and entry rules can change. Check official travel advice before booking flights and again before departure.
Is Rio de Janeiro Worth Visiting?
Yes, Rio de Janeiro is absolutely worth visiting. Few cities offer such a powerful mix of beaches, mountains, rainforest, music, food, culture and world-famous landmarks.
It may not suit travellers who want a completely low-stress destination where they never need to think about safety. Rio requires awareness, planning and sensible behaviour. But for travellers who prepare properly, it can be one of the most memorable city experiences in the world.
The best way to enjoy Rio is to balance famous sights with slower local moments: Christ the Redeemer for the view, Sugarloaf for the bay, Ipanema and Copacabana for beach life, Santa Teresa for atmosphere, Lapa for samba, and Tijuca National Park for Rio’s wild green heart.
FAQs About Rio de Janeiro
What is Rio de Janeiro famous for?
Rio de Janeiro is famous for Christ the Redeemer, Sugarloaf Mountain, Copacabana Beach, Ipanema Beach, Carnival, samba, football, Tijuca National Park and dramatic mountain-to-sea scenery.
How many days do you need in Rio de Janeiro?
Three days is enough for the main highlights, but five to seven days is better if you want beaches, viewpoints, Tijuca National Park, samba, museums and relaxed neighbourhood time.
What is the best area to stay in Rio de Janeiro?
Ipanema, Leblon and Copacabana are the most popular beach bases for first-time visitors. Botafogo is useful for value and transport, while Santa Teresa is best for boutique atmosphere.
Is Rio de Janeiro safe for tourists?
Rio can be visited safely with sensible precautions, but tourists should be alert to theft, scams and violent crime risks. Use trusted transport, avoid displaying valuables and follow current travel advice.
When is the best time to visit Rio de Janeiro?
April to June and September to November often offer a good balance of warm weather and manageable crowds. Summer is lively and beach-focused but hotter, busier and more humid.
Is Christ the Redeemer worth visiting?
Yes. Christ the Redeemer is Rio’s most iconic landmark and offers outstanding city views when visibility is clear.
Is Sugarloaf Mountain worth visiting?
Yes. Sugarloaf Mountain gives some of the best views of Guanabara Bay, the beaches, Corcovado and Rio’s dramatic coastline.
Which beach is better, Copacabana or Ipanema?
Copacabana is more iconic and practical, while Ipanema is often considered more stylish and scenic. Many visitors enjoy both.
Can you visit Rio during Carnival?
Yes, but book accommodation, flights, Sambadrome tickets and tours far ahead. Carnival is exciting but crowded and expensive.
Is Rio de Janeiro worth visiting?
Yes. Rio de Janeiro is one of the world’s great travel cities, combining beaches, mountains, rainforest, samba, food, viewpoints and unforgettable scenery.
Sponsored Popular Items
Quick take: Musement.com offers a worldwide selection of tours and attractions
Rio two days guided tour with Christ Redeemer, Sugarloaf, barbecue – Food Experience Brazil Rio two days guided tour with Christ Redeemer, Sugarloaf, barbecue lunch, and private transfer is a practical option for travellers who want to simplify an important journey. Check current availability, inclusions and booking details before you go.